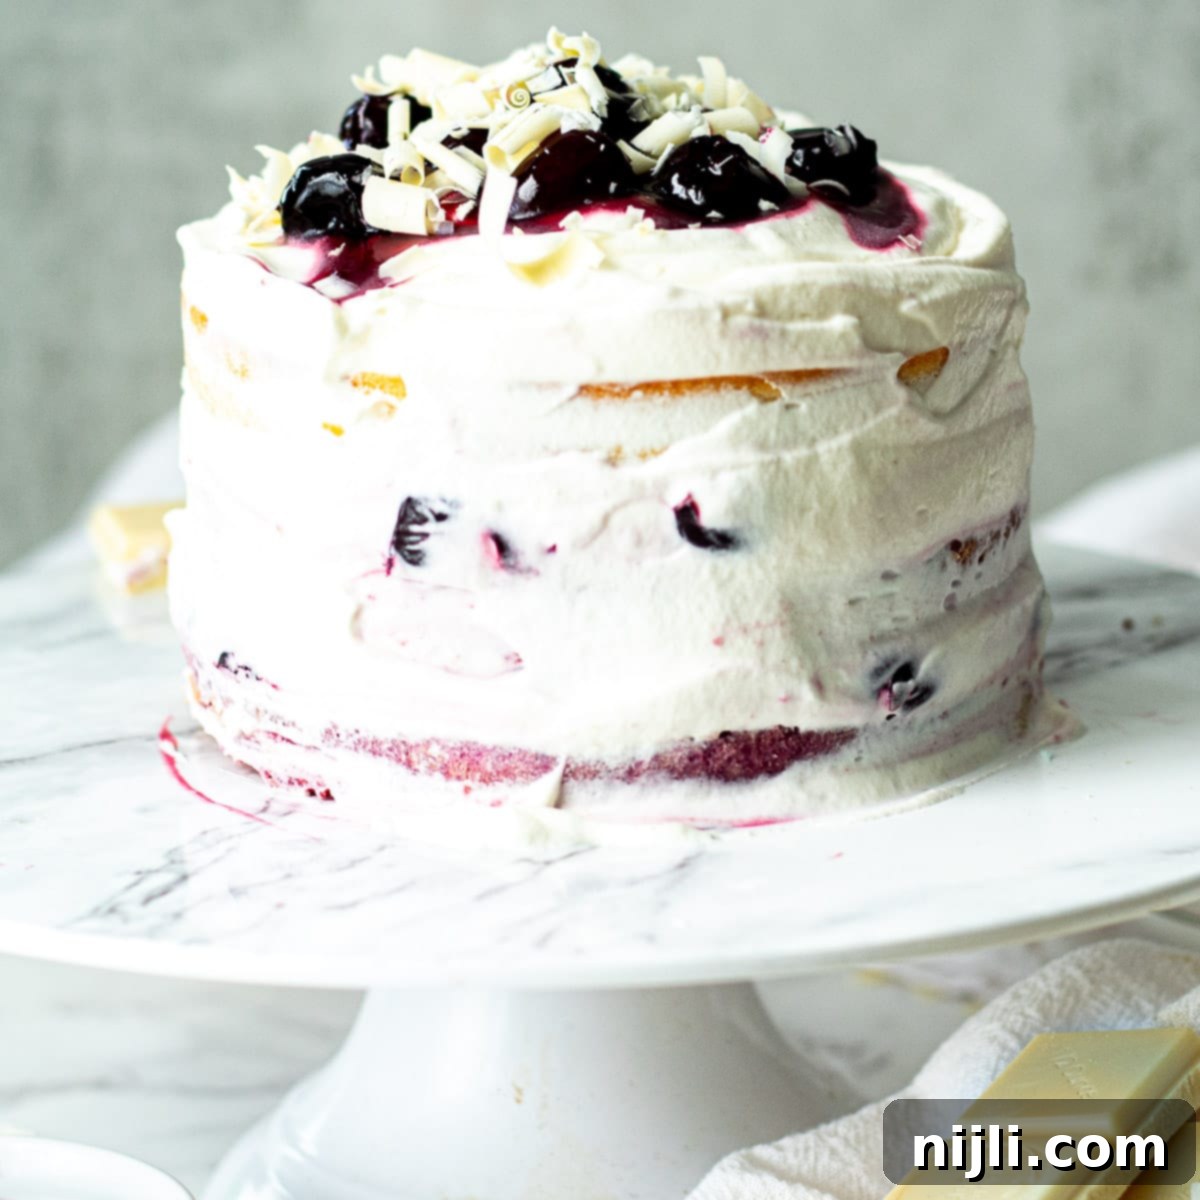
Ultimate White Forest Cake Recipe: A Delicious Twist on a Classic
Prepare to delight your taste buds with this incredible White Forest Cake recipe. It’s a beautifully elegant 6-inch layer cake, perfect for any celebration, offering a lighter, sweeter alternative to its famous cousin. We’ll explore the delightful differences between White Forest Cake vs. Black Forest Cake and share my best tips for stunning white forest cake design!
*This post contains affiliate links — as an Amazon Associate I earn from qualifying purchases. Please see my disclosure for details*.
If you fall in love with this White Forest Cake recipe, be sure to also try my Vanilla Cake with Strawberries for another fruity delight, my Brownie Mix Cookies with White Chocolate, Cherries and Pistachios for a quick treat, and my Cherry Coffee Cake for a comforting classic!
What is White Forest Cake Made Of?
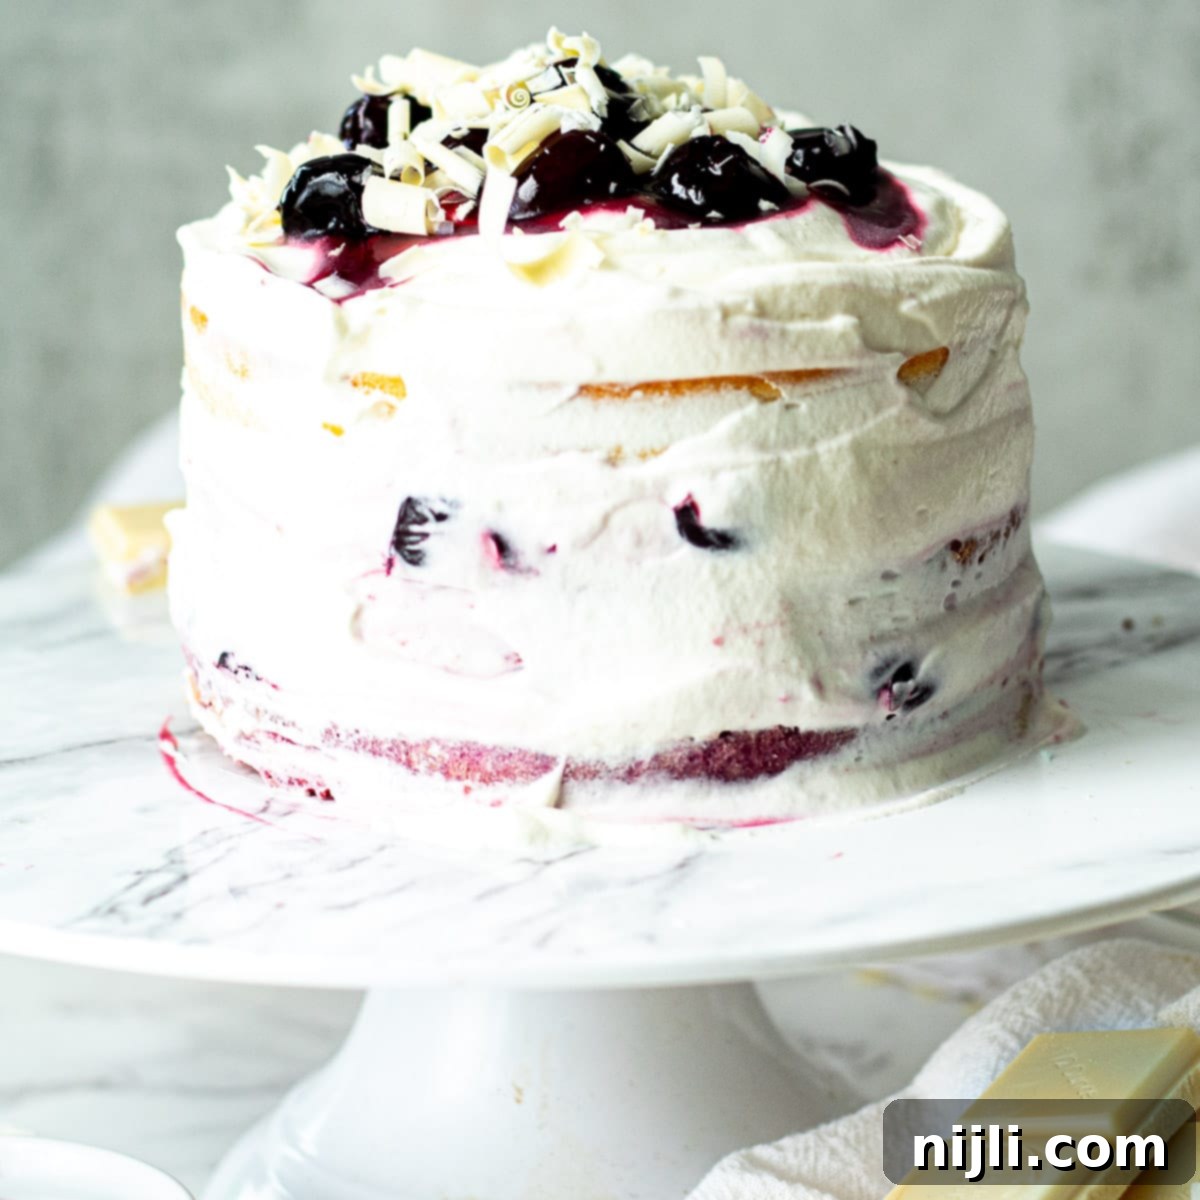
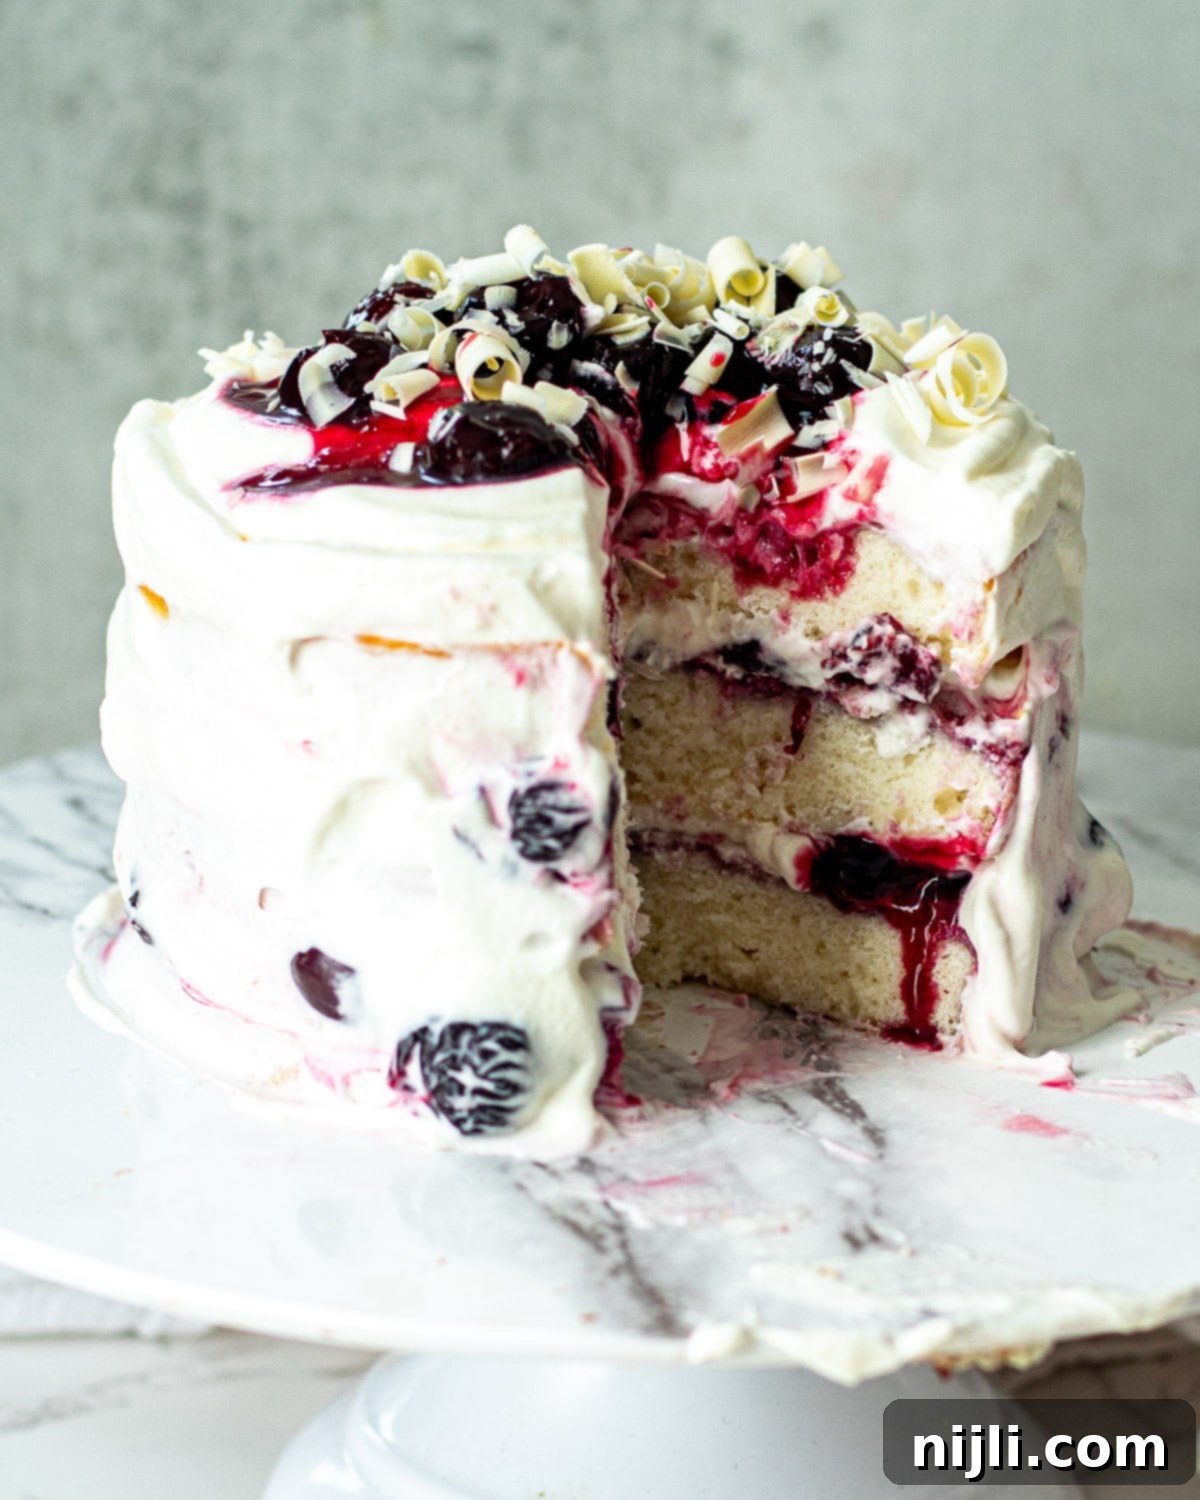
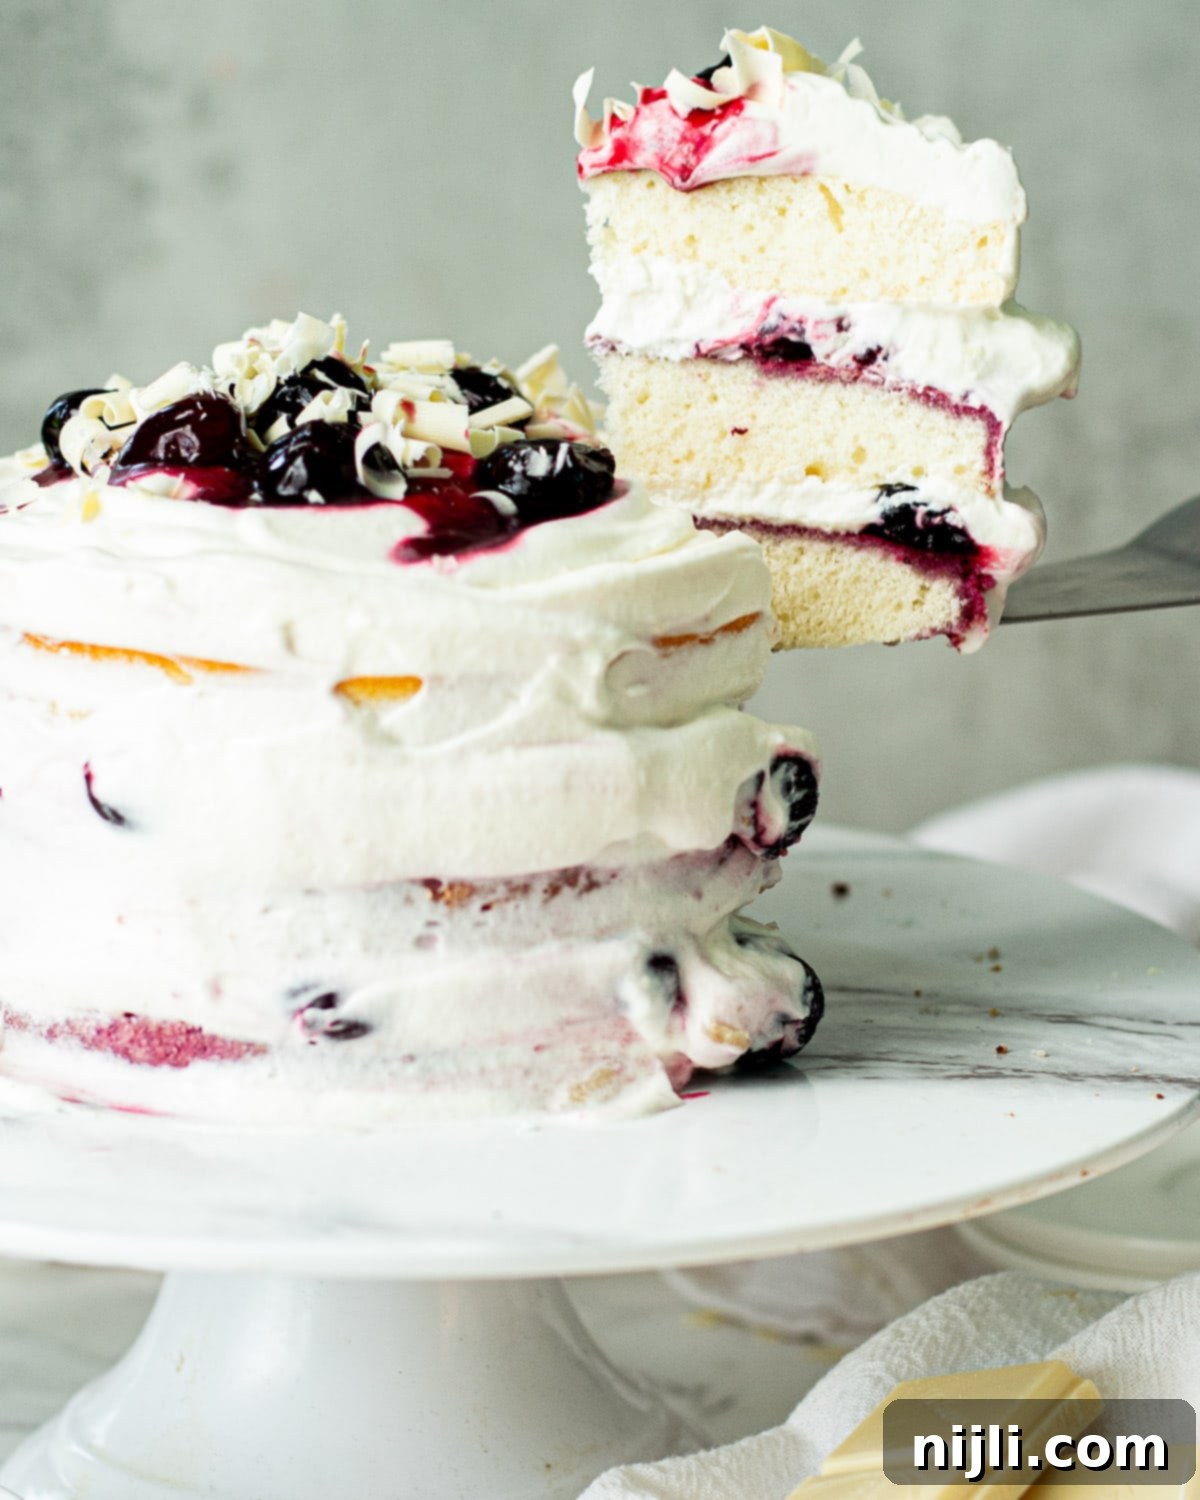
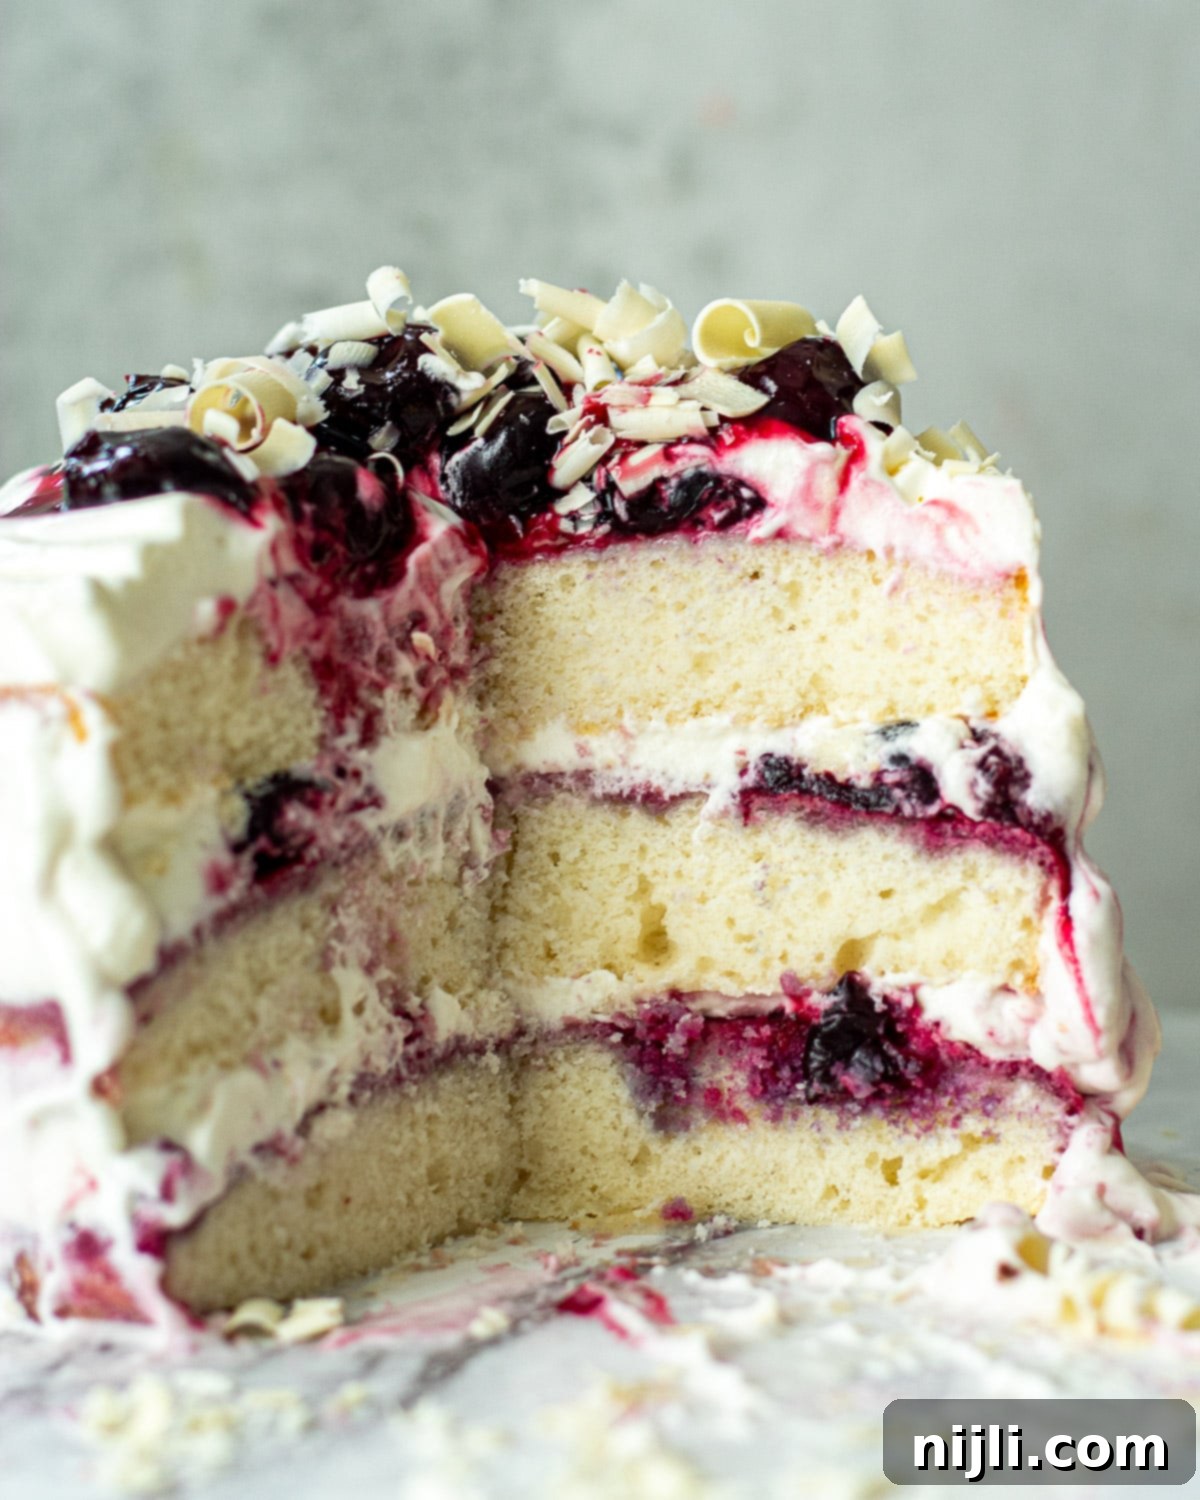
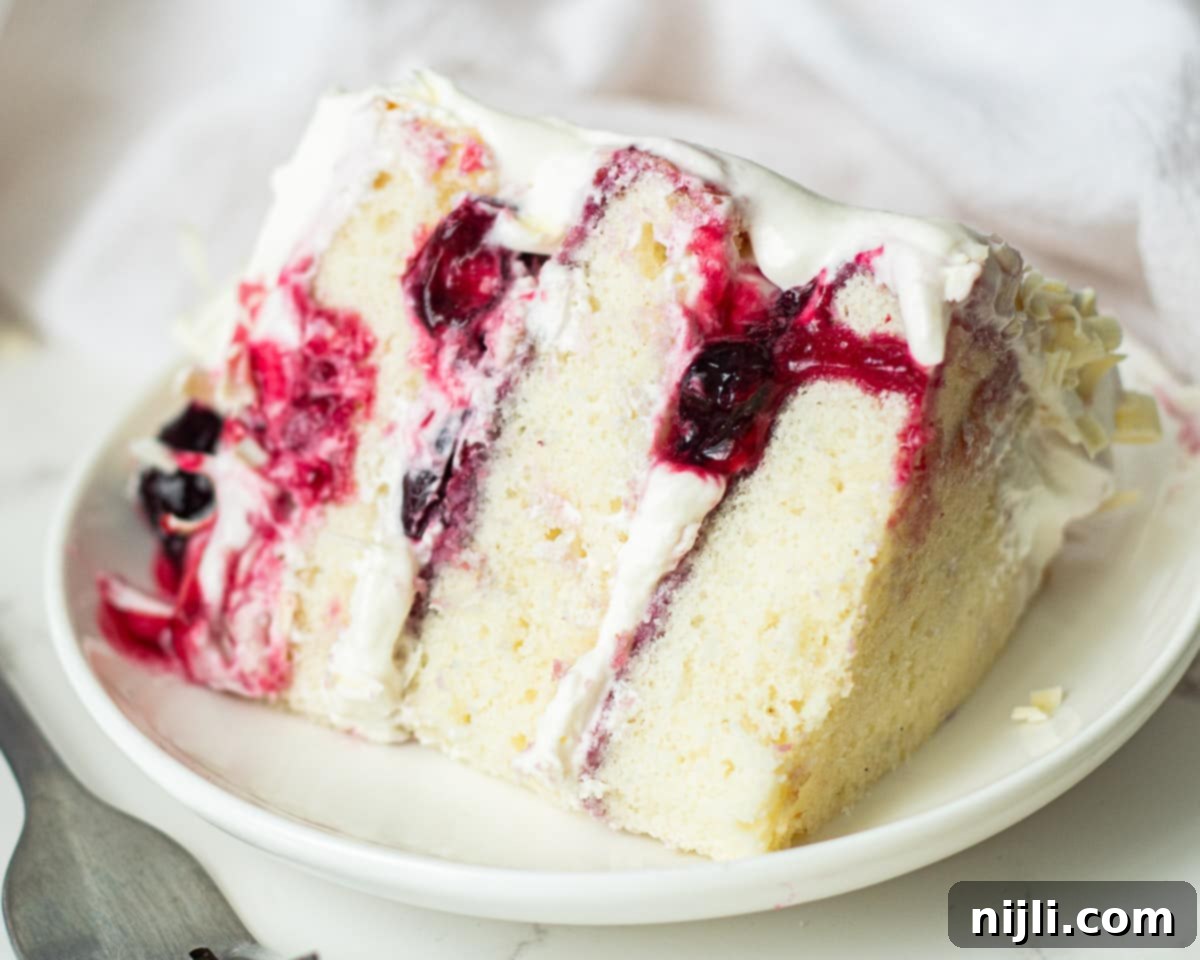
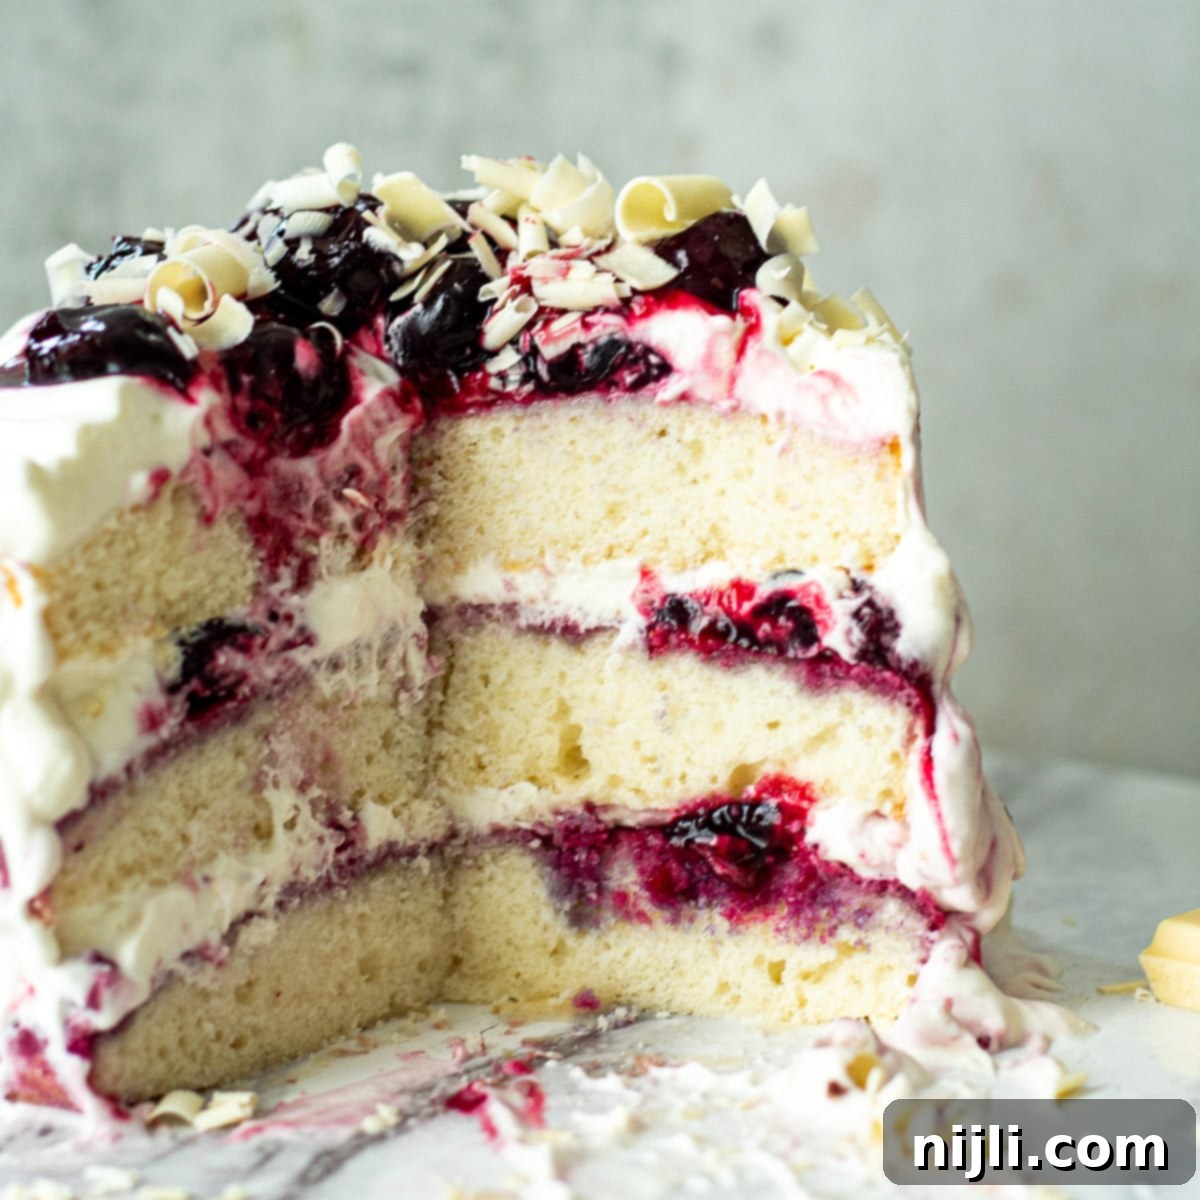
At its heart, this White Forest Cake recipe creates a gorgeous six-inch layer cake composed of three key elements: delicate white vanilla cake layers, a vibrant cherry filling, and a luscious white chocolate whipped cream frosting. Each component plays a vital role in creating a harmonious blend of flavors and textures. The cake layers are exceptionally light and fluffy, providing a perfect canvas for the sweet and slightly tart cherry filling. This filling, often enhanced with a hint of kirsch, adds a sophisticated depth. Finally, the cake is generously covered in a airy white chocolate whipped cream frosting and adorned with elegant white chocolate shavings, making it the ultimate show-stopping dessert for any special occasion. It’s a true masterpiece that balances richness with refreshing fruitiness.
The Sweet Origin of White Forest Cake
The White Forest Cake is often considered the charming, brighter counterpart to the traditional German Black Forest Cake (Schwarzwälder Kirschtorte). While its exact origin isn’t as historically documented as the Black Forest, it emerged as a delightful modern twist, likely in response to a desire for a lighter, sweeter, and visually distinct cherry and cream cake. It retains the beloved elements of whipped cream and cherries but cleverly substitutes dark chocolate with white chocolate and a darker chocolate cake with a pure white vanilla cake. This transformation gives it a unique identity, appealing to those who prefer the creamy, subtle sweetness of white chocolate and a more delicate cake base. It’s a testament to culinary creativity, evolving a classic into something new yet equally captivating.
White Forest Cake vs. Black Forest Cake: The Key Differences
While both the White Forest Cake and its venerable older sister, the Black Forest Cake (also known as Black Forest Gâteau), share common ground with their layers of whipped cream frosting and the delightful tang of cherries in a syrup, they diverge significantly in their core flavors and appearance. The traditional Black Forest Cake is characterized by its rich, dark chocolate sponge layers, often generously soaked in kirschwasser (kirsch), a clear, colorless brandy distilled from sour cherries. This gives it a deep, intense chocolate and cherry flavor profile, usually topped with dark chocolate shavings. The kirsch adds a distinct, boozy kick that is integral to its classic taste.
Our White Forest Cake, on the other hand, offers a radiant contrast. It completely redefines the classic by replacing those dark chocolate cake layers with a pure, light white vanilla cake. This switch not only brightens the cake’s appearance but also allows the subtle flavors of vanilla and white chocolate to truly shine. Instead of dark chocolate, the whipped cream frosting is infused with delicate white chocolate, providing a creamy, sweet, and luxurious texture that perfectly complements the vibrant cherry filling. While kirsch is still a wonderful addition to the cherry syrup for that traditional zest, it is often optional or used more subtly in the white version. The cake is then elegantly finished with delicate white chocolate shavings, creating a stunning visual and palate experience that is unmistakably “white forest.” It’s a fantastic choice for those who love the idea of the Black Forest but prefer a lighter, less intense chocolate experience.
Essential White Forest Cake Ingredients
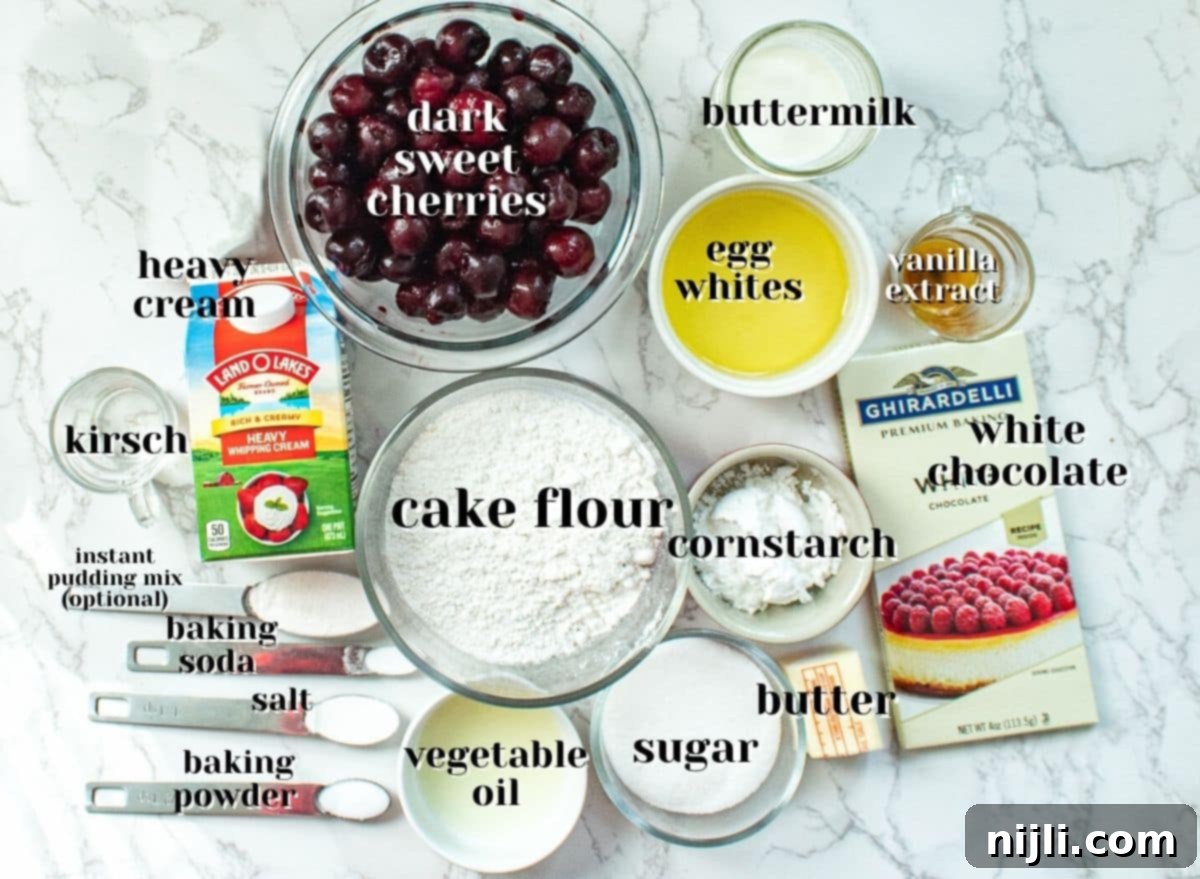
Crafting the perfect White Forest Cake begins with high-quality ingredients. Here’s a detailed look at what you’ll need and why each element is crucial for achieving that irresistible flavor and texture:
- Cake Flour: This is the secret to exceptionally light and fluffy cake layers. Cake flour has a lower protein content than all-purpose flour, which results in less gluten development and a tender, delicate crumb. If you don’t have cake flour, don’t worry! You can easily make your own by combining all-purpose flour with cornstarch (see the FAQ section below for exact measurements). For accurate baking, always measure your flour by weight using a kitchen scale, or use the spoon-and-level method to prevent over-packing.
- Granulated Sugar: Beyond adding the ideal sweetness to our white cake layers, sugar also contributes to the cake’s moisture and tender texture. It helps to keep the cake soft and prevents it from drying out.
- Baking Powder & Baking Soda: These chemical leavening agents work in harmony to create the lift and airy structure characteristic of a delicious layer cake. Baking powder typically provides the initial rise, while baking soda reacts with acidic ingredients (like buttermilk) to give an additional boost, ensuring a wonderfully light crumb.
- Salt: A crucial ingredient that often goes unnoticed, salt plays a vital role in balancing the sweetness of the cake and enhancing all the other flavors, especially the vanilla. It prevents the cake from tasting bland or overly sweet.
- Unsalted Butter: While I often use salted butter in other bakes, for this recipe, unsalted butter is preferred as it gives you more control over the overall salt content. Ensure your butter is at room temperature; this allows it to cream properly with sugar, incorporating air for a lighter cake. Take it out about an hour or two before you plan to bake, or follow my quick softening tip in the FAQ section.
- Vegetable Oil: Incorporating vegetable oil alongside butter is a fantastic way to ensure our cake layers remain incredibly moist and tender. Oil contributes a different kind of moisture that keeps the cake soft for longer, without sacrificing the rich flavor butter provides.
- Buttermilk: Room temperature buttermilk is key. Its acidity reacts with the baking soda to create a beautifully tender and moist crumb. If you don’t have buttermilk on hand, a simple homemade substitute can be made with milk and a touch of lemon juice or vinegar (check the FAQ for details!).
- Egg Whites: To achieve the pristine, pure white appearance of these cake layers, we use only egg whites, omitting the yolks. The yolks would impart a yellow hue, which we want to avoid for a true “white” forest cake. Separate your eggs while they’re cold for easier separation, then let the egg whites come to room temperature before adding them to the batter for optimal mixing.
- Vanilla Extract: For the best flavor, use a high-quality pure vanilla extract. You can even learn how to make your own at home with just two ingredients! While a clear vanilla extract can maintain the cake’s whiteness, I personally prefer the richer, more authentic flavor of pure vanilla or even vanilla bean paste for a touch of elegance.
Then, to create the essential cherry-kirsch filling, you’ll need:
- Pitted Dark Sweet Cherries: These are the star of our filling! You can use either fresh or frozen cherries, making this recipe adaptable year-round. Approximately one 16-oz bag of frozen cherries is usually sufficient. Dark sweet cherries offer the perfect balance of sweetness and a slight tartness that’s ideal for this cake. For more fruity inspiration, check out my Blueberry Cake Filling!
- Granulated Sugar: Helps to draw out the natural juices from the cherries and sweeten the filling to perfection, creating a rich syrup.
- Cornstarch: This acts as a thickening agent, ensuring our cherry filling is luscious and holds its shape beautifully between the cake layers, rather than making them soggy.
- Fresh Lemon Juice: A squeeze of fresh lemon juice is invaluable here. It brightens the flavors of the cherries and adds a subtle tartness that cuts through the sweetness, making the filling more complex and appealing.
- Kirsch (Kirschwasser): This traditional cherry liquor, distilled from tart cherries, adds an authentic, aromatic depth and a distinct, sophisticated kick to the cherry syrup. If kirsch is unavailable or you prefer alternatives, brandy, rum, or cognac can be used. For an alcohol-free version, simply substitute with unsweetened cherry juice, and remember to reduce the granulated sugar in the filling to about ½ cup to account for the juice’s natural sweetness.
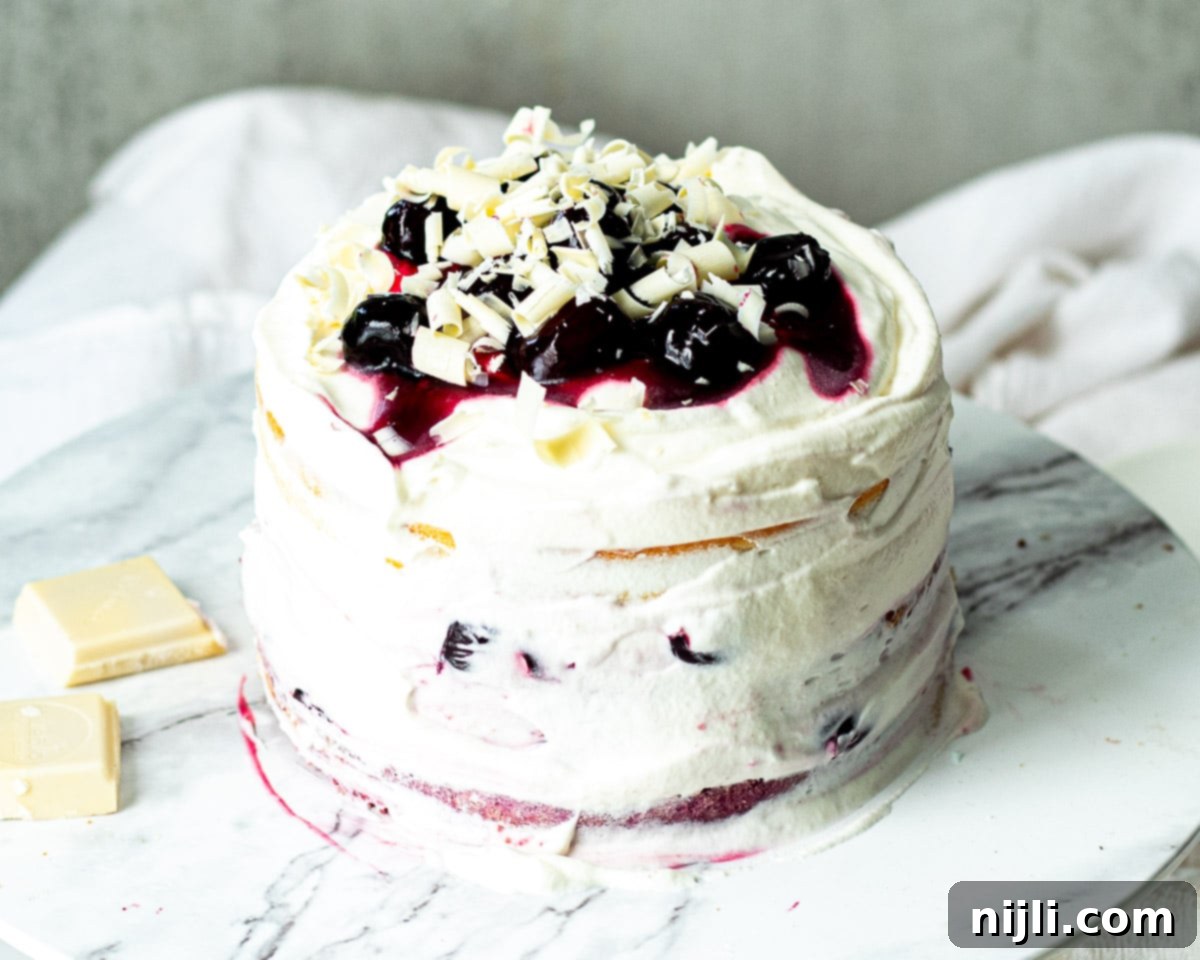
Finally, we’ll create a light, fluffy, and incredibly easy white chocolate whipped cream topping:
- White Baking Chocolate: The quality of your white chocolate truly makes a difference here. I highly recommend using good quality white baking bars, such as Ghirardelli, rather than white chocolate chips, as chips often contain stabilizers that prevent smooth melting. Chopped baking chocolate will melt beautifully into your cream.
- Heavy Cream: Often labeled as “heavy whipping cream” in stores, this is essential for a rich, stable whipped frosting. Make sure it’s very cold before you start whipping for the best results.
- White Chocolate Instant Pudding Mix (Optional): While not strictly necessary (the cake pictured on this page did not use it), a tablespoon of instant pudding mix can be a game-changer for stability. It helps the whipped cream frosting hold its shape better, especially in warmer conditions, and prevents it from weeping or deflating over time, making it stand up perfectly to the cake layers.
- White Chocolate Shavings (Optional, but Recommended!): These add a beautiful, elegant touch and an extra layer of white chocolate flavor to the top of your cake. You can easily make your own using a vegetable peeler on a block of white chocolate, or simply use white chocolate chips for a quicker garnish.
Essential Equipment for Your White Forest Cake
Having the right tools can make all the difference in your baking experience. For this delightful cherry white chocolate cake, you’ll primarily need an electric mixer. I find a stand mixer incredibly helpful for the cake batter, as it provides consistent power and allows you to multitask. For the delicate whipped cream frosting, a hand mixer with a whisk attachment offers excellent control, ensuring you achieve perfect stiff peaks without over-whipping. Additionally, a saucepan is necessary for preparing your luscious cherry filling, and for precise baking results, I always recommend a kitchen scale, particularly for accurately measuring your flour. Don’t forget to check the detailed recipe card below for a complete list of all the tools you might need to create this masterpiece!
How to Make the Perfect White Forest Cake
Creating this stunning White Forest Cake is a rewarding process. Follow these steps for a beautifully layered and delicious dessert:
- Prepare the Cherry-Kirsch Filling Ahead: I highly recommend making your cherry filling first, even a day in advance. This allows it ample time to cool completely and thicken properly, which is crucial for preventing a soggy cake. Simply combine all your filling ingredients in a saucepan, bring them to a boil while stirring, then reduce the heat to a gentle simmer for about 10 minutes, or until the mixture is visibly thickened. Once done, let it cool to room temperature before covering and chilling it thoroughly in the refrigerator. A cold filling is easier to work with and sets better.
- Start Your White Chocolate Whipped Cream Frosting: The first step for our frosting is to melt the white chocolate. In a microwave-safe bowl, combine your chopped white chocolate with about half of the heavy cream. Heat in 30-second intervals, stirring well after each, until the white chocolate is completely melted and the mixture is smooth and uniform. Stir in the remaining cold heavy cream. This mixture needs to be thoroughly chilled before whipping, so cover it and place it in the fridge for at least 4 hours, or ideally, overnight. A well-chilled mixture will whip up light and airy much more effectively.
- Bake Your Delicious White Cake Layers: Now it’s time for the cake! We’ll be using the “reverse creaming method” for this recipe, similar to my orange rosemary olive oil cake. This technique is fantastic for producing a deliciously light, tender, and moist cake with a fine crumb.
- First, in a large mixing bowl or the bowl of your stand mixer, whisk together all your dry ingredients: cake flour, granulated sugar, baking powder, baking soda, and salt.
- Next, add the room temperature unsalted butter to the dry ingredients. Mix on low speed until the mixture resembles coarse, sandy crumbs. Then, incorporate the vegetable oil, ensuring everything is well combined.
- Gradually add the room temperature buttermilk and mix until the batter is smooth. Stir in the pure vanilla extract.
- Finally, with the mixer running on low, gradually add the room temperature egg whites. Scrape down the sides of the bowl as needed to ensure everything is incorporated, mixing until the batter is smooth and uniform. Be careful not to overmix, as this can develop too much gluten and result in a tough cake.
- Bake the Cake Layers: Divide your batter evenly into three prepared six-inch cake pans. (If you prefer a larger cake, you can double this recipe to bake in three 9-inch cake pans – just remember to adjust baking times.) Bake in your preheated oven until a toothpick inserted into the center of each cake layer comes out clean, indicating it’s fully baked. Let the cake layers cool in their pans for about 10-15 minutes before carefully inverting them onto a wire rack to cool completely. Cooling completely is crucial to prevent the frosting from melting.
- Assemble Your White Forest Cake: Once your cake layers are completely cool and your white chocolate-heavy cream mixture is thoroughly chilled, it’s time to whip the frosting. Use an electric mixer with the whisk attachment to whip the cold mixture until it reaches stiff peaks – it should be thick, fluffy, and hold its shape. At this stage, you can optionally add a tablespoon of white chocolate instant pudding mix to provide extra stability to your whipped cream, making it even more robust for layering.
Now for the fun part – assembly! Place your first cake layer on a parchment-lined cake stand or turntable. Spread about ½ cup of the chilled cherry filling evenly over the top, then follow with approximately ⅔ cup of the luscious white chocolate whipped cream frosting. Carefully place the second cake layer on top and repeat the filling and frosting steps. Finish with the third and final cake layer, then generously frost the top and sides of the entire cake with the remaining whipped cream. For an extra touch of elegance and flavor, garnish the top with more cherry compote and delicate white chocolate curls or shavings. Slice, serve, and enjoy your homemade White Forest masterpiece!
Expert Tips and Frequently Asked Questions
While the cake base for a White Forest Cake shares many similarities with a classic vanilla cake, there’s a key distinction: a true white cake, as used in this recipe, is specifically made without egg yolks. By using only the whites of the eggs, the cake layers achieve a much brighter, purer white color, which is essential for the “white” aesthetic of this cake. Regular vanilla cakes often include whole eggs, resulting in a slightly creamier or yellowish hue.
White Forest Cake offers a delightful symphony of flavors that are distinctly elegant and refreshing. The primary notes you’ll taste are the sweet and subtle richness of vanilla from the cake layers, the creamy, luxurious sweetness of white chocolate in the whipped cream, and the vibrant, slightly tart burst of sweet cherries. If you opt for kirsch in your filling, you’ll also get a sophisticated, aromatic “kick” that adds depth and a traditional touch, perfectly balancing the sweetness.
Absolutely! This recipe is adaptable. A double batch of this White Forest Cake works wonderfully in three 9-inch cake pans. Just be mindful that larger cakes will require a slightly longer baking time. Start checking for doneness after 15 minutes, and continue baking until a toothpick inserted into the center comes out clean. Be sure not to overbake, as this can lead to dry cake layers!
No cake flour? No problem! You can easily create a homemade cake flour substitute using all-purpose flour and cornstarch. Here’s how: Using your kitchen scale (for best accuracy), measure out 164 grams of all-purpose flour and sift it together with 24 grams of cornstarch. Alternatively, if you’re measuring by volume, measure out 1 ½ cups of all-purpose flour using the spoon-and-level method, then remove 3 tablespoons of that flour and replace it with 3 tablespoons of cornstarch. Sift these together thoroughly before adding them to your dry ingredients as instructed in the recipe. This substitution helps to reduce the protein content, mimicking the tender crumb of real cake flour.
If you find yourself in a rush and your butter isn’t at room temperature, there’s a quick hack! Pop your stick of butter into the microwave and heat it on high for about 20 seconds. Be sure to rotate it every few seconds to ensure even softening without melting. The goal is soft, pliable butter, not liquid butter, as melted butter will change the texture of your cake.
No buttermilk on hand? You can easily make a substitute! Simply measure out ⅔ cup of whole milk, then remove 2 teaspoons of the milk and replace it with 2 teaspoons of white vinegar or lemon juice. Stir gently and let it sit for 5-10 minutes until it slightly curdles. This acidic mixture will mimic the properties of buttermilk, reacting with the baking soda to create those wonderfully moist and tender white cake layers.
This is a matter of personal preference, and while I may be biased, I’m quite partial to this amazing White Forest Cake recipe! For me, the delicate addition of white chocolate introduces such a lovely, creamy flavor that perfectly complements the fluffy white cake and the bright cherry filling. Black Forest offers a more intense, rich chocolate experience, while White Forest provides a lighter, sweeter, and equally sophisticated option. Both are incredible, so why not try both and decide for yourself?
While both feature a light color, angel food cake and white cake are quite different. Angel food cake is renowned for its incredibly light, airy, and spongy texture because it’s made solely from egg whites and contains no fat whatsoever. It relies on whipped egg whites for its structure. White cake, on the other hand, is a bit richer and denser. It’s also made predominantly with egg whites (to keep its pale color) but includes butter or shortening in the mix, giving it a more classic, moist, and tender cake crumb. So, angel food cake is all about ethereal lightness, while white cake provides a sweet, soft, and slightly more substantial bite.
Black Forest cake and devil’s food cake are both chocolate powerhouses but serve different purposes. Black Forest cake is a complex, multi-layered German dessert that combines distinct chocolate cake layers (often soaked in kirsch) with tart cherries and abundant whipped cream frosting, giving it a unique fruity, creamy, and boozy profile. Devil’s food cake, conversely, is solely focused on delivering a rich, intense, and deeply chocolatey experience. It’s typically a moist, dense chocolate cake, often made with cocoa powder and sometimes coffee to deepen the chocolate flavor, and it’s usually paired with a rich chocolate frosting or ganache, without any fruit. So, if you crave the combination of cherries and chocolate, Black Forest is your choice; if you simply want an unadulterated, powerful chocolate fix, devil’s food cake is the way to go.
Due to its fresh cherry filling and whipped cream frosting, White Forest Cake should always be stored in the refrigerator. Cover it loosely with plastic wrap or place it in an airtight cake carrier to prevent it from drying out or absorbing other odors. It will stay fresh and delicious for 3-4 days. For best flavor and texture, let it sit at room temperature for about 15-20 minutes before serving.
Yes, absolutely! Making components ahead is a great way to spread out the work and make baking less stressful. The cherry-kirsch filling can be made up to 2-3 days in advance and stored, covered, in the refrigerator. The white chocolate-heavy cream mixture for the frosting can also be prepared a day ahead and chilled thoroughly. The baked cake layers can be wrapped tightly in plastic wrap (once completely cooled) and stored at room temperature for up to 2 days, or frozen for up to a month. Thaw frozen layers in the refrigerator overnight before assembling. This pre-preparation makes assembly day a breeze!
If you enjoyed this recipe and are looking for more delicious baking adventures, I highly recommend my Strawberry Crunch Cupcakes for a fun and flavorful treat! And speaking of strawberries, my French Strawberry Cake is an easy yet elegant dessert that’s perfect for spring and summer gatherings. Happy baking!
If you try this delightful White Forest Cake recipe, I would absolutely love it if you could leave a star review rating and comment below! Your feedback is so wonderful to hear and helps our baking community grow. And don’t forget to share your beautiful creations with me by tagging @chenee_today on Instagram!
More Irresistible Cake Recipes You’ll Love
- Vegan Coconut Cake: A rich and creamy plant-based delight.
- Chocolate Orange Cake: A decadent pairing of citrus and cocoa.
- Lemon and Blackberry Cake: Bright, tangy, and bursting with berry flavor.
- Mini Eggs Cake: A fun and festive cake perfect for spring celebrations.
- Marble Loaf Cake: A beautiful swirl of vanilla and chocolate, perfect for any occasion.
📖 Recipe
White Forest Cake Recipe with Whipped Cream Frosting
Pin Recipe
Rate Recipe
Save RecipeSaved!
Equipment you may need
-
Measuring Cups and Spoons
-
Mixing Bowls
-
Hand Mixer
-
Stand Mixer
-
Food Scale
-
Whisk
-
Rubber Spatula
-
3 6-inch Round Cake Pans
-
3 6-inch Silicone Cake Pan Liners
-
Parchment Paper
-
Small Saucepan
-
Offset Spatula
Ingredients
Cherry-Kirsch Filling
- 3 cups pitted dark sweet cherries – fresh or frozen
- 2 tablespoons fresh lemon juice
- 1 tablespoon kirsch (kirschwasser) – or brandy, rum, cognac, or unsweetened cherry juice
- ⅔ cup granulated sugar
- 2 tablespoons cornstarch
White Cake Layers
- baking spray
- 1 ½ cups cake flour – sifted; measured using a kitchen scale or with the spoon and level method
- ⅔ cup granulated sugar
- 1 teaspoon baking powder
- ¼ teaspoon baking soda
- ¼ teaspoon salt
- 4 tablespoons unsalted butter – room temperature
- 5 teaspoons vegetable oil
- ⅔ cup full-fat buttermilk – room temperature
- 2 teaspoons pure vanilla extract
- 3 egg whites – room temperature
White Chocolate Whipped Cream Frosting
- 2 cups heavy whipping cream
- 4 oz white baking chocolate – chopped
- 1 tablespoon white chocolate instant pudding mix – optional, to stabilize whipped cream
- shaved white chocolate – for topping
Instructions
Prepare Cherry-Kirsch Filling
-
Add all the filling ingredients to a medium saucepan and stir well to combine them thoroughly.3 cups pitted dark sweet cherries, 2 tablespoons fresh lemon juice, 1 tablespoon kirsch (kirschwasser), ⅔ cup granulated sugar, 2 tablespoons cornstarch
-
Bring the mixture to a boil over medium heat, stirring continuously to prevent sticking. Once boiling, reduce the heat to a gentle simmer and cook for approximately 10 minutes, or until the filling has thickened to a syrupy consistency. It should coat the back of a spoon.
-
Remove from heat and let the filling cool completely to room temperature. Then, transfer it to an airtight container and place it in the refrigerator to chill thoroughly until you are ready to assemble your cake. Chilling helps the filling set and prevents it from making your cake layers soggy.
Prepare Cake Layers
-
Preheat your oven to 350°F (180°C). Prepare three 6-inch round cake pans by lining the bottoms with parchment paper or silicone liners, and then generously spraying the sides and liners with baking spray. This ensures your cake layers release easily.baking spray
-
In a large mixing bowl or the bowl of a stand mixer fitted with the paddle attachment, combine the cake flour, granulated sugar, baking powder, baking soda, and salt. Whisk these dry ingredients together thoroughly to ensure they are well combined and there are no lumps.1 ½ cups cake flour, ⅔ cup granulated sugar, 1 teaspoon baking powder, ¼ teaspoon baking soda, ¼ teaspoon salt
-
Add the room temperature unsalted butter to the dry ingredients. Mix on low speed until the mixture resembles coarse crumbs, ensuring the butter is fully distributed. Then, mix in the vegetable oil until just combined.4 tablespoons unsalted butter, 5 teaspoons vegetable oil
-
Pour in the room temperature full-fat buttermilk and mix on low speed until the batter is just smooth. Be careful not to overmix. Then, add the pure vanilla extract and mix briefly to incorporate.⅔ cup full-fat buttermilk, 2 teaspoons pure vanilla extract
-
With the mixer still running on low speed, gradually add the room temperature egg whites in a slow, steady stream. Continue mixing until the batter is smooth and all the egg whites are fully incorporated. Scrape down the sides of the bowl as necessary to ensure a uniform batter. Again, avoid overmixing.3 egg whites
-
Evenly divide the batter among the three prepared cake pans. Bake in the preheated oven for 12-15 minutes, or until a wooden skewer or toothpick inserted into the center of each cake layer comes out clean, indicating it’s fully baked.
-
Allow the cake layers to cool in their pans for 10 minutes. Then, carefully invert them onto a wire rack to cool completely. Ensure they are entirely cool before frosting to prevent the whipped cream from melting.
Prepare White Chocolate Whipped Cream Frosting
-
In a microwave-safe bowl, combine the chopped white chocolate and 1 cup of heavy cream. Heat in 30-second intervals, stirring well after each, until the white chocolate is completely melted and the mixture is smooth and uniform.4 oz white baking chocolate, 2 cups heavy whipping cream
-
Stir in the remaining cold cup of heavy cream until completely smooth. Cover the mixture and place it in the refrigerator to chill until it is very cold – ideally for at least 4 hours, or even overnight. This chilling is crucial for the whipped cream to achieve stiff peaks.
-
Once thoroughly chilled, transfer the white chocolate-cream mixture to a clean mixing bowl (preferably chilled) and use an electric mixer with the whisk attachment to whip the mixture on medium-high speed until it becomes light and fluffy. At this point, you can optionally add a tablespoon of white chocolate instant pudding mix to help stabilize the whipped cream frosting, making it sturdier.1 tablespoon white chocolate instant pudding mix
-
Continue beating the mixture until stiff peaks form. The whipped cream should hold its shape firmly when the whisk is lifted. Once you reach this consistency, your luscious frosting is ready to be used for assembling and decorating the cake.
Assemble Cake
-
Place one completely cooled cake layer on your chosen cake stand or a turntable lined with parchment paper. Spread approximately ½ cup of the chilled cherry filling evenly over the top of the cake layer, leaving a small border around the edge. Then, gently spread about ⅔ cup of the prepared white chocolate whipped cream frosting over the cherry filling. Carefully place the second cake layer on top and repeat the process with another ½ cup of cherry filling and ⅔ cup of whipped cream frosting.
-
Finally, add the third and final cake layer. Use the remaining whipped cream frosting to cover the top and generously frost the sides of the entire cake, smoothing it out for a neat finish. For an elegant final touch, spoon more cherry compote on top of the cake, and if desired, garnish with delicate shaved white chocolate curls or fresh cherries. Serve immediately or chill until ready to enjoy!shaved white chocolate
Last Step!Click here to leave a review and a star rating! It helps spread the word and allows me to keep sharing free recipes! 🥰
Video
Notes
Cake Flour Substitute: If you don’t have cake flour, you can easily make your own. For a precise measurement, use your kitchen scale to measure out 164 grams of all-purpose flour and then sift it with 24 grams of cornstarch. If measuring by volume, spoon and level 1 ½ cups of all-purpose flour, remove 3 tablespoons, and replace it with 3 tablespoons of cornstarch. Sift them together well before using in the recipe.
Softening butter quickly: For perfectly room temperature butter in a pinch, gently heat your stick of butter in the microwave on high for about 20 seconds. Rotate it every few seconds to ensure it softens evenly without melting completely. You want it pliable, not liquid.
Buttermilk Substitute: If you’re out of buttermilk, don’t fret! You can create a simple substitute by using whole milk and adding an acidic agent. For ⅔ cup of buttermilk, measure out ⅔ cup of whole milk and then replace 2 teaspoons of the milk with 2 teaspoons of white vinegar or lemon juice. Let it sit for 5-10 minutes until it slightly curdles. This acidity will help your white cake layers turn out even more moist and tender.
Perfect Whipped Cream Tips: For the most stable and fluffy whipped cream, ensure your heavy cream and white chocolate mixture is thoroughly chilled (at least 4 hours, preferably overnight). Chilling your mixing bowl and whisk attachment for 15 minutes before whipping can also help achieve perfect stiff peaks.
Nutrition
Nutrition Disclaimer
Did you try this recipe? Rate it below!I can’t wait to see (and share) your results! Follow me on Instagram at @chenee_today and tag #cheneetoday!

