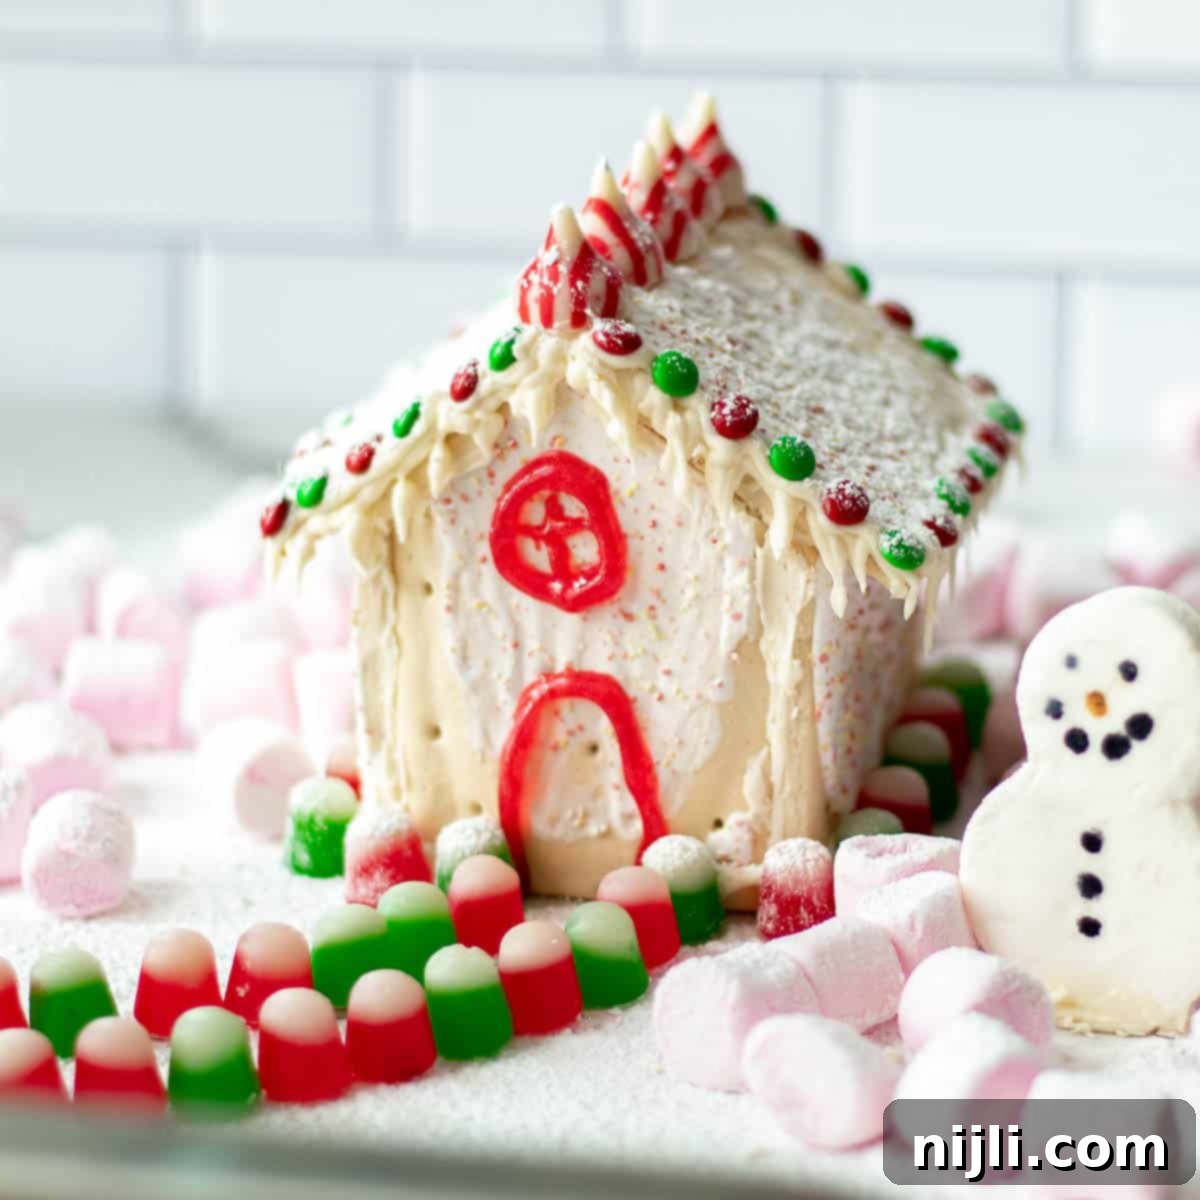
Easy Pop Tart Gingerbread House: Build Your Own Festive Edible Masterpiece (No Kit Needed!)
Get ready for a delightful holiday activity that promises fun without the fuss! This comprehensive guide will show you how to create the ultimate Easy Pop Tart Gingerbread House – no complicated kits or baking from scratch required. Discover the simplest methods for cutting Pop Tarts into perfect house shapes, mastering the art of making candy decorations stick, and selecting the best candies to bring your festive vision to life. This ingenious Pop Tart gingerbread house recipe is poised to become your family’s favorite new holiday tradition!
For more easy holiday ideas and delicious treats, make sure to explore my Peppermint Espresso Martini, my Vegan Gingerbread Loaf Cake, and my Cinnamon Toast Crunch Popcorn Recipe!
*This post contains affiliate links — as an Amazon Associate I earn from qualifying purchases. Please see my disclosure for details*.
Why Choose Pop Tarts for Your Gingerbread House? A Fun & Fuss-Free Alternative
Forget the stress of baking delicate gingerbread walls or the limitations of pre-packaged kits! This Pop-Tarts gingerbread house recipe offers a wonderfully delicious and incredibly simple alternative, making holiday crafting accessible to everyone. With just two core ingredients – Pop Tarts and frosting – plus your favorite candy decorations, you can construct an adorable edible house that’s perfect for the Christmas season. It’s a fantastic solution for those seeking a quick, mess-free, and thoroughly enjoyable holiday project.
This innovative Christmas Pop Tarts house concept truly marks a new era in gingerbread house building. It’s significantly easier and faster than traditional gingerbread houses, which often require extensive baking, cooling, and precise assembly. Our Pop Tart method minimizes the effort while maximizing the fun, ensuring a successful and satisfying experience for all ages. Like my Christmas Cookie Cake, this project is a delightful holiday idea that can even serve as a charming focal point for a festive Christmas Charcuterie Board!
The Secret to Sticky Success: How to Make Candy Adhere to Your House
Achieving perfectly stuck candy decorations on your gingerbread house is surprisingly simple, especially when you use the right adhesive. The easiest and most effective method is to use store-bought canned frosting! Its thick, slightly sticky texture provides excellent grip, holding your Pop Tart walls together securely and ensuring all your candies stay precisely where you place them. Unlike royal icing, which can be finicky to prepare and work with, canned frosting offers instant convenience and reliability, making your decorating process smooth and enjoyable.
Essential Ingredients for Your Pop Tart Gingerbread House
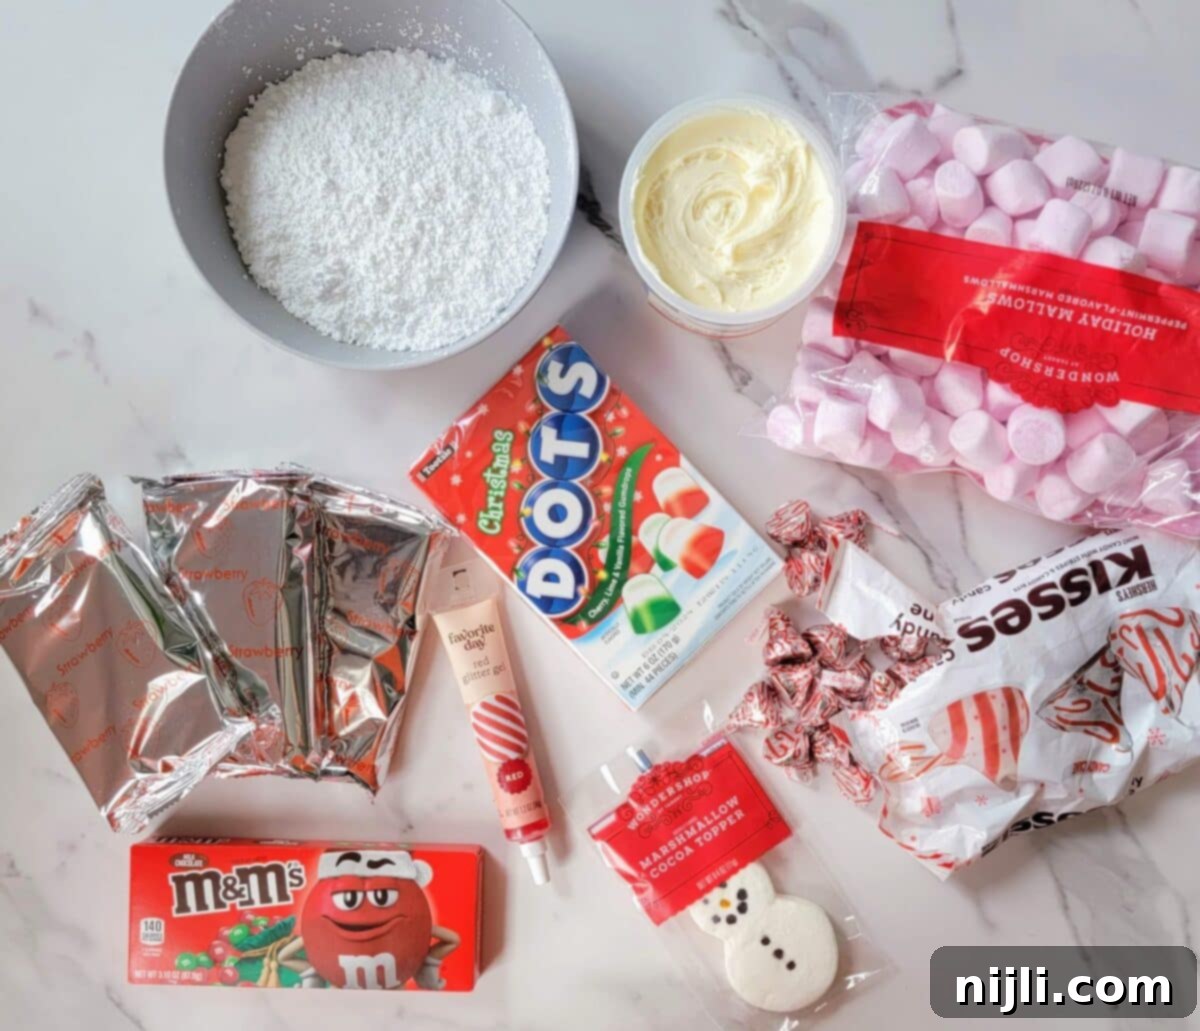
The beauty of this delightful gingerbread Pop Tarts house recipe lies in its simplicity! You only need a few core ingredients to get started, with the rest being pure creative freedom for your decorations:
- Pop Tarts: These toaster pastries form the structural foundation of your house. Any standard-sized Pop Tart will work perfectly, or you can opt for any store-brand toaster pastries available on store shelves. For a festive touch, I chose strawberry Pop Tarts because their red and green sprinkles perfectly complement the Christmas season. However, don’t limit yourself! Consider flavors like chocolate for a dark, rustic look, brown sugar cinnamon for a classic gingerbread feel, or even s’mores for a unique twist. The best Pop Tart flavor for your gingerbread house is truly whatever you enjoy most or have on hand!
- Canned White Frosting: This is your edible “glue.” I highly recommend using store-bought regular frosting for its incredible ease of use and consistent stickiness. It’s a fantastic shortcut that saves time and guarantees a stable structure. While you could make an easy icing with powdered sugar and water, canned frosting provides superior hold and convenience, aligning perfectly with the “easy” theme of this project.
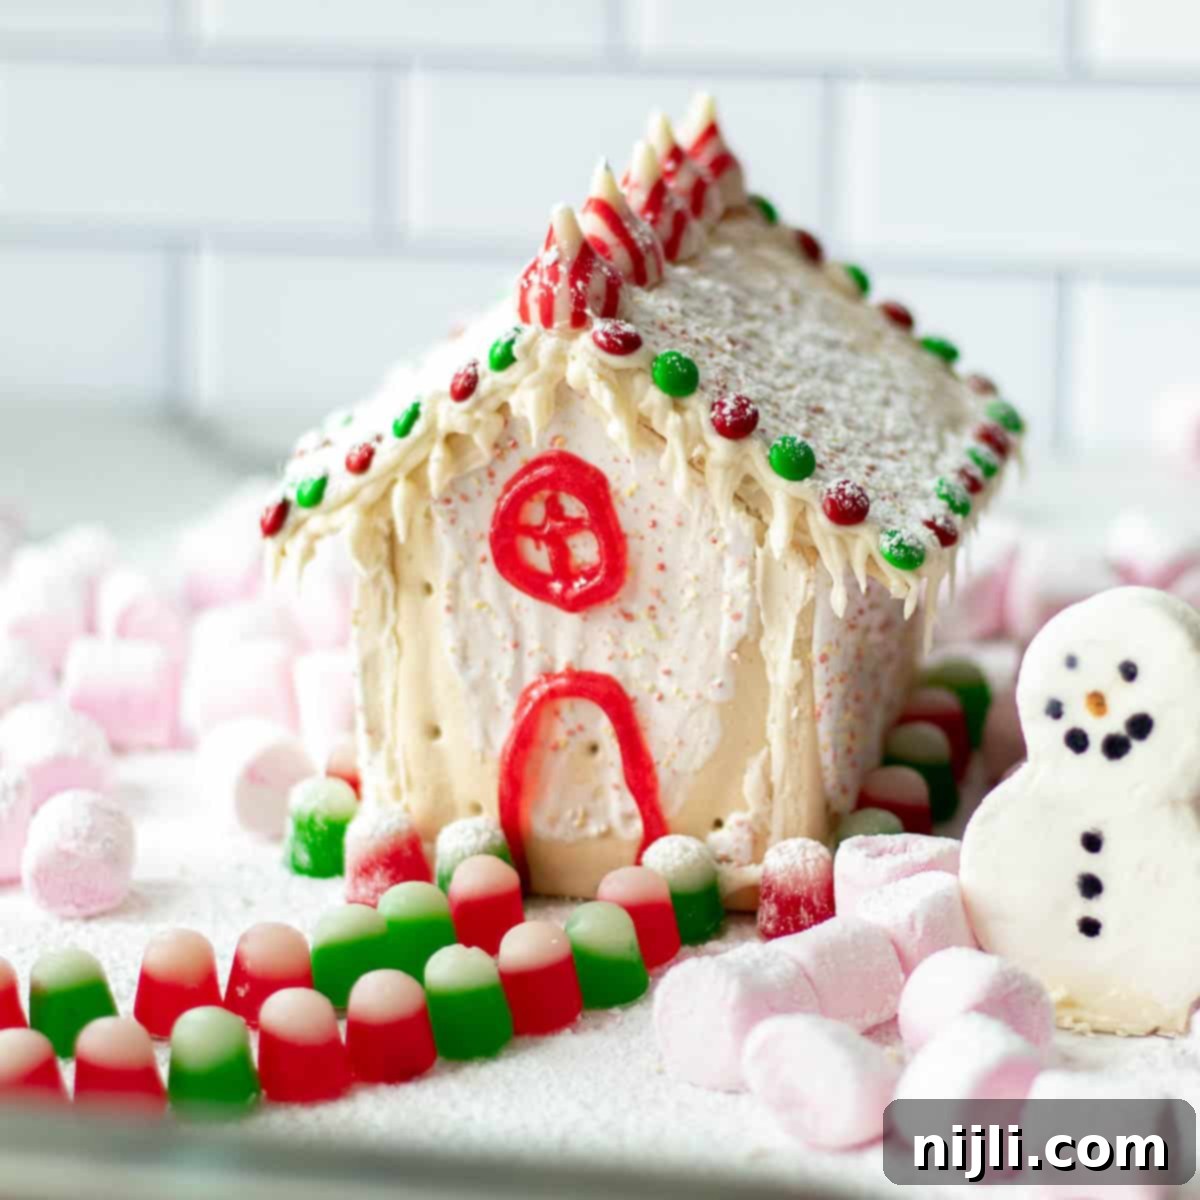
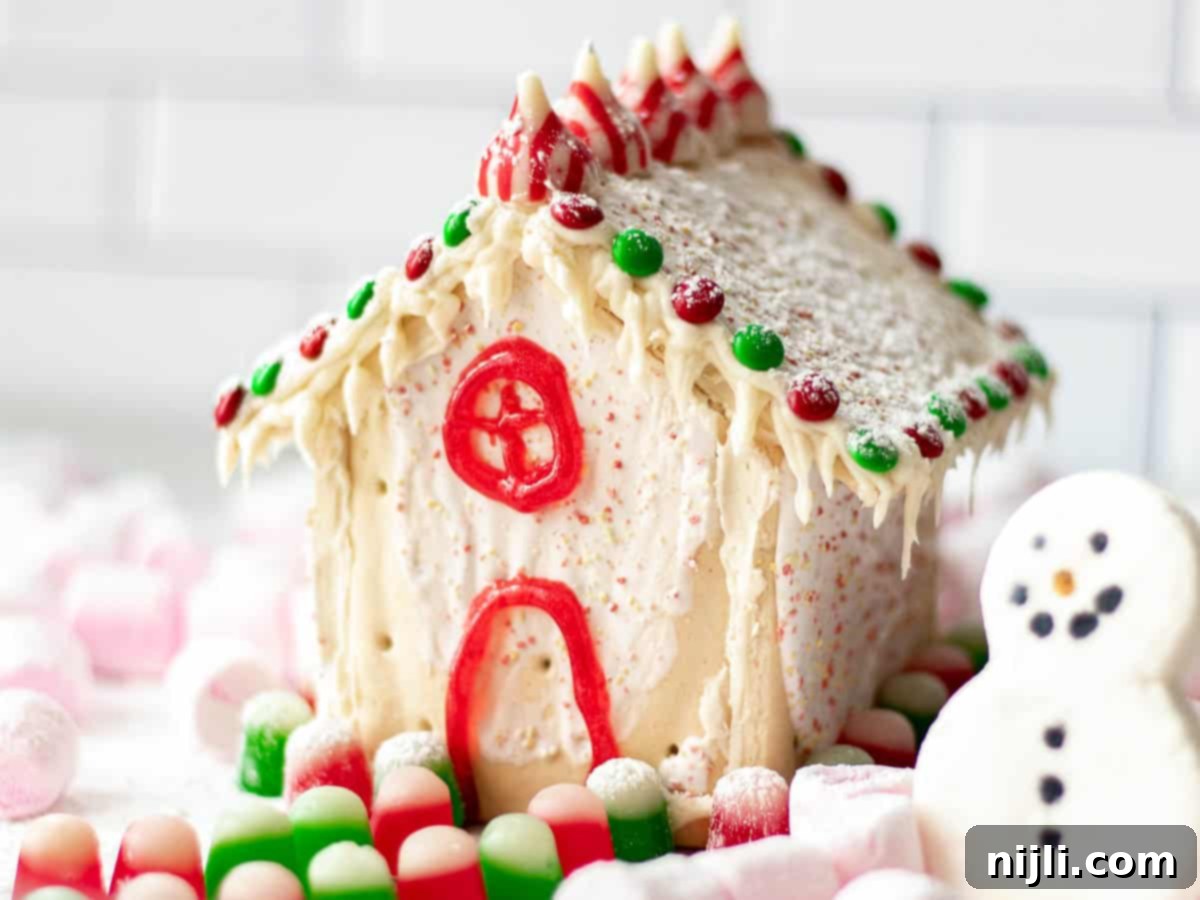
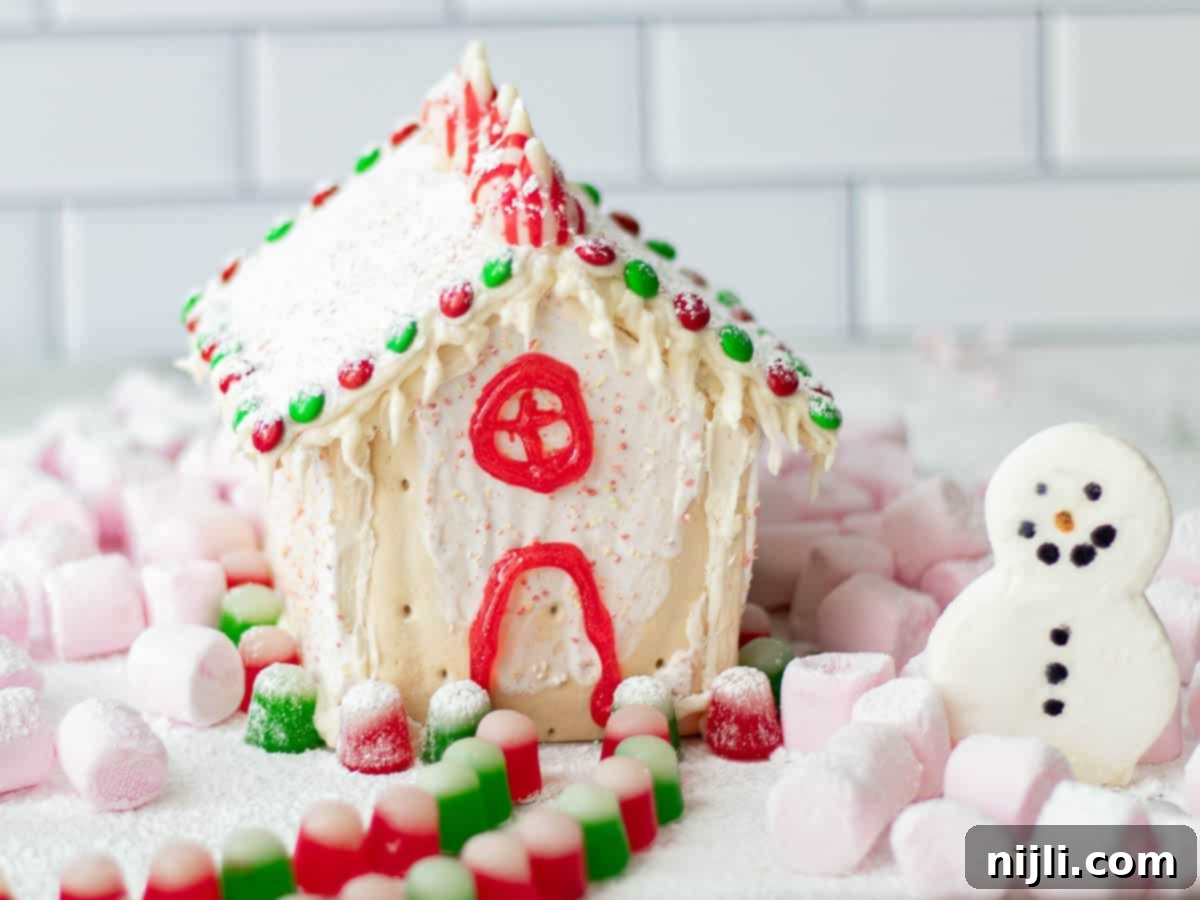
- Candy Toppings and Decorations: This is where your imagination takes flight! Gather an assortment of your favorite festive candies to create a personalized edible masterpiece. For my house, I used mini M&Ms to line the roof, colorful Christmas gumdrops for vibrant accents, Candy Cane Hershey’s Kisses for charming details, bright red icing for decorative lines, and fluffy mini marshmallows for snowy drifts. To complete the winter wonderland scene, I also dusted the entire creation with a generous layer of powdered sugar, mimicking a fresh blanket of snow.
Tools You’ll Need: Simple Equipment for Building Your Edible House
One of the many advantages of this Pop Tart gingerbread house project is that you don’t need a pantry full of specialized baking tools! Just a few basic items will ensure a smooth and enjoyable building experience. For the best results, achieving clean, precise cuts on your Pop Tarts is crucial for a sturdy structure. Therefore, I highly recommend using a sharp serrated knife. The serrated edge helps saw through the pastry without crumbling it, giving you neat edges. Additionally, a piping bag and a simple round piping tip will be invaluable for applying frosting neatly, both for assembly and for decorative details like snowy rooflines and window frames. A flat surface like a cutting board or a clean countertop will also be essential for your workspace.
Step-by-Step Guide: How to Construct Your Pop Tart Gingerbread House
Building your Pop Tart gingerbread house is a fun and straightforward process, but seeing the steps in action can be incredibly helpful! While I’ve provided detailed step-by-step instructions and photos below, be sure to watch the accompanying video further down the page. It offers a visual guide that will help you fully visualize how to cut your Pop Tarts and assemble this charming Pop Tart Gingerbread House with ease.
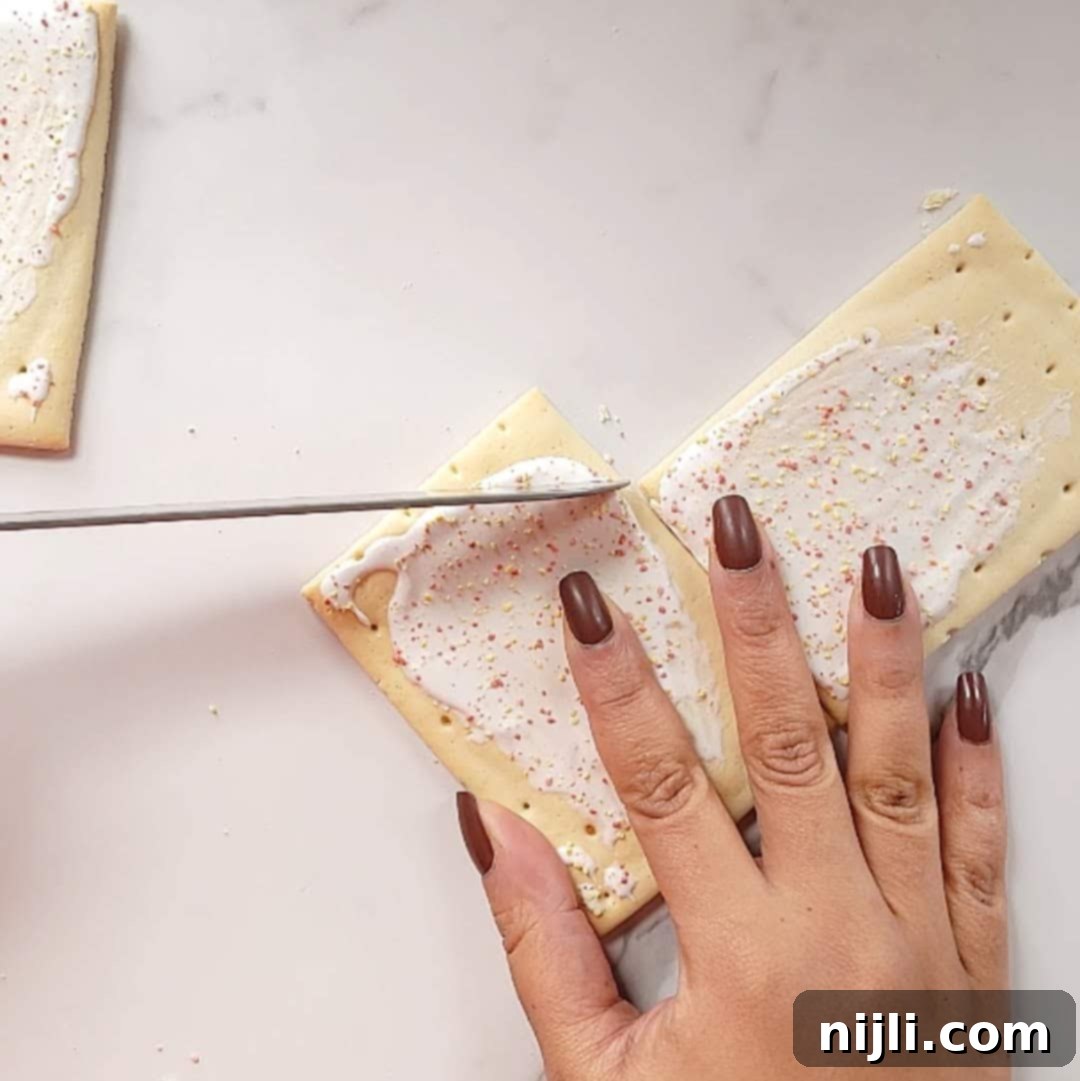
Step 1: Preparing Your Front and Back Walls. Begin by placing two Pop Tarts side-by-side on your workspace. Position one Pop Tart horizontally and the other vertically. Using your sharp serrated knife, carefully saw through the vertically placed Pop Tart. Make a precise cut that starts from the edge where the two Pop Tarts meet and extends towards the center of the vertical Pop Tart. This will form one side of your roof peak.
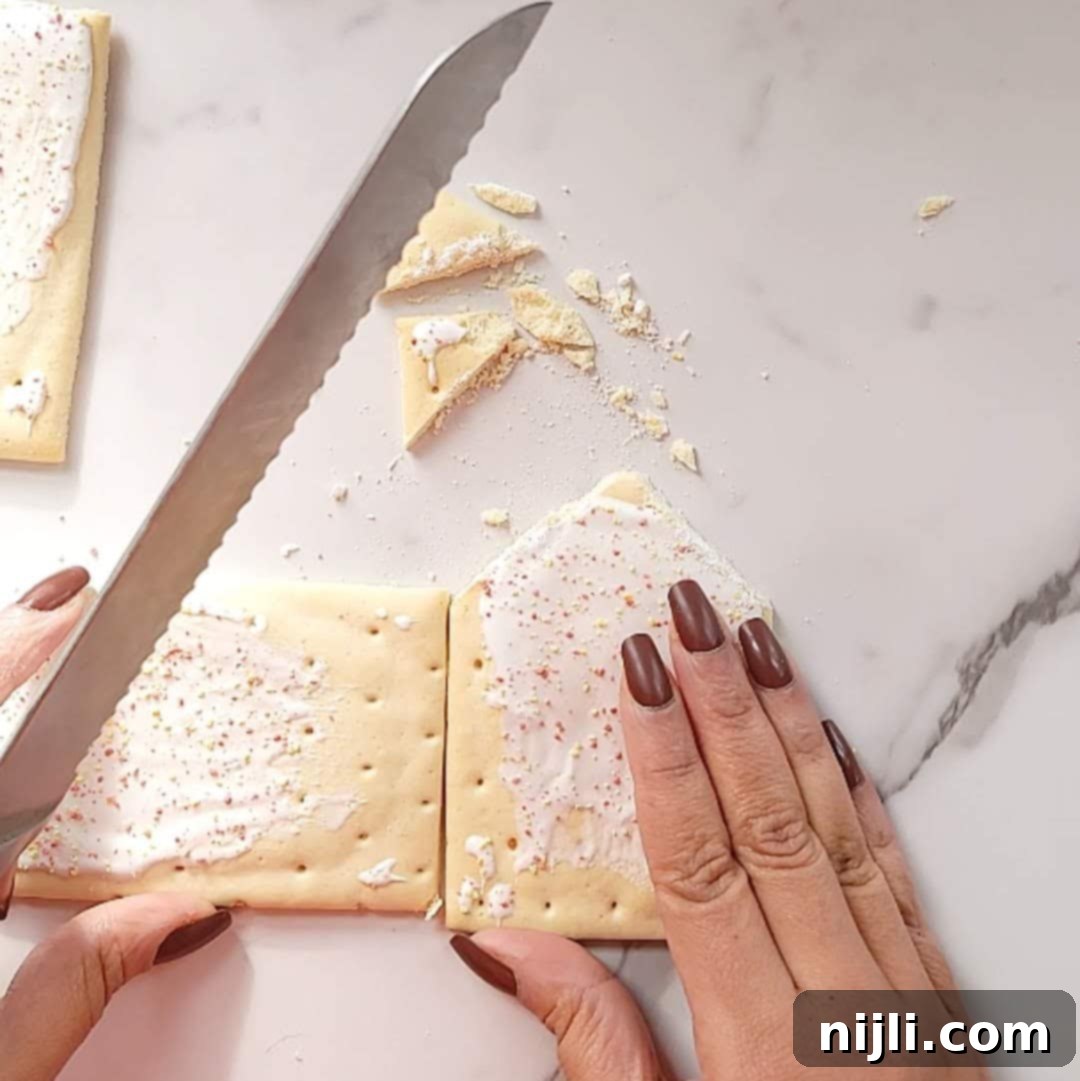
Step 2: Creating the House Shape. Repeat the cutting process on the other side of the vertical Pop Tart, mirroring your first cut. This will create a classic house shape with a triangular peak, which will serve as your front wall. Ensure that the base of the roof line perfectly aligns with the top edge of the horizontal Pop Tart. Now, repeat both steps 1 and 2 with another Pop Tart to create a second identical house-shaped piece for the back wall. You should now have two house-shaped pieces and four whole Pop Tarts remaining.
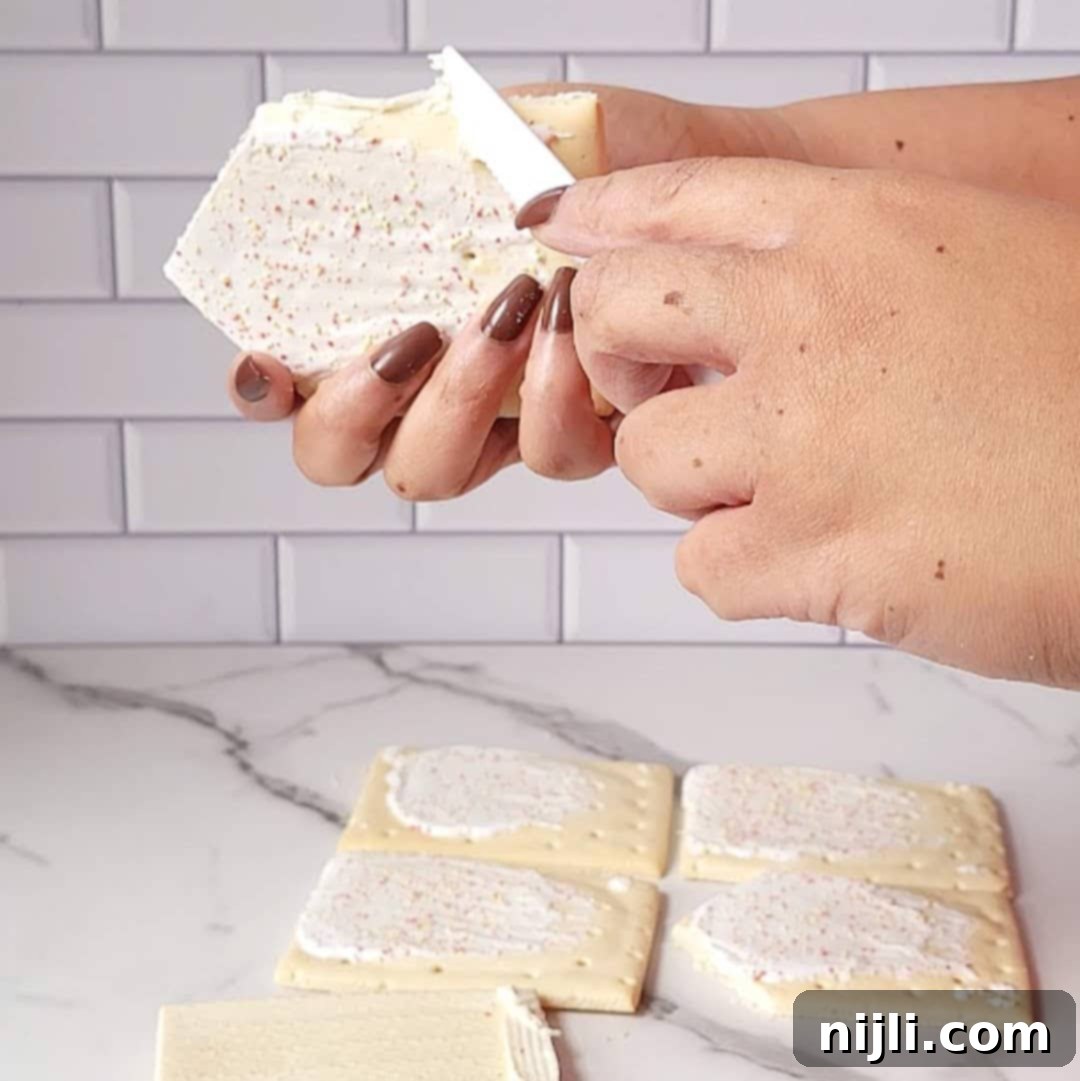
Step 3: Applying the Frosting “Glue”. To ensure a strong and stable structure, generously spread a layer of canned white frosting onto the edges of your house-shaped Pop Tarts. Do the same along the short edges of two of the whole Pop Tarts, which will form your side walls. It’s crucial to apply frosting to all surfaces of the Pop Tarts that will be touching each other before gently pressing them together to form a solid bond.
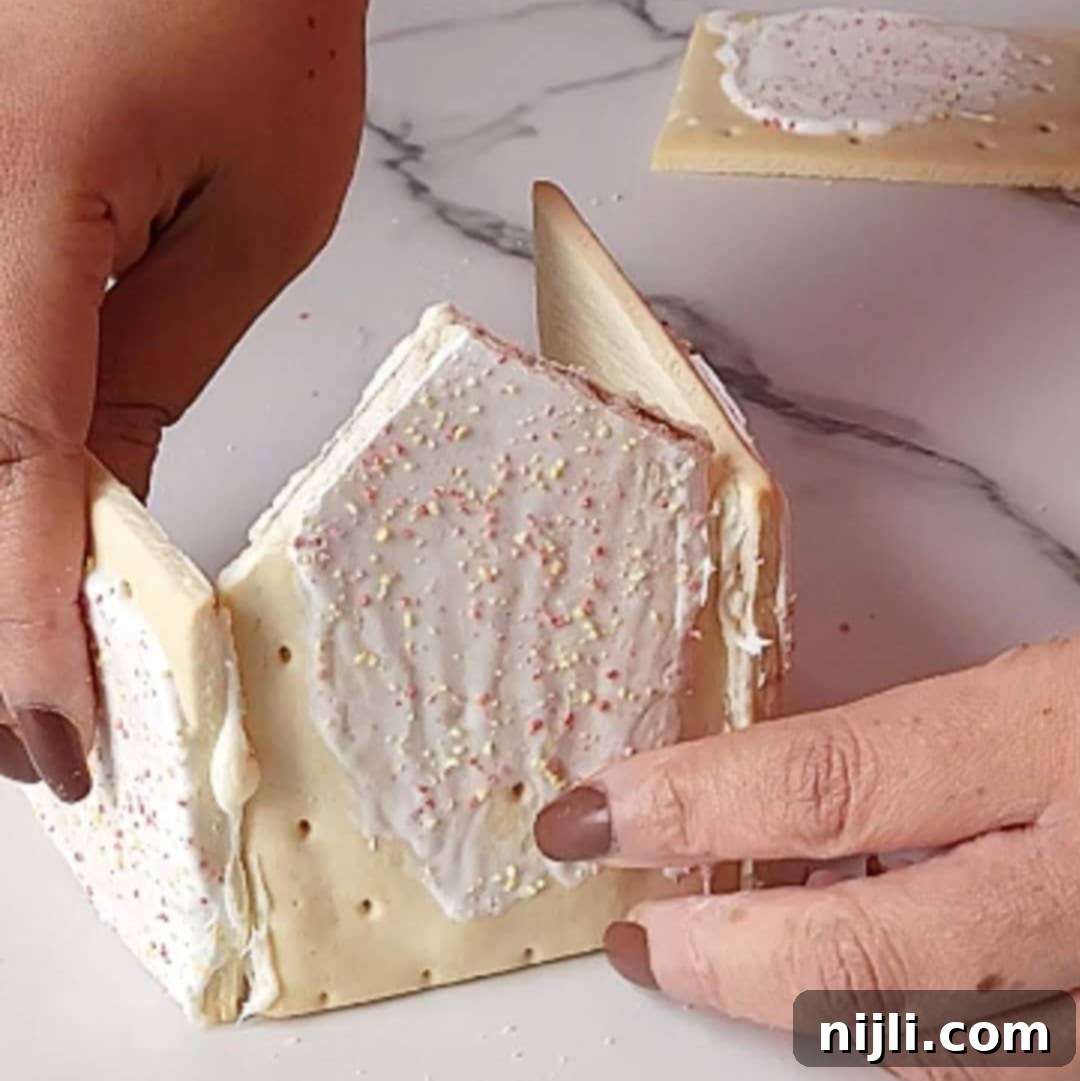
Step 4: Assembling the Walls. Carefully begin to assemble the main structure of your house. Gently press one of your “house-shape” pieces (which will be the front) to the short edges of two horizontal Pop Tarts (your side walls). Then, add the second “house-shape” piece (the back wall) in between the two side walls. Remember to spread frosting thoroughly on all connecting edges to create a secure, stable base for your edible masterpiece. Press lightly to adhere, being careful not to crush the Pop Tarts.
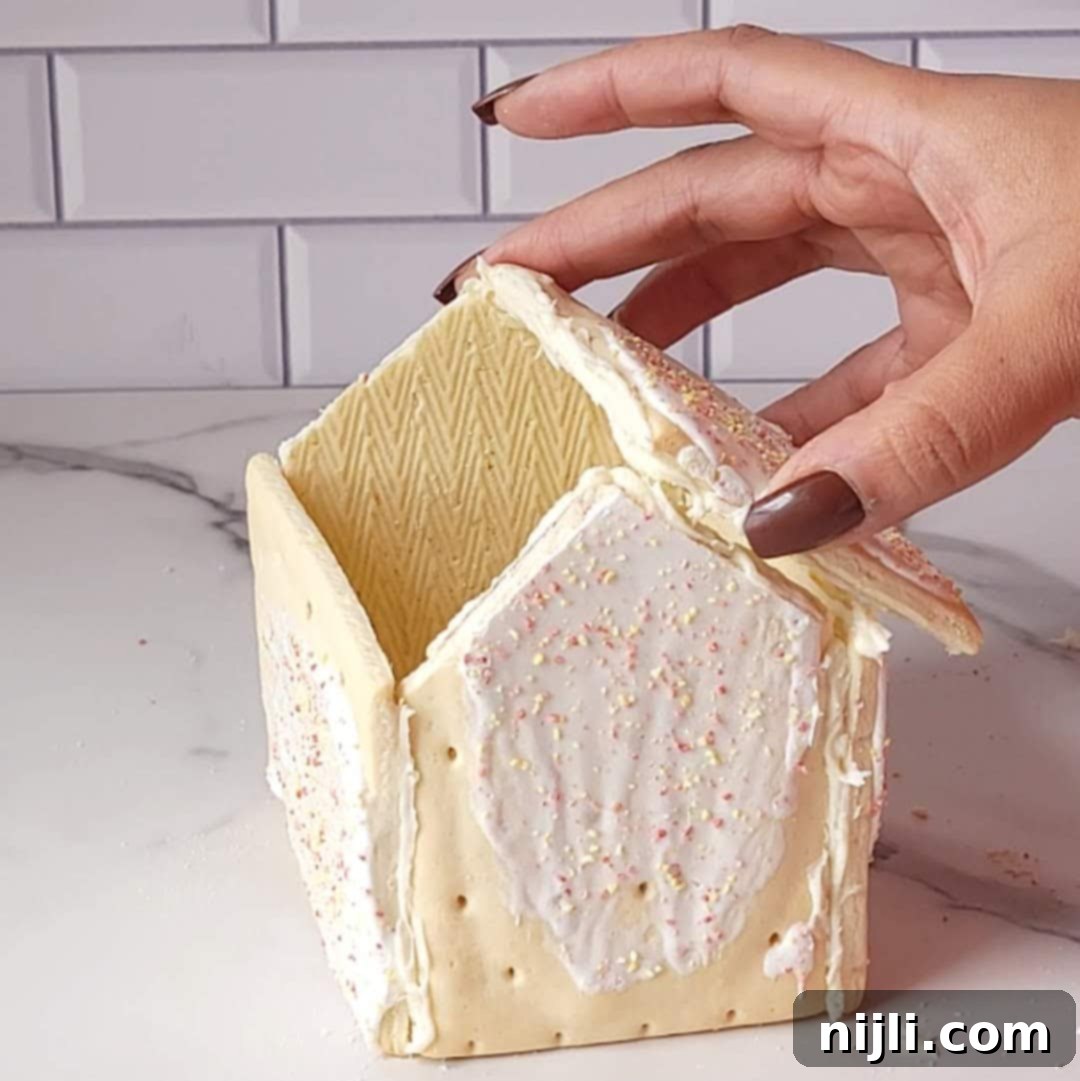
Step 5: Adding the Roof and Setting Time. Take the two remaining whole Pop Tarts, which will serve as the two sides of your roof. Spread a generous amount of frosting on all edges that will connect to the house’s peak and side walls. Gently press these roof pieces into place, ensuring they sit securely without shifting the already assembled walls. Once the main structure is complete, resist the urge to decorate immediately! Allow the assembled house to sit undisturbed for at least 1 hour to give the frosting ample time to harden and create a solid bond. This step is crucial for a durable house.
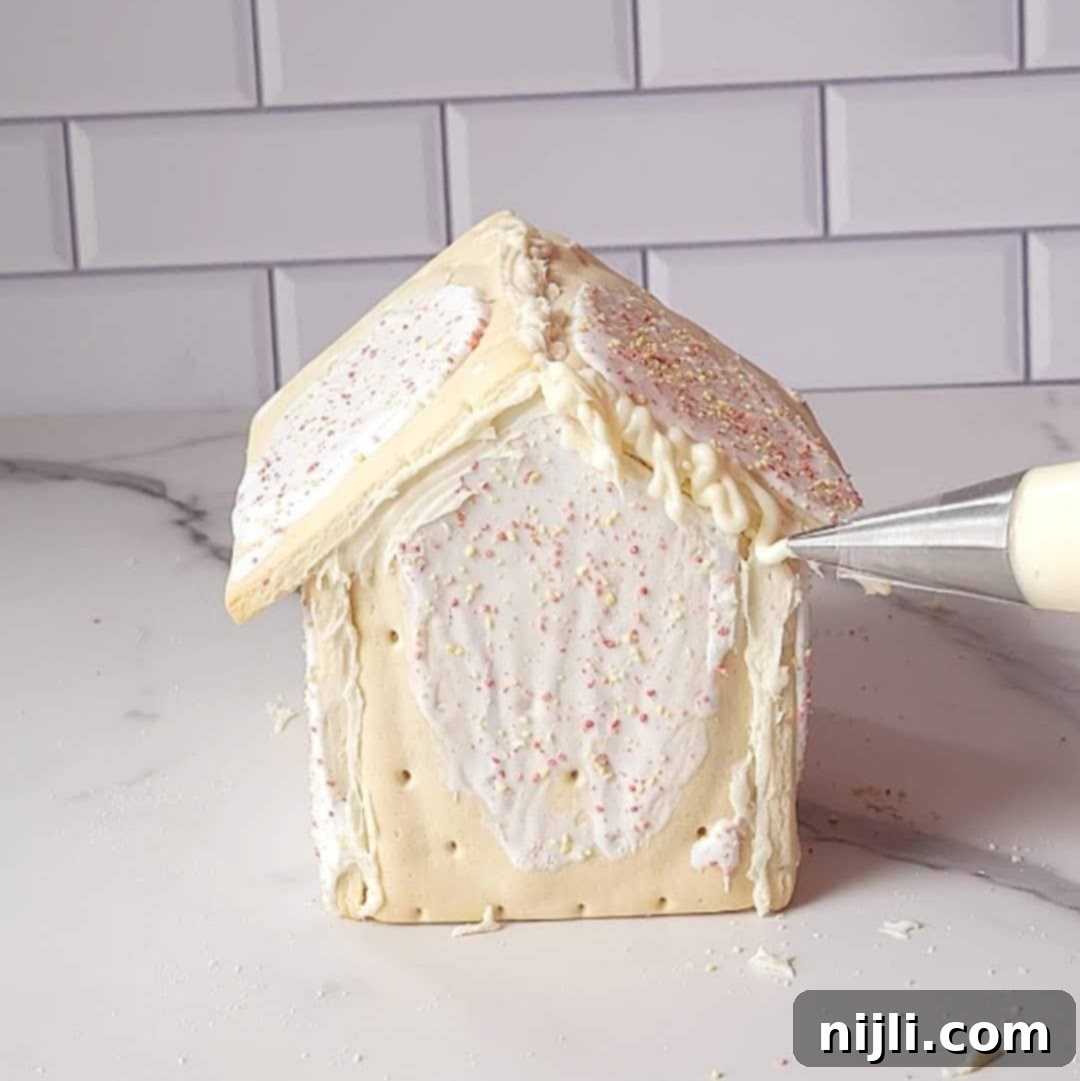
Step 6: Preparing for Decoration. After the hardening period, it’s time to prepare your house for its festive adornments. Load a piping bag with more white frosting. Pipe a beautiful, snowy white icing line along the roof’s peak and edges. This not only adds a charming “snow” effect but also provides a fresh, sticky surface for your first layer of roof decorations, ensuring they adhere perfectly.
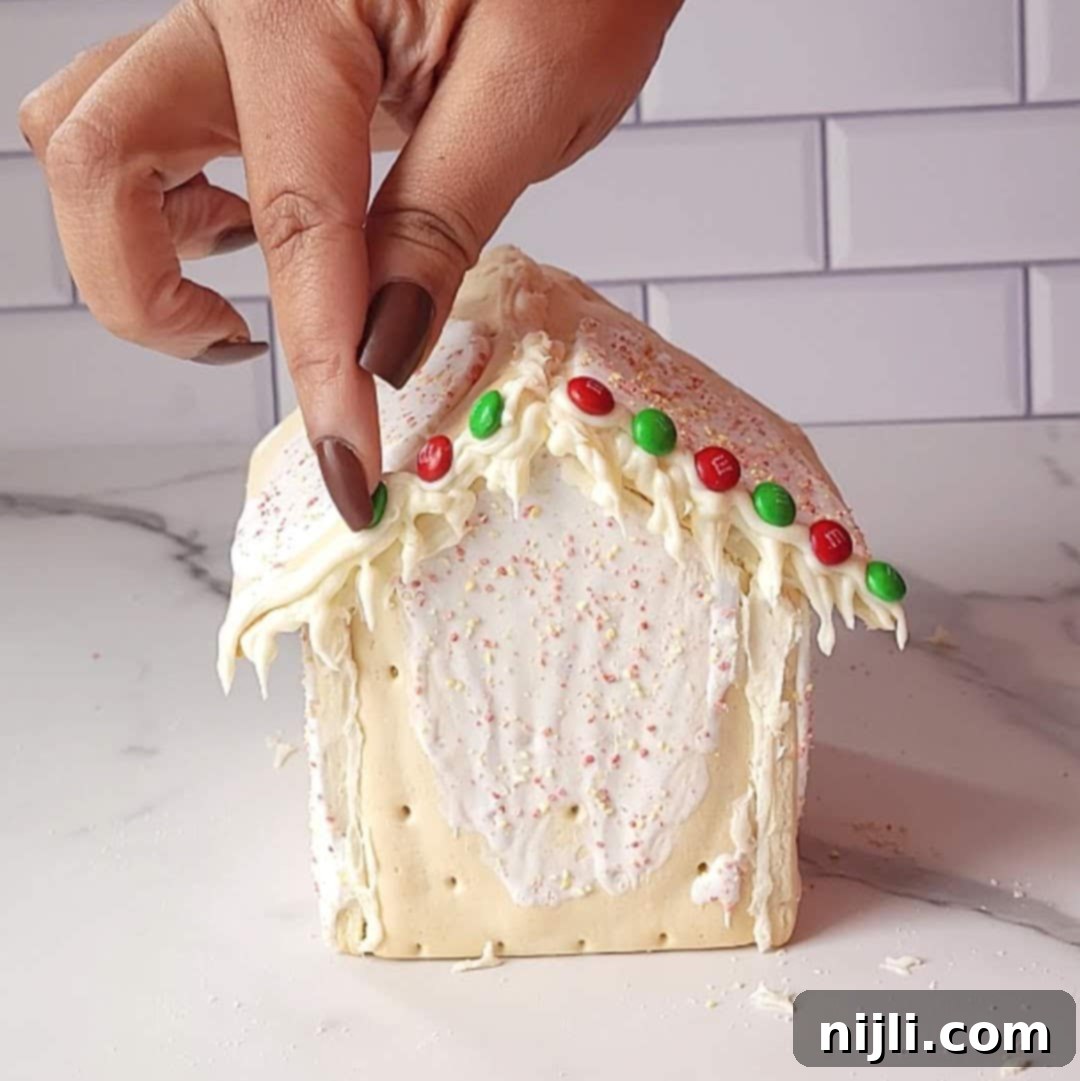
Step 7: Decorate Your House. Now for the most exciting part – decorating! Liberally apply frosting to any areas where you want to attach your candy decorations. Use your favorite candies to create windows, doors, chimneys, festive patterns, or anything your imagination desires. A small dab of frosting on the back of each candy piece will secure it firmly to the Pop Tart surface.
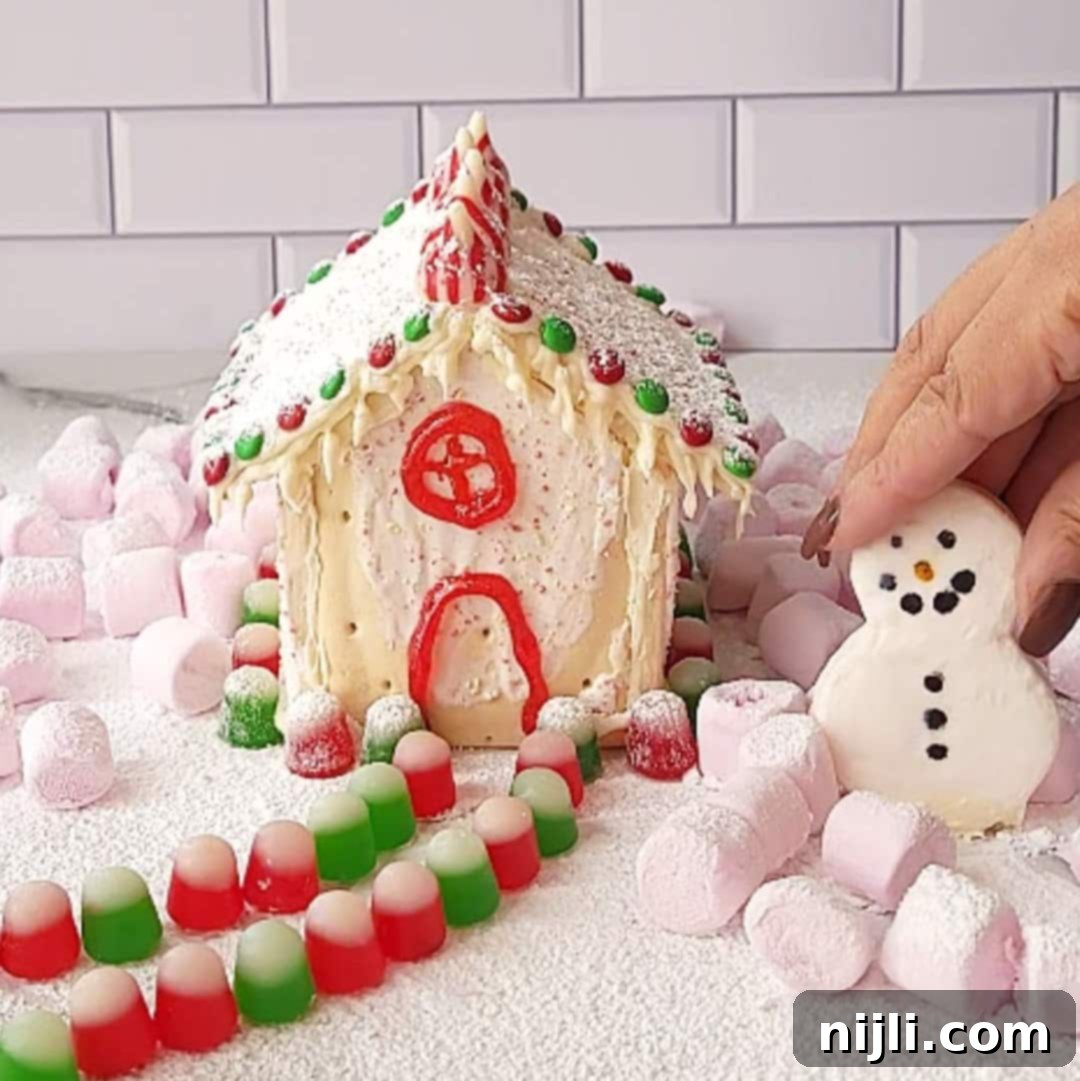
Step 8: Create a Winter Wonderland Scene. Extend your creativity beyond the house itself! Decorate the area surrounding your Pop Tart gingerbread house with a dusting of powdered sugar to mimic freshly fallen snow. Arrange additional candy Christmas decorations, such as mini candy canes, gumdrop trees, or chocolate chip pathways, to create an enchanting winter wonderland display. This adds depth and charm to your edible creation.
Pro Tip for Stability: Assemble Where You Plan to Display It! To avoid any accidental mishaps or structural damage, begin assembling your Pop Tart gingerbread house directly in the spot you intend to display it. Moving a freshly assembled house can be risky, potentially causing the delicate frosting bonds to break. Consider using a sturdy cutting board or a beautiful marble pastry board as its permanent base. This not only provides a lovely presentation but also ensures your festive creation remains intact for everyone to admire!
Gingerbread Pop Tarts: A Seasonal Favorite (Are They Discontinued?)
While you can absolutely use any flavor of Pop Tarts (or even store-brand toaster pastries) for this delightful project, many people wonder about the seasonal gingerbread flavor. For that authentic gingerbread taste, using actual Gingerbread Pop Tarts would be ideal!
Good news for fans: I’ve personally seen gingerbread Pop Tarts available for sale in 2022, so it appears they are not discontinued and make seasonal appearances! However, if you can’t find these delicious frosted gingerbread Pop Tarts, don’t worry – any flavor works perfectly. As mentioned, I opted for strawberry Pop Tarts to achieve a cheerful red, white, and green color combination. Other fantastic options include Pretzel Pop Tarts for a unique texture, Brown Sugar Cinnamon for a warm, classic feel, or S’mores for a fun, chocolatey base. Ultimately, the best Pop Tart flavor for your gingerbread house is simply the one you enjoy most and have readily available!
Unleash Your Creativity: Best Candies and Decorations for Your House
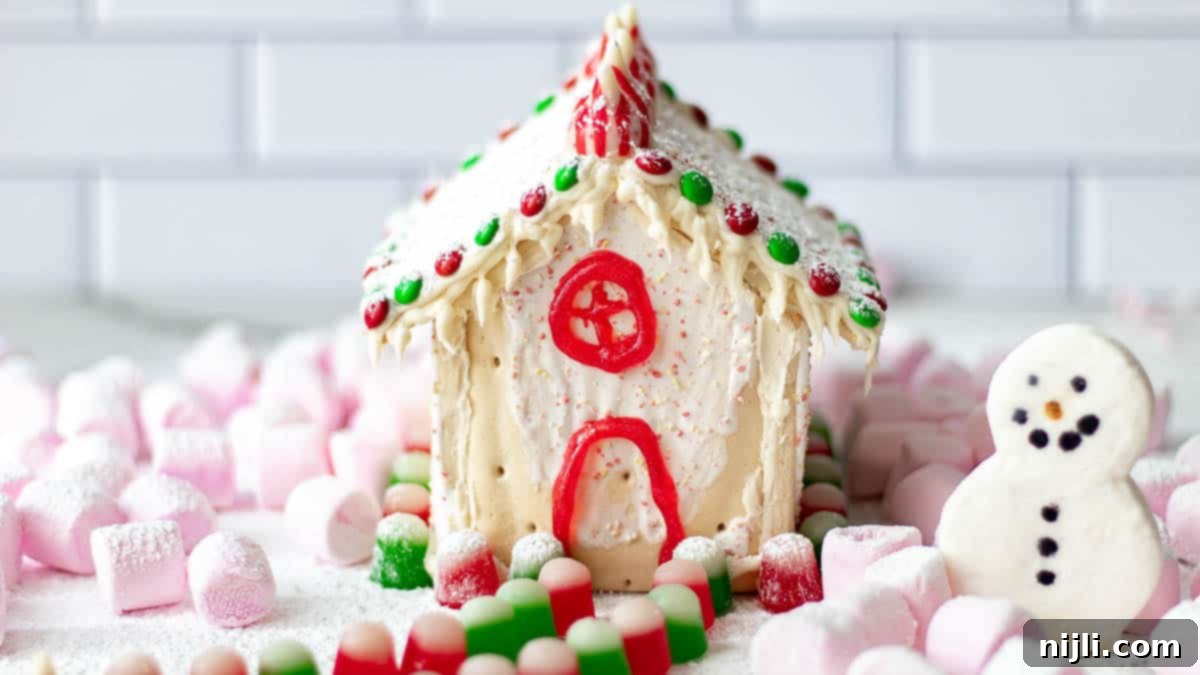
The most exciting aspect of building a Pop Tart gingerbread house is the endless possibilities for customization! This project truly allows you to let your creativity shine by choosing your absolute favorite candies and confections. Here are some highly recommended candies and ideas to inspire your decorating:
- M&Ms or other candy-coated drops: Perfect for creating colorful roof shingles, outlining windows, or designing pathways. I used mini M&Ms to craft a vibrant border around the roof of this Pop Tart Gingerbread House, adding a cheerful touch.
- Licorice or colored writing icing: Ideal for defining edges, drawing intricate details like window panes or a front door, and adding festive patterns. You can use classic Twizzler Pull-and-Peel or sour straws for architectural elements, or opt for brightly colored glitter icing to add sparkle.
- Gumdrops or Necco wafers: These versatile candies are excellent for creating bushes, trees, or decorative accents around the house. I used colorful Dots, but any gummy candy will add a delightful burst of color and texture.
- Marshmallows: Use mini marshmallows to create fluffy snowdrifts on the roof or around the “yard.” Larger shaped marshmallows can form charming snowmen, chimney smoke, or even playful clouds in your edible scene.
- Hershey’s Kisses, mini candy canes, and sprinkles: These are perfect for adding those crucial finishing touches. Hershey’s Kisses can cap off roof peaks or form tiny lampposts, while mini candy canes make delightful fence posts or icicles hanging from the eaves. Sprinkles, of course, add a magical sparkle over the entire creation or can be used for specific details.
- Pretzels: Pretzel sticks or twists can be used to create charming fences, log piles, or even rustic roof accents.
- Cookies or Wafers: Thin wafers or small rectangular cookies can make excellent doors, shutters, or even a cobblestone path leading up to your Pop Tart house.
Spooky Season Fun: The Pop Tart Haunted House Variation
Who says Pop Tart houses are only for Christmas? This ingenious technique can be easily adapted to create a spectacularly spooky Pop Tart haunted house for Halloween! Instead of festive colors, simply choose darker Pop Tart variations, such as rich chocolate Pop Tarts or eerie cookies and cream, for a perfectly creepy base. Then, let your imagination run wild with your favorite spooky decorations!
Adorn your haunted Pop Tart house with green or purple icing, gummy worms crawling up the walls, candy corn for ghostly windows, edible googly eyes peeking from shadowy corners, and an assortment of Halloween candies like gummy bats or candy pumpkins. It’s a wickedly fun way to celebrate the spooky season, offering a creative and delicious activity that the whole family will enjoy during October!
Storing Your Edible Masterpiece: Keep Your Pop Tart House Fresh
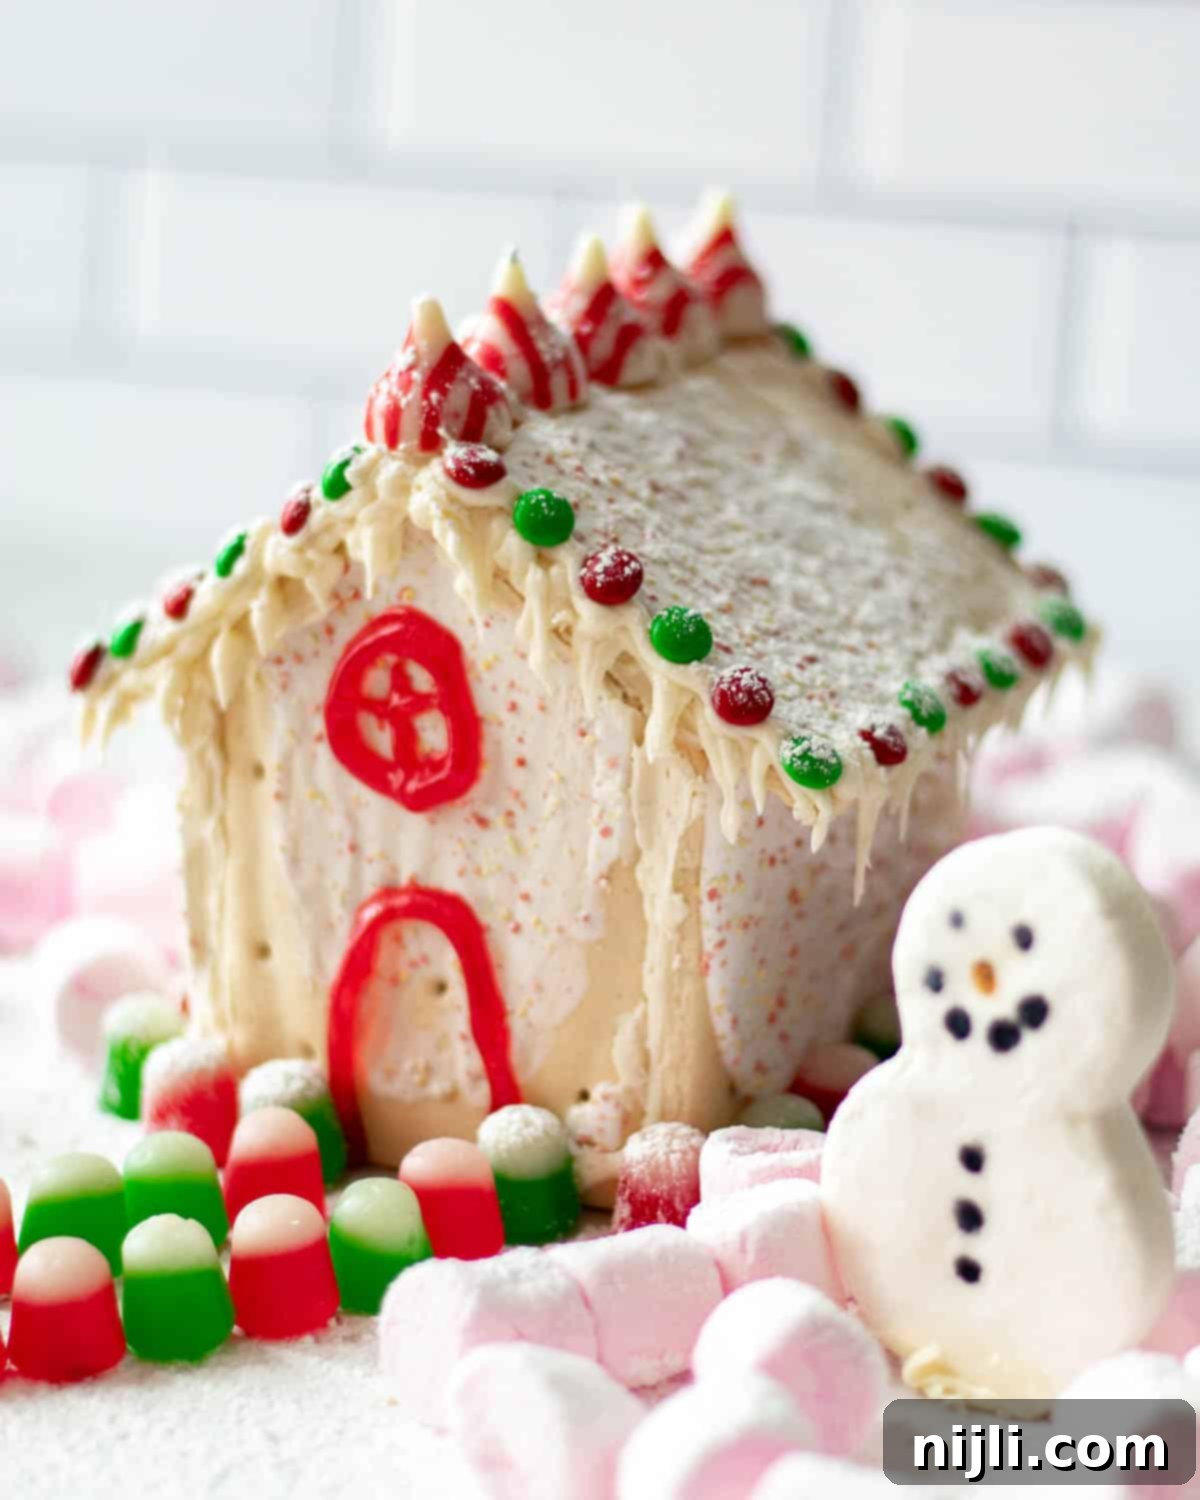
Once your beautiful Pop Tart gingerbread house is complete, you’ll want to preserve its charm for as long as possible. To properly store your edible creation, carefully double-wrap it with plastic wrap at night, ensuring it’s completely sealed from air exposure. Then, place it in a cool, dry place – away from direct sunlight or excessive humidity. Under these conditions, your Pop Tart gingerbread house should impressively last for up to a month, allowing you to enjoy its festive presence throughout the holiday season. While it remains edible for a while, it’s generally best enjoyed as a decorative display after a week or so.
Frequently Asked Questions (FAQ) About Pop Tart Gingerbread Houses
Great news for gingerbread flavor enthusiasts! As of the time I’m writing this post, gingerbread Pop Tarts have indeed made a comeback for the holiday season. I successfully found gingerbread Pop Tarts available at Target in 2022. Keep an eye out in late fall and early winter, as they are typically a seasonal offering!
If you absolutely adore this Christmas Pop Tart house project, you’re in for a treat with more festive ideas! Be sure to try my recipe for homemade Sweet Potato Pop Tarts for another Pop Tart-inspired creation. And for even more delightful holiday goodies and inspiration, check out the 45 Best Cookies for Cookie Exchange + Cookie Exchange Ideas! There’s so much fun to be had in the kitchen during the holiday season!
Absolutely! The entire Pop Tart gingerbread house is made with edible components. It’s best enjoyed within the first few days of assembly when the Pop Tarts are freshest. After a week or so, while still safe to eat if stored properly, it might be better appreciated as a festive display piece as the pastry can become a bit stale.
Top Tip: Patience is Key for a Sturdy Build!
For a durable and long-lasting Pop Tart gingerbread house, remember this crucial step: always allow your assembled house to sit for at least one hour. This gives the frosting ample time to harden and create strong bonds, ensuring your beautiful decorations have a stable foundation!
If you embark on this delightful recipe, I would be thrilled if you could leave a star review rating and comment below! Your feedback is incredibly valuable and it’s always so wonderful hearing about your creative results! And don’t forget to share your amazing Pop Tart gingerbread house creations with me by tagging @chenee_today on Instagram!
📖 Recipe
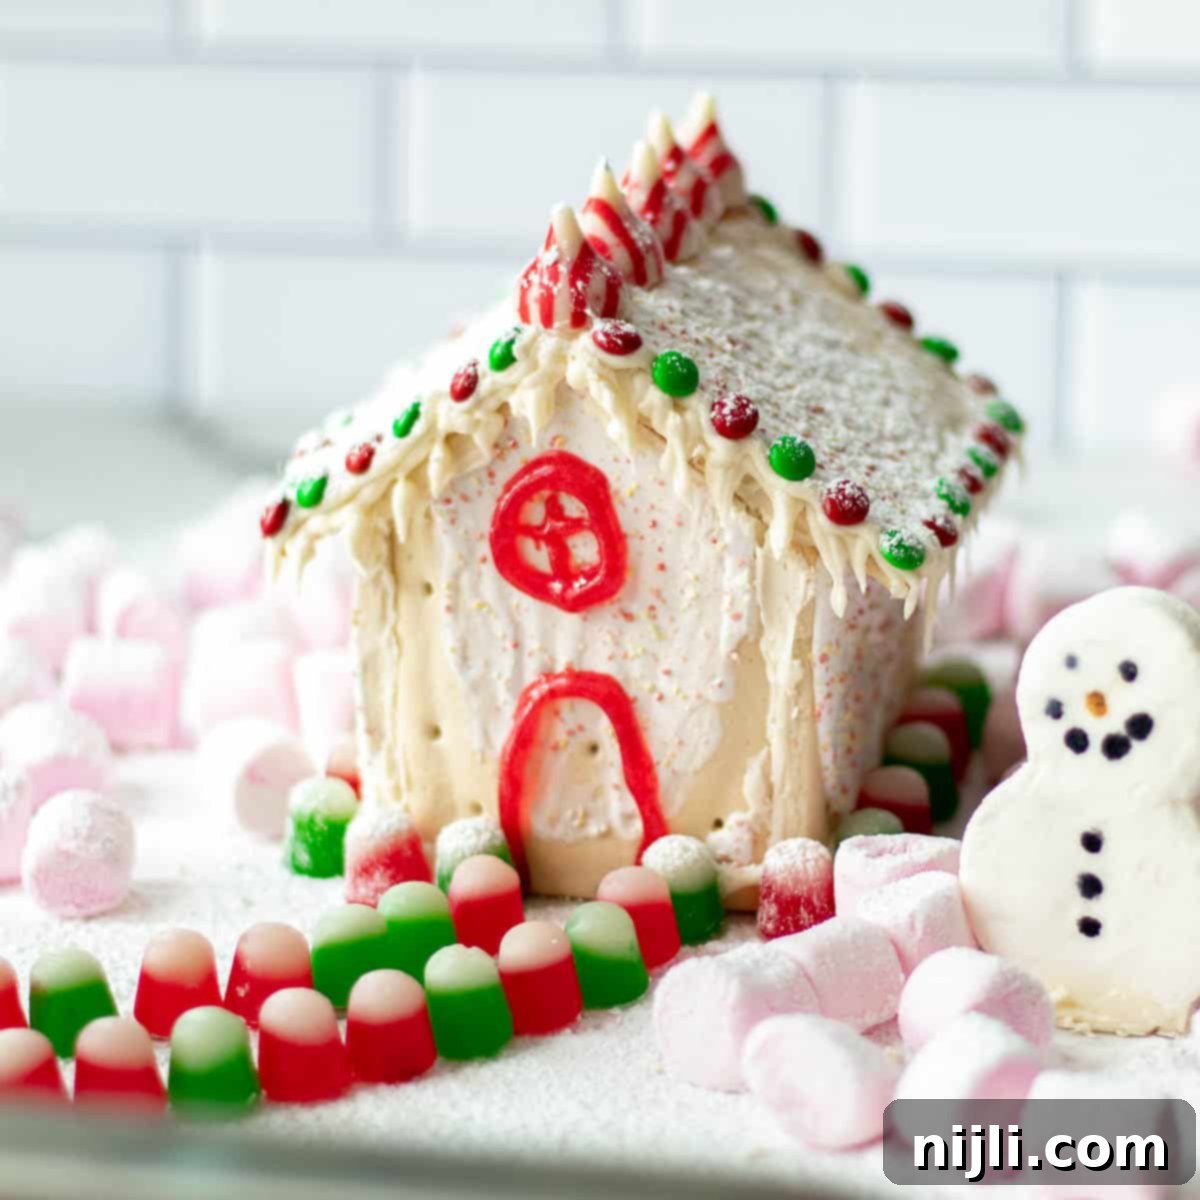
Pop Tart Gingerbread House – No Kit Needed (WITH VIDEO)
Pin Recipe
Rate Recipe
Save RecipeSaved!
Equipment you may need
-
Sharp Serrated Knife
-
Piping Bag and Tips (small round tip recommended)
-
Cutting Board or flat work surface
Ingredients
- 6 Pop Tarts – any flavor, or other shelf-stable toaster pastries (Strawberry or Gingerbread recommended for festive themes)
- Canned White or Vanilla Frosting – for both assembly and decoration
- Assorted Candy Decorations – such as mini M&Ms, gumdrops, mini marshmallows, candy canes, Hershey’s Kisses, sprinkles, powdered sugar, licorice, etc.
Instructions
-
On a clean work surface, place two Pop Tarts side-by-side: one horizontally and one vertically.6 Pop Tarts
-
Using a sharp serrated knife, carefully make a diagonal cut through the vertical Pop Tart. Start from the inner edge where it meets the horizontal Pop Tart, and cut towards the center of the vertical Pop Tart’s top edge. This forms one side of the roof peak.
-
Repeat this diagonal cut on the other side of the vertical Pop Tart, mirroring the first cut. This creates a triangular house shape. Ensure the bottom of this new “roof line” aligns neatly with the top of the horizontal Pop Tart. This will be your front wall.
-
Repeat steps 1-3 with another Pop Tart to create an identical house-shaped piece for the back wall. You should now have two house-shaped pieces (front and back walls) and four whole Pop Tarts remaining (two for sides, two for the roof).
-
Spread a generous amount of canned frosting on the edges of the two house-shaped Pop Tarts and along the short edges of two of the whole Pop Tarts. Apply frosting to all surfaces that will be touching during assembly.Canned White or Vanilla Frosting
-
Carefully press together one “house-shape” piece (front wall) with two whole Pop Tarts (side walls) to form the front and sides of your house.
-
Then, add the second “house-shape” piece (back wall) in between the two side walls, ensuring all connecting edges have frosting and are gently pressed together for stability.
-
For the roof, spread frosting on the edges of the two remaining whole Pop Tarts. Gently place and press them into position as the two sides of the roof, being careful not to shift the assembled walls.
-
Allow the entire assembled house structure to sit undisturbed for at least 1 hour. This crucial drying time allows the frosting to harden and creates a strong, stable foundation for your decorations.
-
Once hardened, use a piping bag with a small round tip to add more frosting along the roof line and any other areas you wish to decorate. This creates a fresh, sticky surface for your candies and adds a lovely “snowy” effect.
-
Unleash your creativity! Add candy decorations all over and around the house as you like, using small dabs of frosting to secure each piece firmly. Dust with powdered sugar for a final snowy touch.Assorted Candy Decorations
Video Tutorial
Notes
Pop Tart Gingerbread House – Halloween Version: Get creative for Halloween! Use this same technique to make a Pop Tart haunted house. Choose darker Pop Tart variations like chocolate Pop Tarts or cookies and cream for a spooky base. Then, decorate with your favorite Halloween candies, green or purple icing, edible googly eyes, and gummy creatures for a fun, eerie treat!
Candy Decoration Ideas:
- M&Ms or other candy-coated drops – Mini M&Ms are perfect for outlining the roof, windows, or creating colorful pathways.
- Licorice or colored writing icing – Use these to draw doors, window frames, or intricate patterns and details on your house. Twizzler Pull-and-Peel or sour straws also work great for structural accents.
- Gumdrops or Gummy Candies – These add lovely bursts of color and can be used to create bushes, trees, or festive accents.
- Marshmallows – Mini marshmallows are fantastic for creating snowdrifts, fluffy clouds, or chimney smoke. Shaped marshmallows can also add playful character.
- Hershey’s Kisses, mini candy canes, and sprinkles – Ideal for finishing touches like roof peak caps, festive borders, miniature lampposts, or sparkling snowy effects!
- Powdered Sugar – For a magical dusting of snow around the base of the house.
Nutrition Information (Estimated)
Nutrition Disclaimer

