Rescuing Your Batch: The Ultimate Guide to Fixing Dry and Crumbly Cookie Dough for Perfectly Soft Cookies
There’s nothing quite as frustrating in baking as encountering a batch of cookie dough that’s too dry. Whether you’re aiming for classic chocolate chip cookies, delicate shortbread, or festive sugar cookies, crumbly dough can quickly turn your baking dreams into a nightmare. You might be left wondering, “How do I add moisture to dry cookie dough?” or “What went wrong with my otherwise perfect recipe?” This comprehensive guide is here to help! We’ll explore the common culprits behind dry, crumbly cookie dough, provide actionable steps to revive it, and even offer creative solutions for cookies that have already baked up a bit too dry.

*This post contains affiliate links — as an Amazon Associate I earn from qualifying purchases. Please see my disclosure for details*.
For even more essential baking tips that will elevate your skills and ensure delicious results every time, be sure to check out our detailed guides on Browned Butter 101, learn How to Make Vanilla Extract with 2 Ingredients, and master Measuring Baking Ingredients Accurately for Better Results. Once you’ve equipped yourself with these invaluable insights, you’ll be perfectly prepared to bake up a storm and impress everyone with your delectable creations, perhaps for a special event like a cookie exchange! Don’t forget to check out my list of the Best Cookies for a Cookie Exchange!
Common Reason for Dry Cookie Dough #1: The Pitfall of Too Much Flour
One of the most frequent culprits behind dry, stiff, and crumbly cookie dough is an excessive amount of flour. While it might seem counterintuitive, even a beloved recipe can yield disappointing results if your flour isn’t measured correctly. The traditional method of scooping flour directly from the bag with a measuring cup can compact the flour significantly, leading you to add up to 25% more than the recipe actually intends. This surplus flour absorbs too much of the liquid ingredients, leaving your dough parched and unmanageable.
To ensure precision and achieve consistently perfect cookies with the ideal texture, I strongly recommend using a kitchen scale to measure your dry ingredients, especially all-purpose flour. Weighing your flour (and other dry ingredients) provides an exact measurement, eliminating the guesswork and variability of volumetric measuring cups. A good kitchen scale doesn’t have to be expensive; the kitchen scale I use is under $10 and incredibly reliable, proving that accurate baking is accessible to everyone! For a deeper dive into this topic and more tips on achieving baking accuracy, explore my comprehensive post on measuring baking ingredients accurately.
Common Reason for Dry Dough #2: Wet Ingredients Not At Room Temperature
The temperature of your wet ingredients plays a surprisingly crucial role in the final texture of your cookie dough. When a recipe calls for ingredients like melted butter, brown sugar, white sugar, eggs, or any other liquid additions to be at room temperature, it’s not just a suggestion – it’s a vital step for proper emulsion and consistency. Cold ingredients don’t emulsify (combine smoothly) with each other as effectively as room temperature ones. For instance, cold butter can lead to a lumpy dough that doesn’t incorporate sugar or eggs properly, resulting in a dough that feels dry and stiff because the fats and liquids aren’t evenly distributed.
The only significant exception to this rule is when you’re making specific types of dough, such as certain shortbread recipes, that explicitly call for cold butter to achieve a particular flaky or crisp texture. Otherwise, always aim for your butter to be soft and pliable, but not melted, and your eggs to feel neither warm nor cold to the touch. If you’re short on time, you can quickly bring eggs to room temperature by placing them in a bowl of warm water for 5-10 minutes. For butter, cutting it into smaller pieces will help it soften faster on the counter.

Common Problem with Crumbly Dough #3: Insufficient Fat or Liquid Content
Beyond incorrect measurements or temperature, the fundamental ratio of wet to dry ingredients in your recipe can also be the cause of dry cookie dough. If a recipe is simply formulated with too little fat or liquid, your dough will naturally lack the necessary moisture to hold together. Fats, like butter or oil, contribute to the richness and tender texture of cookies, while liquids like milk or eggs provide essential moisture and help bind the ingredients.
Always ensure you are using the full, specified amount of butter, oil, milk, or eggs as indicated in the recipe. Don’t be tempted to reduce these for perceived health benefits, as it will inevitably compromise the cookie’s texture. Furthermore, pay attention to the size of eggs requested; if the recipe calls for “large eggs,” use them. Smaller eggs contain less liquid, and that seemingly small difference can impact the overall hydration of your dough, leading to a drier, more crumbly result. Consistency in ingredient quantity is key to preventing this common baking mishap.
Reason for Dry Cookie Dough #4: The Impact of Overmixing
While mixing is essential, overmixing your cookie dough can quickly lead to a tough, dry, and less tender cookie. This phenomenon is primarily due to the activation and development of gluten. Flour contains proteins that, when combined with water or other liquids and agitated (mixed), form gluten strands. The more you mix, the more these gluten strands develop and strengthen, much like in bread dough. While strong gluten is desirable for chewy bread, for cookies, it results in a denser, tougher texture that lacks the desired melt-in-your-mouth tenderness.
To avoid overmixing, I suggest mixing your dough only until the ingredients are just combined. You’ll often see recipes instruct to mix until “just combined” or “no streaks of flour remain.” This means stopping as soon as the dry ingredients are fully incorporated into the wet. If you’re using an electric mixer, which can be very powerful, use it for creaming butter and sugar, but consider switching to a spatula or a dough whisk for the final steps of incorporating the flour and any add-ins like chocolate chips or nuts. This manual approach gives you more control and helps prevent inadvertently developing too much gluten, ensuring your cookies stay perfectly soft and chewy.

Cookie Dough Dried Out in Fridge: Proper Storage for Moist Dough
Even if you’ve followed your recipe perfectly and created a wonderfully moist dough, storing it improperly can lead to it drying out in the refrigerator. The interior of refrigerators is designed to constantly circulate cold air to maintain consistent temperatures and prevent spoilage. While this is great for food safety, it’s a nemesis for uncovered cookie dough, as the circulating air rapidly wicks away moisture.
To prevent this common source of frustration, always make sure to cover your dough tightly. If you plan to store your cookie dough in the fridge for more than an hour, or overnight, transfer it to an airtight container or wrap it securely with several layers of plastic wrap. Press the plastic wrap directly onto the surface of the dough to prevent air pockets, and then seal the container or wrap it again. This creates a barrier that locks in moisture and keeps your dough fresh and pliable, ready for baking whenever you are. Alternatively, you can shape the dough into a log and wrap it tightly in plastic wrap, then foil, for easy slicing and baking later, or even freeze it for longer storage.
What to Do if Your Cookie Dough is Too Dry: Making Crumbly Dough Stick Together
So, you’ve encountered a batch of crumbly cookie dough. Don’t despair! Most dry cookie dough can be salvaged with a few simple adjustments. The key is to add moisture back into the dough gradually and carefully, re-establishing the balance of ingredients. Here are a few effective ways to fix dry, stiff, and crumbly cookie dough:
- Incorporate More Fat (Vegetable Oil or Melted Butter): If your recipe inherently lacks sufficient fat, or if the fat wasn’t properly incorporated, your dough might feel dry and resist coming together. To remedy this, gradually add a bit more fat, such as vegetable oil or melted butter (allow melted butter to cool slightly before adding). Start with a small amount, like half a teaspoon, and mix it thoroughly into the dough. Continue adding half a teaspoon at a time, mixing after each addition, until the dough reaches a pliable, cohesive consistency. This method is particularly effective for richer doughs like shortbread or those that rely heavily on butter for texture.
- Add Extra Liquid Ingredients in Small Increments: Sometimes, a simple lack of liquid is the issue. Depending on your cookie recipe, adding a small amount of milk, an extra egg yolk (for richness and moisture without too much extra protein), a touch of vanilla extract, or even just a teaspoon of water can make a significant difference. Start with just half a teaspoon of your chosen liquid, mix it in thoroughly, and assess the dough’s texture. If it’s still too dry, add another half teaspoon. Be cautious not to add too much at once, as you can quickly turn dry dough into sticky, unmanageable dough. For example, if your sugar cookie dough is too dry, a little milk can not only moisten it but also help your cookies spread slightly in the oven for a crispier edge, if desired.
- Allow the Dough to Rest for Gluten Relaxation: If your dough feels dry and stiff, especially after mixing, it might be due to overactive gluten development (as discussed earlier). Giving the dough time to rest can work wonders. Place the dough in a bowl, cover it tightly with plastic wrap (or a damp towel to prevent further drying), and let it sit at room temperature for 30 minutes to an hour. During this resting period, the gluten strands will relax, and the dry ingredients will have more time to fully absorb the available moisture. This process often leads to a much softer, more pliable dough that’s easier to work with and yields a tender, chewy cookie. It’s a fantastic, low-effort way to improve dough texture without adding more ingredients.
Preventing Dry Cookies: The Art of Not Overbaking
Even if you meticulously follow all the steps to achieve perfectly moist and pliable cookie dough, your efforts can be undone by overbaking. Baking cookies for too long is a surefire way to transform them from delightfully soft and chewy to hard, dry, and crumbly. The oven’s heat continues to evaporate moisture from the cookies as they bake, and once too much is lost, there’s no going back.
The key to preventing overbaked cookies is knowing when to pull them from the oven. Most recipes will give you a time range, but it’s often more about visual cues. Look for the edges to turn a light golden brown, while the centers may still appear slightly soft, even a little underbaked. This “underbaked” appearance is often exactly what you want! Cookies continue to set and firm up as they cool on the hot baking sheet and then on a wire rack. This carryover cooking helps them achieve that desirable soft, chewy, or tender texture you crave, much like with my Crumbl Sugar Cookies Recipe!
To ensure your oven temperature is accurate (as many ovens can run hot or cold), use an oven thermometer. This simple tool can prevent countless baking disasters. If your oven tends to run hot, you might even consider reducing the baking time by a minute or two from the recipe’s minimum. Trust your instincts and the visual cues; it’s always better to slightly underbake and allow for carryover cooking than to overbake and end up with hard, brittle cookies.

How to Fix Already Baked Dry Cookies
Sometimes, despite your best efforts, cookies still come out of the oven a little drier or harder than you’d hoped. But don’t throw them away just yet! There are a couple of clever tricks you can use to add moisture back into baked cookies and restore some of their softness:
- The Bread Slice Trick: This is a classic baker’s secret! Place your dry cookies in an airtight container or a resealable plastic bag. Add a slice of fresh bread (any kind will do, but a plain white bread works well) to the container with the cookies. Seal the container tightly. Over the next 12-24 hours, the cookies will absorb moisture from the bread, transforming their texture from hard to wonderfully soft and chewy. Just remember to remove the bread slice after a day or two to prevent it from molding, and enjoy your revived cookies!
- A Quick Microwave Softening: For a rapid fix, especially if you just want to enjoy one or two cookies right away, the microwave can be your friend. Place a single dry cookie on a microwave-safe plate. You can also place a small cup of water next to it in the microwave to help create a steamy environment. Microwave on high for just 4-5 seconds. This short burst of heat will gently warm the cookie and reactivate some of its internal moisture, softening its texture. Be careful not to overdo it, as microwaving for too long can actually make cookies even harder once they cool.
Creative Ways to Use Dry Cookies (When All Else Fails)
Even if your cookies are beyond saving by re-moisturizing, or if you simply prefer to repurpose them, dry and crumbly cookies are far from useless! They can be transformed into delicious components for other desserts, adding flavor and texture. Here are some fantastic ideas for what to do with dry cookies:
- Decadent Cookie Crumbs for Crusts: Crush your dry cookies into fine crumbs. These are perfect for making a flavorful base for cheesecakes (like a Biscoff cheesecake!), pies, or bars. Simply mix the crumbs with a little melted butter, press into a pan, and bake or chill.
- Crunchy Layers in No-Bake Desserts: Layer crushed cookies into parfaits, trifles, or fun treats like these Halloween Dirt Cups. The texture contrast adds an exciting element to creamy desserts.
- Mix-ins for Ice Cream: Roughly chop or crumble the dry cookies and fold them into homemade no-churn ice cream or soften store-bought ice cream and mix them in for a custom flavor and texture boost.
- Toppings for Cakes, Brownies, and Yogurt: Sprinkle crushed dry cookies over frosted cakes, fudgy brownies, puddings, or even your morning yogurt for an instant crunchy topping.
- Homemade Cookie Butter: With a food processor, you can turn dry cookies into a spreadable cookie butter! Process the cookies until fine crumbs, then add a little oil and other flavorings until it reaches a smooth, spreadable consistency.
- Cookie Milkshakes: Blend dry cookies with milk and ice cream for a thick, delicious milkshake.
Favorite Cookie Recipes to Try for Success
The best defense against dry, tough cookies is to start with a reliable, well-tested recipe that inherently has the right balance of moisture. Here are a few of my favorite recipes that consistently deliver delicious, perfectly textured cookies, ensuring you’ll avoid the dreaded dry dough dilemma in your next baking adventure:
- Raspberry White Chocolate Cookies
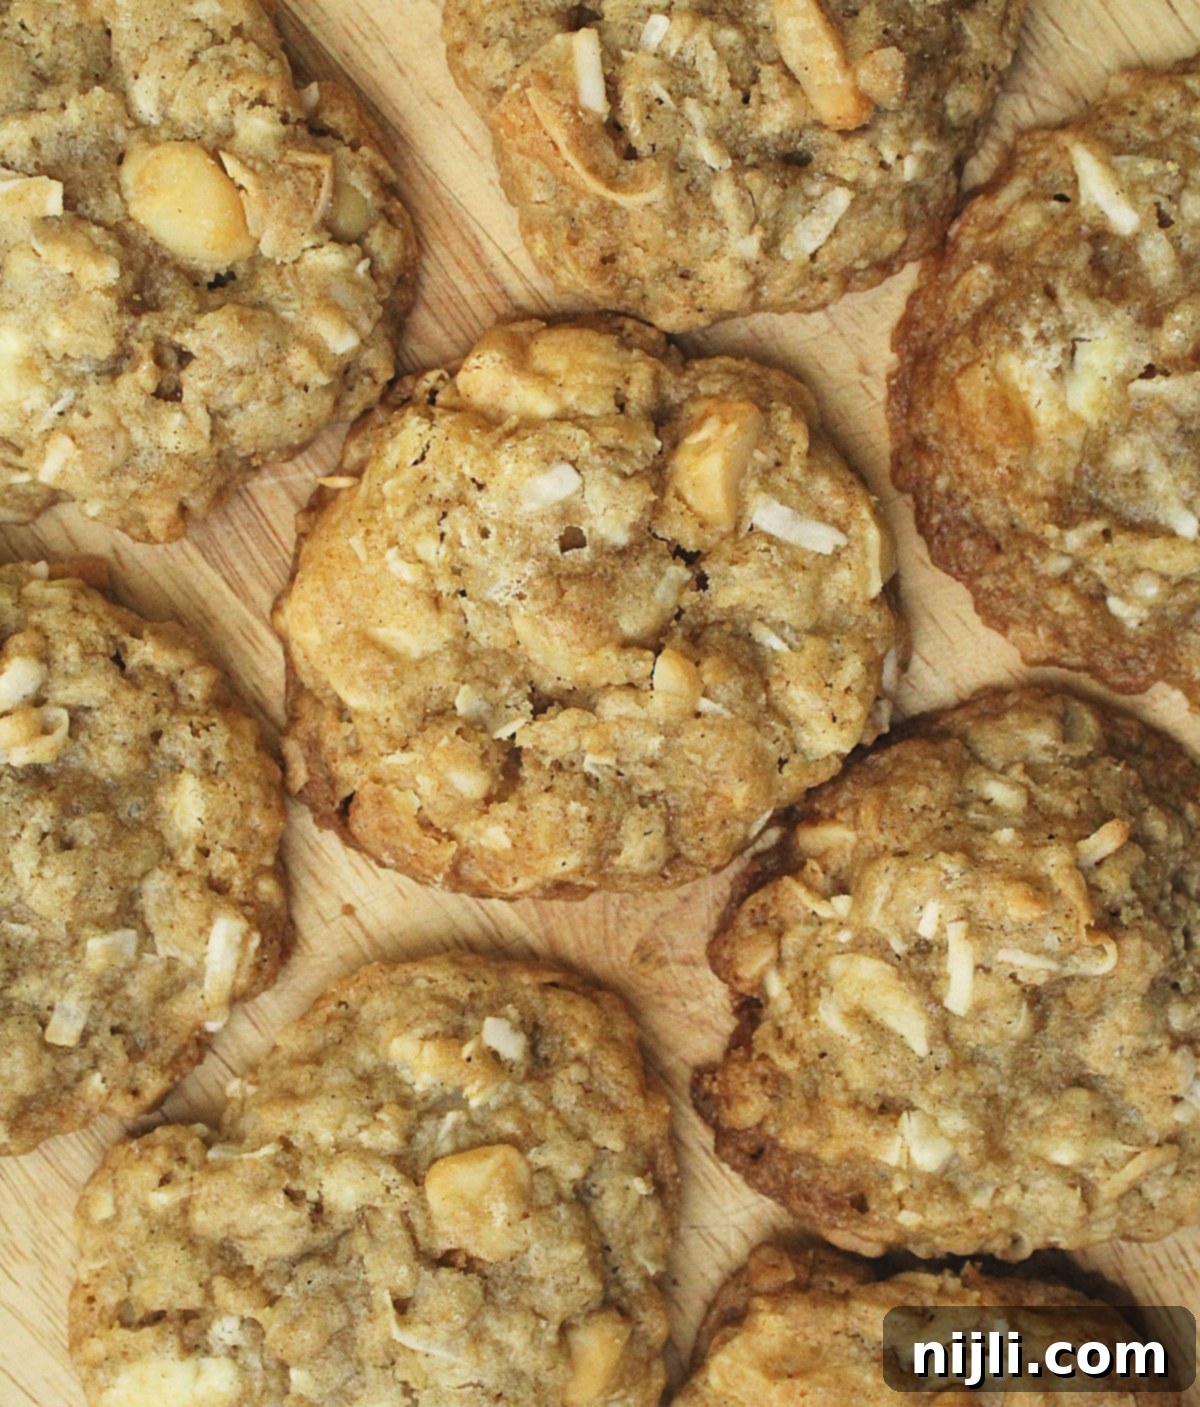
- Coconut Macadamia Oatmeal Cookies with White Chocolate Chunks
- Peanut Butter and Jelly Thumbprint Cookies
- Snickerdoodle Recipe without Cream of Tartar
📖 Recipe

Coconut Oatmeal Cookies with Macadamias and White Chocolate Chunks
Pin Recipe
Rate Recipe
Save RecipeSaved!
Ingredients
- ½ cup unsalted butter – softened (1 stick)
- ½ cup light or dark brown sugar – packed
- ½ cup granulated white sugar
- 1 large egg – room temperature
- 2 teaspoon pure vanilla extract
- 1 teaspoon coconut extract – optional
- 1 cup all-purpose flour – (128g)
- 1 cup old-fashioned rolled oats – (90g)
- ½ teaspoon ground cinnamon
- ½ teaspoon baking soda
- ¾ teaspoon salt
- 4 oz white baking chocolate – chopped
- ¾ cup sweetened flaked coconut
- ½ cup roasted macadamia nuts – chopped (see note)
Instructions
-
Preheat oven to 350°F.
-
Beat the butter, granulated sugar and brown sugar in the bowl of an electric mixer on medium speed until fluffy.
-
Add the egg, vanilla, and coconut extract and beat until combined.
-
Add flour, oats, baking soda, cinnamon and salt and stir with a spatula until just combined.
-
Fold in the white chocolate, coconut, and macadamia nuts.
-
(Optional) Chill dough in refrigerator for 30 minutes to an hour.
-
Scoop rounded tablespoons of dough and roll into balls. Arrange on parchment-lined baking sheets about 2 inches apart.
-
Bake until golden on edges, about 12-14 minutes. Cool on the baking sheets for 10 minutes then transfer to wire racks to cool completely.
Notes
If you can’t find macadamia nuts already roasted, they’re so easy to roast yourself! Just toss some whole macadamia nuts on a parchment-lined baking sheet and bake at 350°F for 10 minutes or until they’re lightly browned. Allow to cool before using in your cookies.
Nutrition Disclaimer

