Classic Thumbprint Cookies with Icing & Sprinkles: The Ultimate Holiday Treat Recipe
Step into a world of holiday magic with these delightful old-fashioned thumbprint cookies! Imagine a tender, buttery shortbread base, perfectly baked to a golden hue, holding a vibrant, sweet icing center, all finished with a festive sprinkle of your favorite toppings. These aren’t just any cookies; they are a timeless classic, especially cherished during the holiday season, but truly perfect for any celebration or simply to brighten an ordinary day. What makes them truly special is their incredible versatility – the thumbprint cookie filling is wonderfully customizable, allowing you to tailor them to any taste or occasion. Whether you prefer a simple vanilla glaze, a rich chocolate icing, or a decadent buttercream, these cookies are a canvas for your culinary creativity.

*This post contains affiliate links — as an Amazon Associate I earn from qualifying purchases. Please see my disclosure for details*.
If you’re as passionate about baking as I am, you’ll love exploring more of my favorite cookie recipes. Be sure to try my Chocolate Chip Cookies Without Brown Sugar for a unique twist on a classic, or indulge in the aromatic delight of my Coffee Cookies. For those planning a cookie exchange or simply seeking inspiration, my comprehensive list of 45 Best Cookies for Cookie Exchange + Cookie Exchange Ideas offers a treasure trove of ideas to impress everyone.
[feast_advanced_jump_to]
Irresistible Old-Fashioned Thumbprint Cookies with Icing
These old-fashioned thumbprint cookies with icing are truly a blank slate for your imagination. The beauty of this recipe lies in the completely customizable thumbprint cookie filling. While I’m partial to a generous scattering of colorful sprinkles for a festive touch, you can easily opt for classic nuts for an elegant crunch, or explore various fruit preserves for a more traditional take. Their delicate shortbread base and endless filling possibilities make them a perfect choice for bakers who love to personalize their treats. They are a staple for any holiday platter, adding a homemade touch that everyone will adore.
For me, these have quickly become my new favorite Christmas cookies, capturing the essence of the season in every bite. If you fall in love with these, you must also try my Strawberry Shortbread Cookies for another delightful shortbread experience. They would also look absolutely stunning arranged on my Christmas Charcuterie Board, making for a truly impressive display. And for all the M&M lovers out there, don’t miss my fun and colorful Chocolate Chip M&M Cookies!
The Essential Ingredients for Perfect Thumbprint Cookies
Crafting these delectable shortbread thumbprint cookies requires just a few simple, high-quality ingredients, resulting in a tender texture and rich flavor. The full measurements and detailed ingredient list are provided in the recipe card below, but let’s take a closer look at what makes these cookies so special.
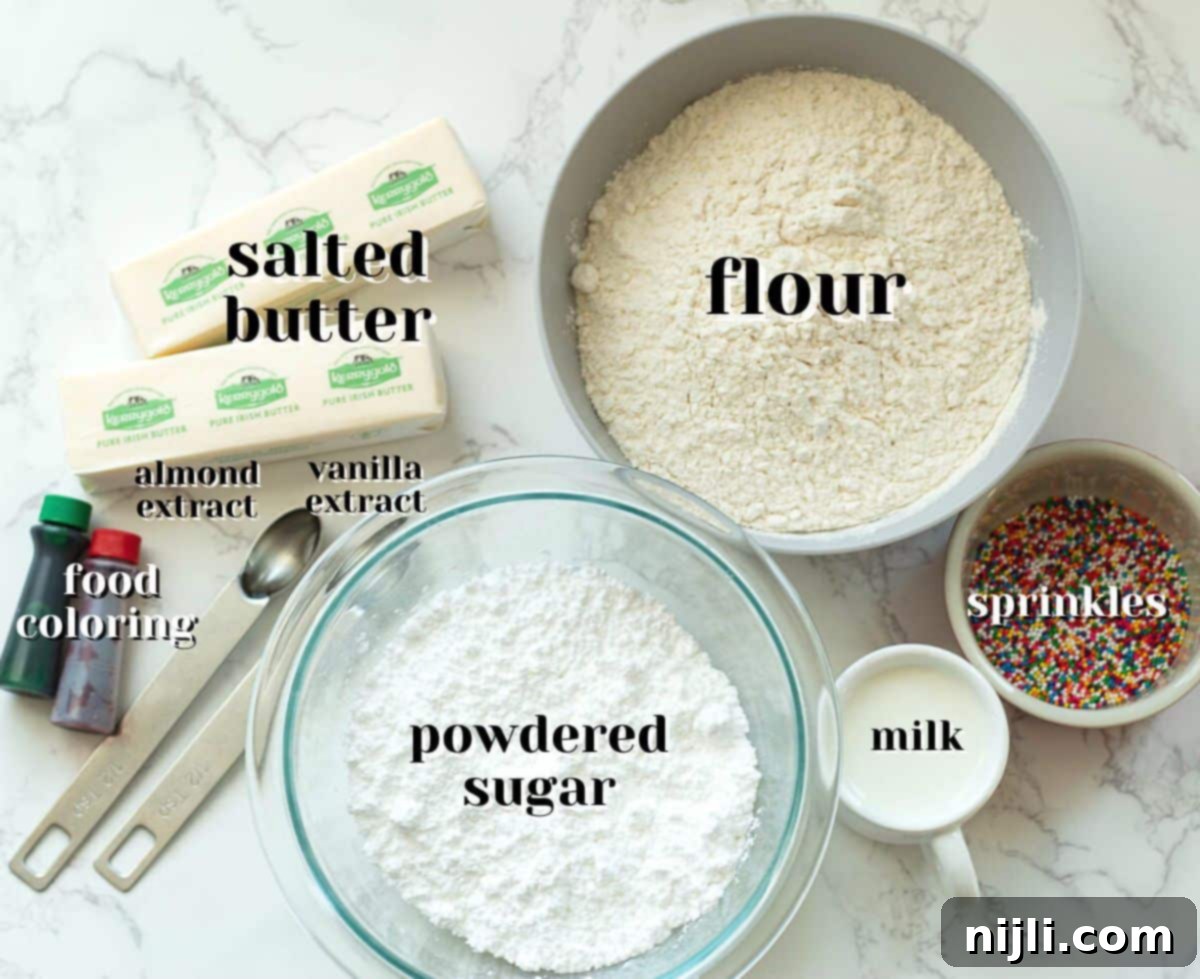
For the Tender Shortbread Cookie Base:
- Powdered Sugar: This is key for achieving the incredibly soft, melt-in-your-mouth texture that defines the best thumbprint cookies. Unlike granulated sugar, powdered sugar dissolves more completely into the dough, leading to a finer crumb. For consistent results, always use a kitchen scale to measure your powdered sugar by weight, or employ the spoon-and-level method to avoid over-packing.
- Salted Butter: Your butter should be cold and cut into small cubes. Chilling the butter beforehand helps prevent the cookies from spreading too much in the oven, maintaining their shape. I prefer salted butter for its balanced flavor, but if you opt for unsalted butter, remember to add ½ teaspoon of fine salt along with your flour to achieve a similar taste profile.
- Almond Extract & Vanilla Extract: These extracts infuse the cookies with a rich, aromatic flavor that complements the sweet icing beautifully. Be sure to use high-quality pure vanilla extract for the best taste. For an even more homemade touch, check out my post on how to make vanilla extract at home with just two simple ingredients!
- All-Purpose Flour: As these cookies feature a delicate shortbread base, accurate flour measurement is crucial. I highly recommend measuring flour by weight using a kitchen scale. Measuring with a cup can lead to too much flour if it’s packed too densely, resulting in a crumbly dough that’s difficult to form and a drier, less tender cookie.

For the Customizable Thumbprint Cookie Filling:
- Powdered Sugar: The foundation of our sweet and smooth thumbprint cookie filling, providing the perfect consistency and sweetness.
- Vanilla Extract: Essential for adding a delicious, classic flavor to our icing, enhancing the overall taste of the cookies.
- Milk: Used to achieve the desired consistency for your icing. Start with the smaller amount and add gradually until it’s smooth and pipeable (or spoonable!). Any type of milk works; I typically use whole dairy milk for a richer result.
- Pinch of Salt: A small but mighty addition, a pinch of salt helps to balance the sweetness of the icing and bring out all the delightful flavors in these old-fashioned thumbprint cookies.
- Food Coloring: This is entirely optional but highly recommended for adding a festive touch! Choose colors that match your celebration or the time of year – think vibrant pinks for Valentine’s Day, cheerful oranges for Halloween, or classic reds and greens for the holiday season.
- Sprinkles (or Nuts/Other Toppings): These are what make thumbprint cookies truly fun and visually appealing! Nothing says “holiday treat” quite like colorful sprinkles. If you’re a sprinkle enthusiast, you’ll also adore my Birthday Rice Krispie Treats or my adorable Valentine’s Day Cake Pops. For those who prefer a more sophisticated finish, chopped nuts like pecans or walnuts offer a wonderful textural contrast and flavor.
Recommended Equipment for Easy Baking
Having the right tools can make all the difference in achieving perfect thumbprint cookies. Here’s a rundown of the equipment I recommend for a smooth baking experience:
- Food Processor or Stand Mixer: To effortlessly combine your ingredients for the cookie dough, I highly recommend using either a food processor or a stand mixer fitted with the paddle attachment. A food processor, like my trusty Cuisinart 14-Cup food processor, makes quick work of cutting the cold butter into the flour mixture, ensuring a tender shortbread. A stand mixer also provides excellent aeration and even mixing.
- Cookie Sheets: Essential for baking your cookies evenly. Using sturdy cookie sheets ensures consistent heat distribution and prevents burnt bottoms.
- Parchment Paper: Lining your baking sheets with parchment paper is a game-changer! It prevents sticking, makes for easy cleanup, and helps the cookies bake more evenly.
- Wire Rack: A wire rack is crucial for cooling your cookies completely, allowing air to circulate around them and preventing them from becoming soggy.
- Kitchen Scale: As mentioned in the ingredients section, a kitchen scale is invaluable for accurate ingredient measurement, especially flour and powdered sugar, leading to more consistent and superior baking results.
- Small Cookie Scoop or Teaspoon: For uniformly sized cookies, a small cookie scoop (about 1 tablespoon) is very helpful. Alternatively, a regular teaspoon works perfectly for portioning the dough.
- Measuring Spoon or Wine Cork: To create the signature “thumbprint” indentations, you can use the back of a small measuring spoon, your thumb, or even a clean wine cork for a perfectly rounded divot.
Step-by-Step Guide to Baking Your Thumbprint Cookies
Making these classic thumbprint cookies with icing is surprisingly simple, and the process is incredibly rewarding. While detailed instructions are in the recipe card below, here’s a visual and simplified overview of how easily these old-fashioned treats come together.
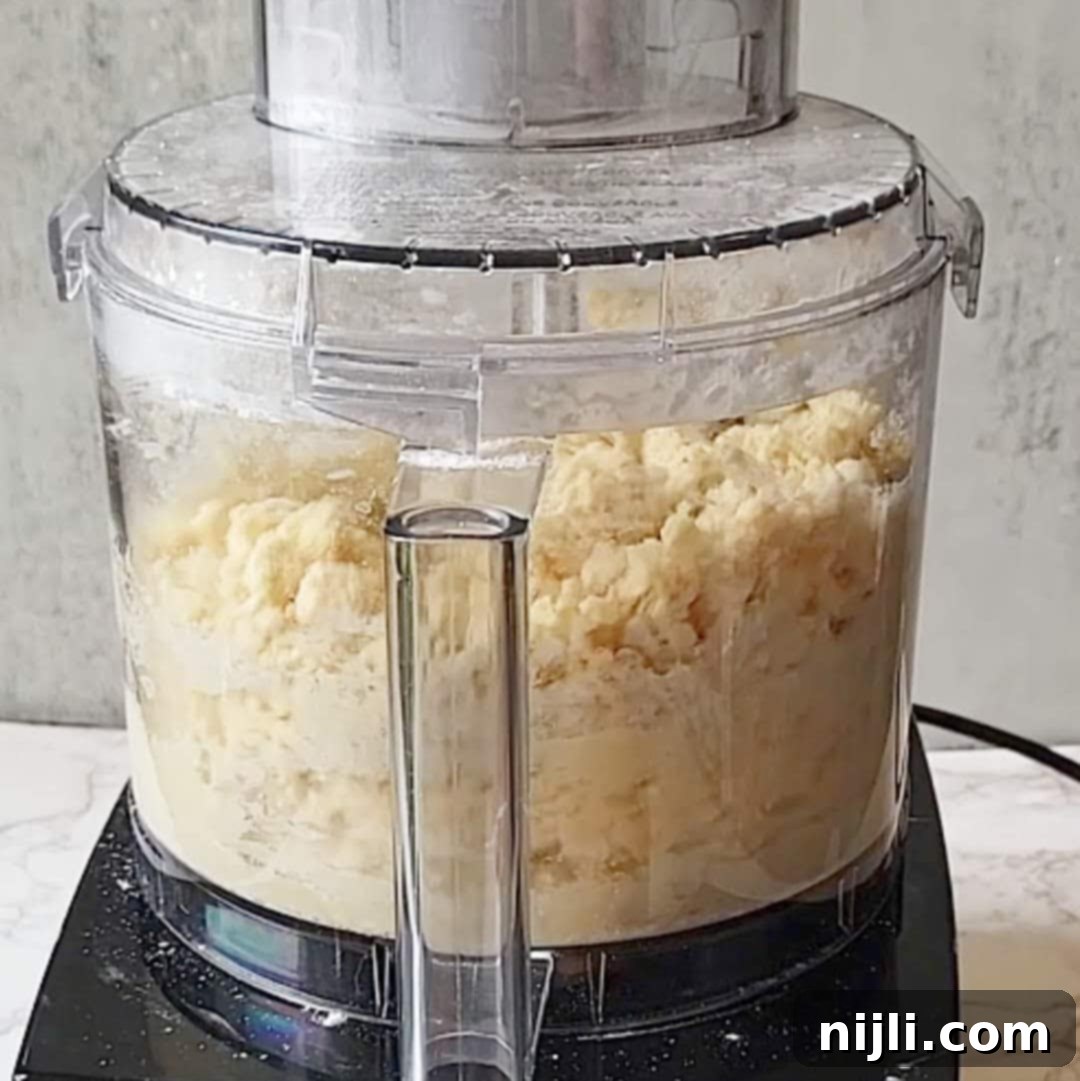
Begin by creaming together the cold, cubed butter and powdered sugar in your food processor or the bowl of a stand mixer. Process until the mixture is light, fluffy, and well-combined, making sure to scrape down the sides of the bowl to ensure everything is incorporated. Next, mix in the almond and vanilla extracts, then gradually add the all-purpose flour until the dough just comes together. Be careful not to overmix.
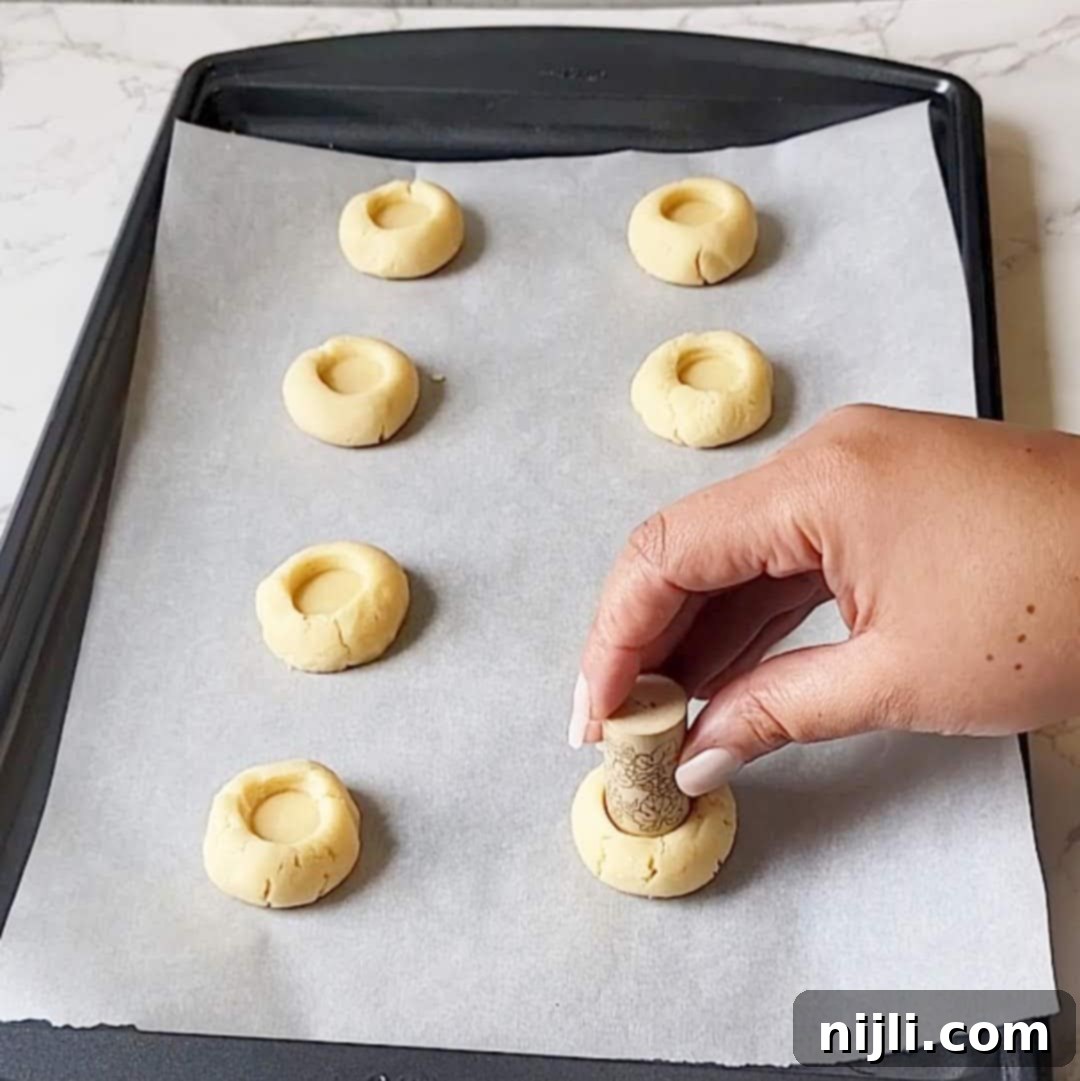
Once your dough is ready and chilled (this is a crucial step for perfect cookies!), form it into tablespoon-sized balls. You can use a small cookie scoop for consistency and then roll them smoothly between your palms. Place these dough balls onto a prepared baking sheet. Using the back of a measuring spoon, your thumb, or even a wine cork, press a shallow indent into the center of each cookie. Bake them until the bottoms are lightly golden brown, indicating they are perfectly cooked through.
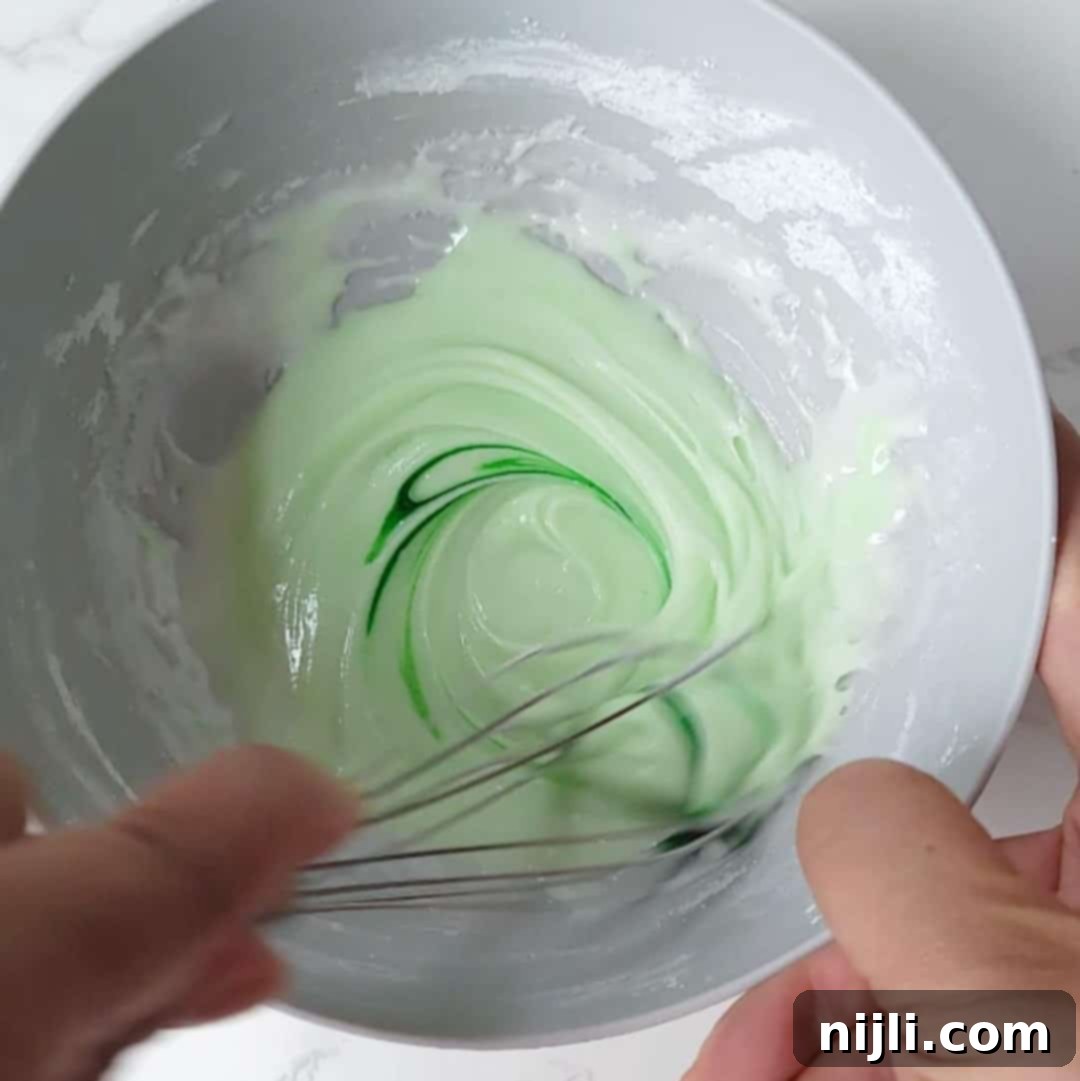
While your freshly baked cookies are cooling, prepare the vibrant icing for the thumbprint filling. In a small bowl, whisk together the powdered sugar, vanilla extract, and milk until smooth. If you desire multiple colors for your cookies, simply divide the plain icing into separate small bowls and add a few drops of liquid food coloring to each, stirring until you achieve your desired hue. This is where the customization really shines!
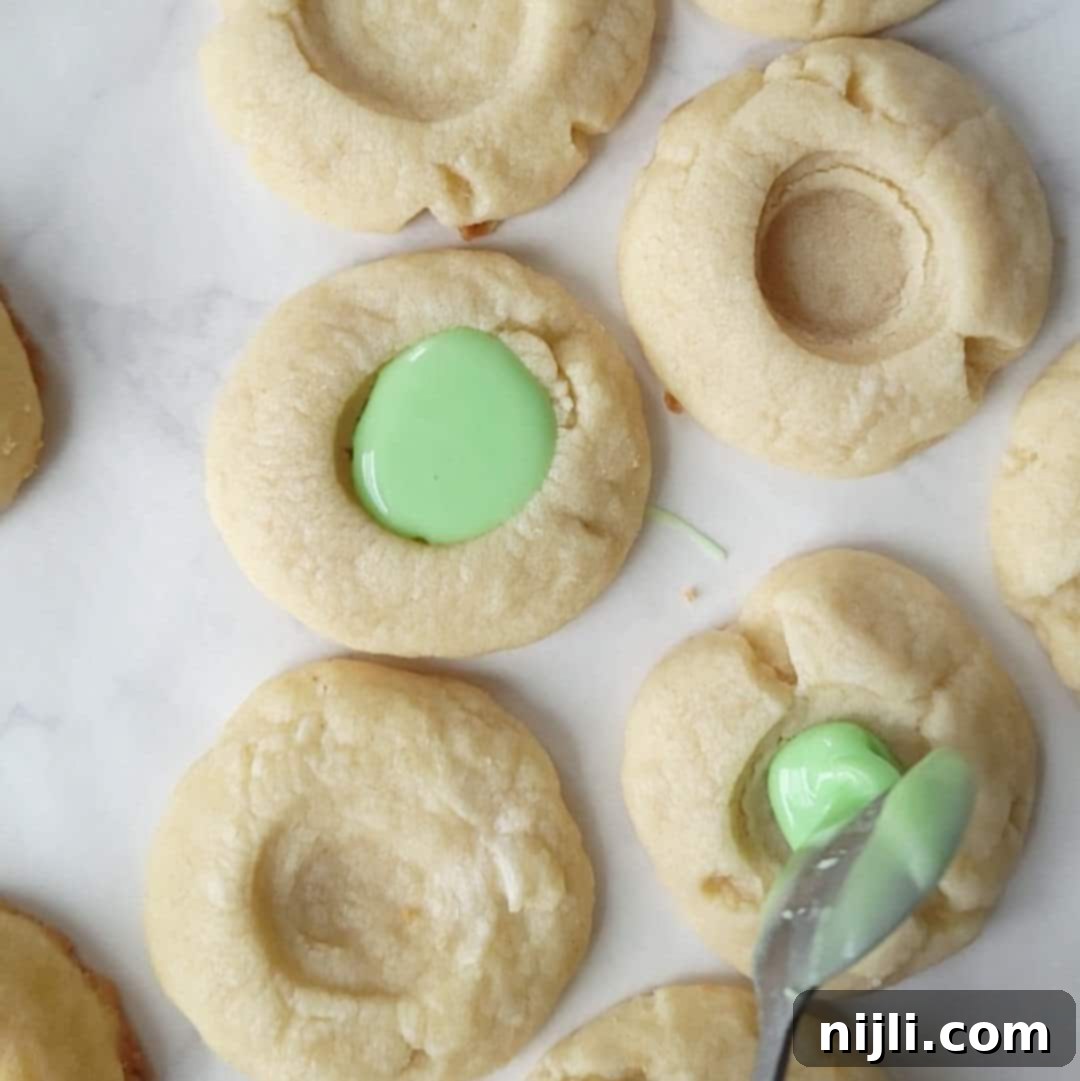
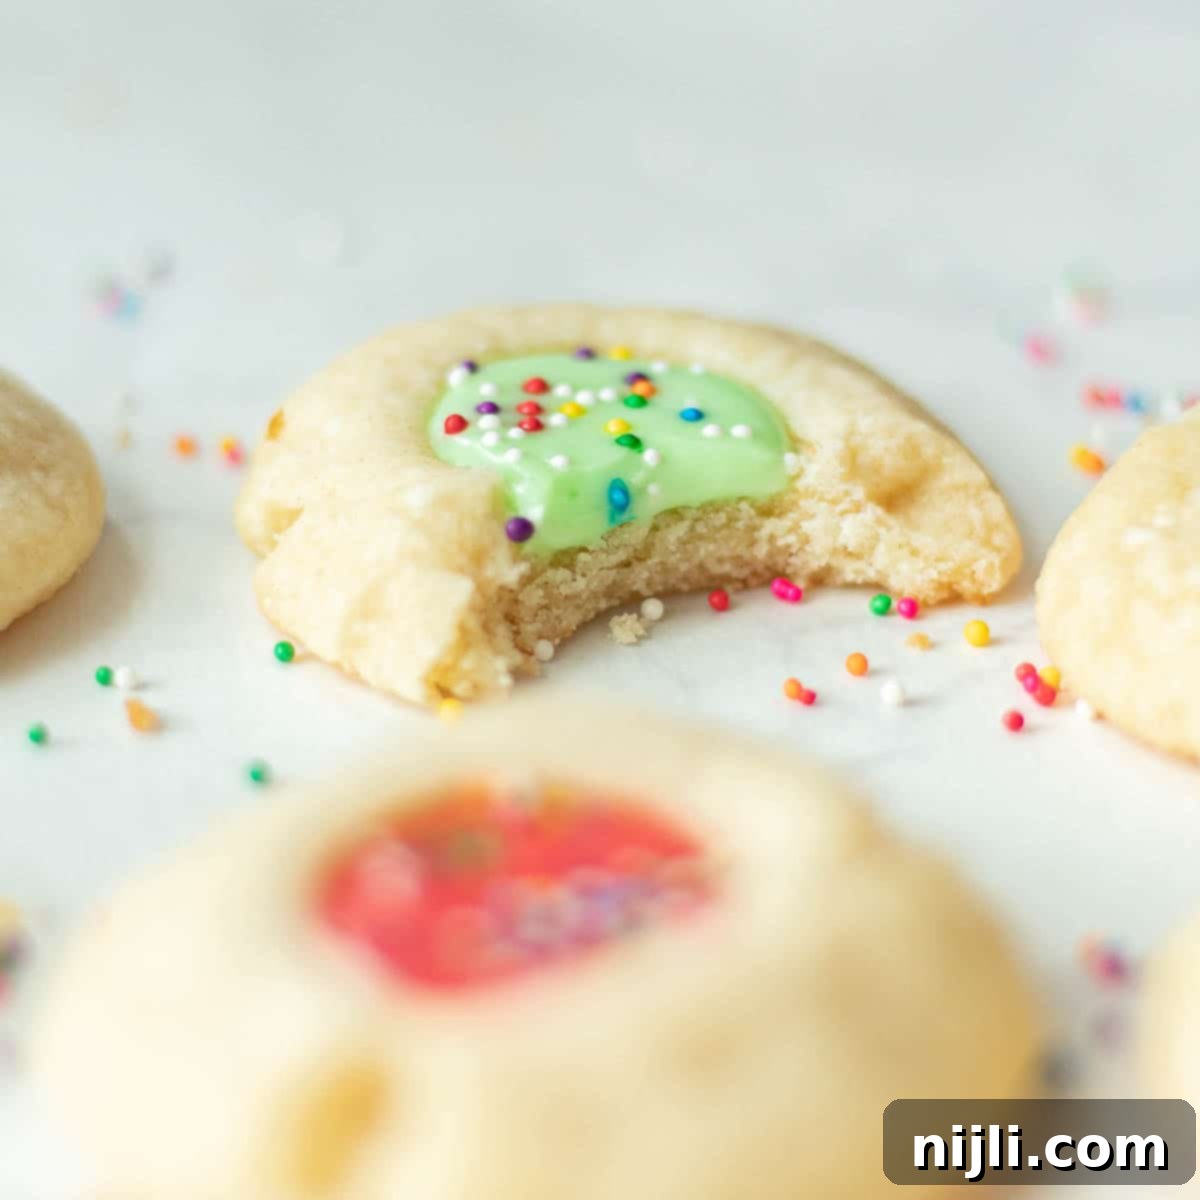
Once the cookies have cooled completely, it’s time for the final, most fun step! Carefully fill the indents in each thumbprint cookie with your prepared icing. You can use a piping bag for precision, or simply a small spoon for a more rustic, homemade look. Immediately after filling each cookie, generously top it with your chosen sprinkles or chopped nuts. This ensures the toppings adhere to the wet icing before it sets, creating a beautiful and delicious finish.
Hint: To make sure your sprinkles or other delicious toppings stick perfectly, add them to the center of each cookie immediately after you’ve filled your thumbprint cookies with icing. Don’t wait for the icing to set!
Delicious Variations: Buttercream and Chocolate Icing
While the simple powdered sugar glaze in this recipe is fantastic, these thumbprint cookies are incredibly versatile and welcome a variety of fillings. Don’t hesitate to experiment with different types of icing to create unique flavor profiles and textures.
Thumbprint Cookies with Creamy Buttercream Icing
For an extra touch of richness and a more substantial filling, consider making these thumbprint cookies with a luxurious buttercream icing. The creamy, velvety texture of buttercream complements the tender shortbread perfectly. You can use a classic vanilla buttercream, like the one found in my Mini Vanilla Cake recipe, for a universally loved flavor. For a brighter, zesty twist, a lemon buttercream frosting, similar to what I use in my Lavender Lemon Cupcakes, would be absolutely divine. Or, if you’re a fan of tangy and sweet combinations, a cream cheese buttercream, like the one from my Chocolate Spice Cake, would add a wonderful depth of flavor. Each option elevates these cookies into something truly extraordinary.
And if you’re looking for another fun variation on traditional cookies, be sure to try my Chocolate Filled Cookies for a delicious surprise in every bite!
Decadent Thumbprint Cookies with Chocolate Icing
For the chocolate lovers out there, transforming these into thumbprint cookies with chocolate icing is incredibly easy and adds a rich, indulgent twist. Simply follow the powdered sugar icing recipe provided below, but replace 3 tablespoons of the powdered sugar with unsweetened cocoa powder. This small adjustment will yield a beautiful, deeply flavored chocolate glaze that pairs wonderfully with the buttery shortbread. A sprinkle of sea salt on top of the chocolate icing can further enhance its depth, creating a sophisticated sweet and salty treat. These chocolate-filled beauties are sure to be a hit with everyone!
Storage and Freezing Tips for Thumbprint Cookies
These iced thumbprint cookies are wonderful for make-ahead baking and can be enjoyed for several days. Proper storage is key to keeping them fresh and delicious.
This recipe can be stored in an airtight container at room temperature for up to 3 days, or in the refrigerator for up to 1 week. For best results, place a piece of parchment paper between layers of cookies to prevent them from sticking together or the icing from smudging.
If you’re looking to extend their freshness even further, thumbprint cookies are excellent for freezing. They can be frozen, well-wrapped, for up to 3 months. To freeze, arrange fully cooled and iced cookies in a single layer on a baking sheet and freeze until solid. Once frozen, transfer them to an airtight freezer-safe container or bag, again using parchment paper between layers. Thaw them at room temperature for a few hours before serving.
You can also freeze the unbaked dough. Simply form the dough into balls, make the indents, and then freeze them on a baking sheet until solid. Transfer the frozen dough balls to a freezer-safe bag. When ready to bake, you can bake them directly from frozen, adding a few extra minutes to the baking time.
Common Questions & Troubleshooting for Thumbprint Cookies
Why Do My Thumbprint Cookies Spread or Go Flat?
Achieving perfectly shaped thumbprint cookies that hold their form can sometimes be tricky. If your cookies are spreading too much or going flat in the oven, keep these crucial tips in mind:
- Use Very Cold Butter: This is arguably the most important tip for shortbread-based cookies. Ensure your butter is cold and cut into cubes. Avoid handling the butter too much with your hands, as the warmth can melt it prematurely. Cold butter creates steam in the oven, resulting in a tender, flaky texture that holds its shape.
- Chill the Dough Thoroughly: After mixing, always chill your dough. Better yet, once you’ve formed the dough balls and pressed the indents, place your prepared cookie sheets in the freezer to chill for at least 15-20 minutes while your oven preheats. This additional chill time helps solidify the butter and prevents excessive spreading.
- Accurate Oven Temperature: An oven that isn’t at the correct temperature can cause major baking issues. Use an oven thermometer to verify your oven’s accuracy. If your oven runs hot or cold, adjust accordingly.
- Correct Oven Rack Placement: Always bake your cookies on the center rack of the oven. This ensures even heat distribution, helping the cookies bake consistently without one side cooking faster than the other.

Frequently Asked Questions
Absolutely! If you’re planning to bake your thumbprint cookies with icing and nuts (or any topping) the next day, refrigerating the dough overnight is an excellent strategy. This extended chill time deepens the flavors and helps the dough become firmer and easier to handle, which is especially beneficial for shortbread-style cookies. Just be sure to cover the container tightly to prevent the dough from drying out. If you find your cookie dough ends up too dry, don’t worry, check out my post on how to fix dry, crumbly cookie dough for helpful tips. For ultimate convenience, I recommend scooping the dough into balls and pressing the indents before refrigerating or freezing them overnight. This way, they’ll be ready to pop directly into the oven the next day with minimal effort.
Cracking can occur for a few reasons. Sometimes, the dough might be a little too cold or not quite pliable enough when you press the indents, causing small cracks to form. If you notice cracks appearing when you press the indentation, simply use your fingers to gently press the dough back together and repair them before baking. This will help ensure your baked cookies have a smooth, flawless appearance. Additionally, overmixing the dough can sometimes lead to a tougher, more prone-to-cracking texture, so always mix until just combined.
Now that you’ve mastered this classic Christmas cookie recipe, there’s a whole world of thumbprint variations to explore! If you’re a fan of tart and sweet desserts, you’ll adore my Lemon Curd Cookies, which feature a bright, tangy lemon curd filling. For a nostalgic and comforting treat reminiscent of your favorite sandwich, try my Peanut Butter and Jelly Thumbprint Cookies. And if you crave that irresistible salted caramel flavor, you’ll be absolutely smitten with my Salted Caramel Thumbprint Cookies with Cinnamon Sugar. Each of these recipes offers a unique spin on the beloved thumbprint cookie format, ensuring there’s a perfect cookie for every palate and occasion.

If you try this delightful recipe, I would absolutely love to hear from you! Please consider leaving a star review rating and a comment below to share your experience. Your feedback is incredibly wonderful to hear and helps me create more delicious content! And don’t forget to share your beautiful cookie creations with me by tagging @chenee_today on Instagram!
📖 Recipe

Thumbprint Cookies with Icing and Sprinkles (or Nuts)
Pin Recipe
Rate Recipe
Save RecipeSaved!
Equipment you may need
-
food processor
-
measuring cups and spoons
-
food scale
-
mixing bowls
-
parchment paper
-
¾ sheet baking pan
-
whisk
Ingredients
- 1 cup (120 g) powdered sugar – measured by weight or fluffed using the spoon-and-level method
- 1 cup (227 g) salted butter – cold, cubed
- ½ teaspoon (2 ml) pure vanilla extract
- ½ teaspoon almond extract
- 2 cup (250 g) all-purpose flour – measured by weight or fluffed using the spoon-and-level method
Thumbprint Cookie Filling
- 2 cups powdered sugar – measured by weight or fluffed using the spoon-and-level method
- ½ teaspoon pure vanilla extract
- 2-4 tablespoon milk – I use whole milk
- pinch salt
- 2-6 drops liquid food coloring
- sprinkles, nuts, etc. – for topping
Instructions
-
Combine powdered sugar and cold, cubed butter in the bowl of a food processor or stand mixer. Cream them together until well-combined and smooth, scraping down sides of bowl as needed. Add in extracts.1 cup powdered sugar, 1 cup salted butter, ½ teaspoon pure vanilla extract, ½ teaspoon almond extract
-
Gradually add in flour, processing until fully incorporated and dough is well mixed. Place dough in refrigerator, covered, to chill for an hour.2 cup all-purpose flour
-
Roll dough into smooth tablespoon-sized balls and place 2 inches apart on a parchment-lined baking sheet.
-
Use the back of a utensil, your thumb, a teaspoon measuring spoon or a wine cork to press a shallow indentation in the center of each dough ball (about halfway down).
-
Place baking sheet in freezer to chill for 15 minutes while you preheat the oven to 350°F and place the rack in the center of the oven.
-
Bake in preheated oven for 10-12 minutes, or until edges of cookies are slightly golden brown. Let cool for 15 minutes on the baking sheet, then gently transfer to a wire rack to cool completely.
Thumbprint Cookie Filling
-
While cookies are cooling, whisk together powdered sugar, vanilla, and 2 tbsps of milk.2 cups powdered sugar, ½ teaspoon pure vanilla extract
-
Add up to 2 more tablespoons of milk as needed, a little at a time, until desired consistency is reached.2-4 tablespoon milk
-
Add a pinch of salt to taste. Divide into smaller bowls and add drops of food coloring until desired colors are reached.pinch salt, 2-6 drops liquid food coloring
-
Immediately top with sprinkles or nuts, let icing set, and serve!sprinkles, nuts, etc.
Video
Nutrition
Nutrition Disclaimer

