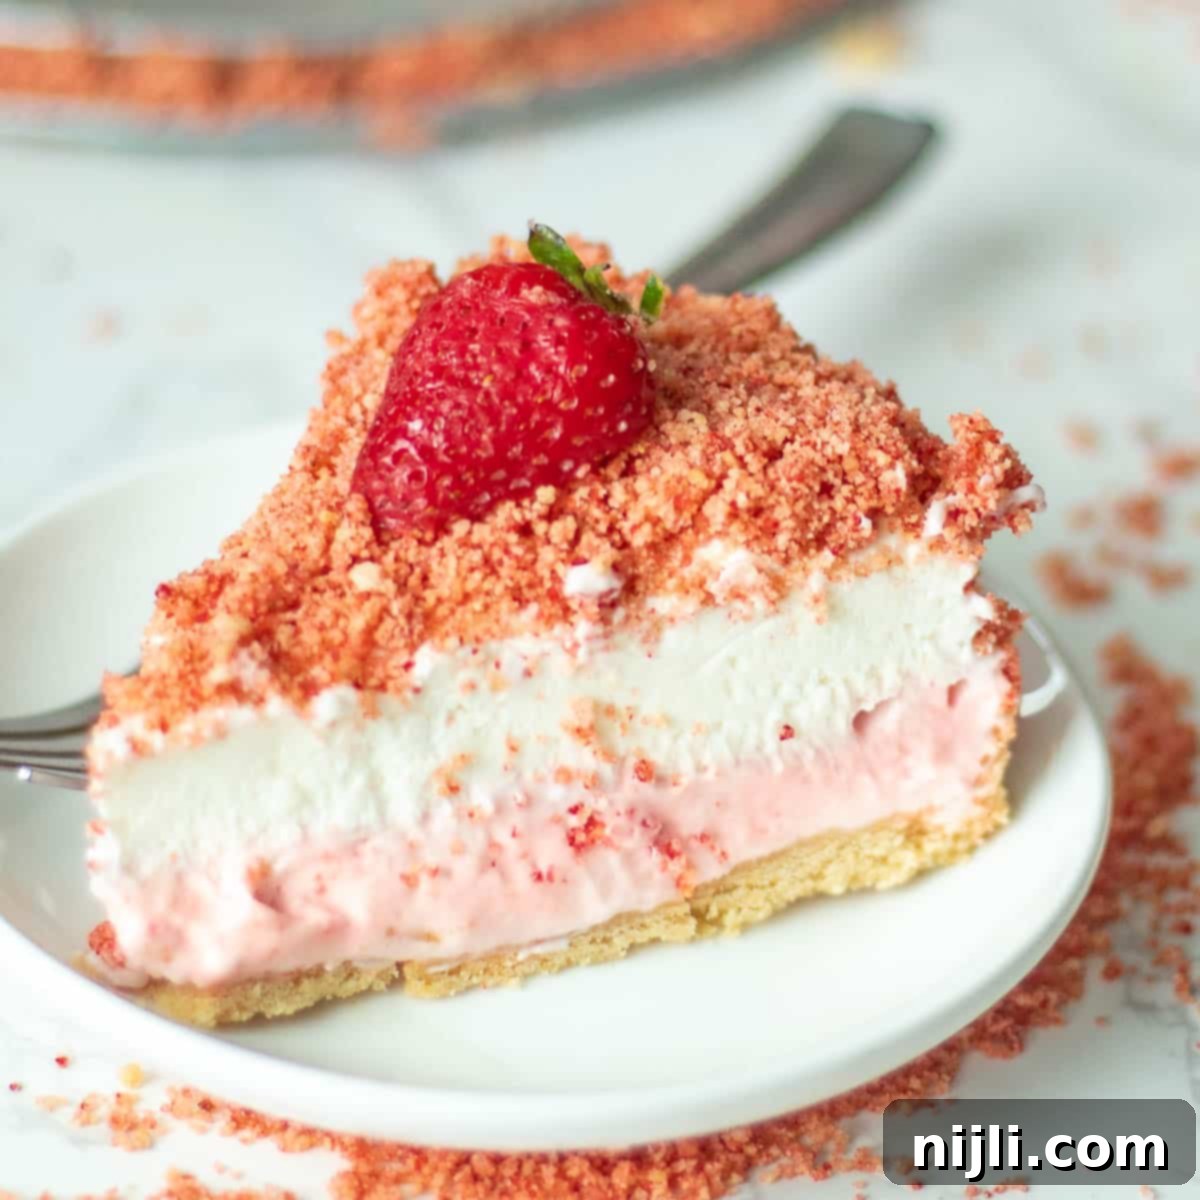
Irresistible No-Bake Strawberry Crunch Cheesecake: Your Ultimate Easy Dessert Recipe
Dive into the delightful world of homemade desserts with this incredibly easy, no-bake strawberry crunch cheesecake! This recipe isn’t just a dessert; it’s an experience, bringing together a luscious creamy texture with an unforgettable crispy, sweet strawberry crunch. Perfect for any gathering, a summer treat, or simply to satisfy your sweet tooth, this versatile recipe can be transformed into elegant strawberry crunch cheesecake cones, charming individual jars, or convenient cheesecake bites. Get ready to impress with minimal effort and maximum flavor!
*This post contains affiliate links — as an Amazon Associate I earn from qualifying purchases. Please see my disclosure for details*.
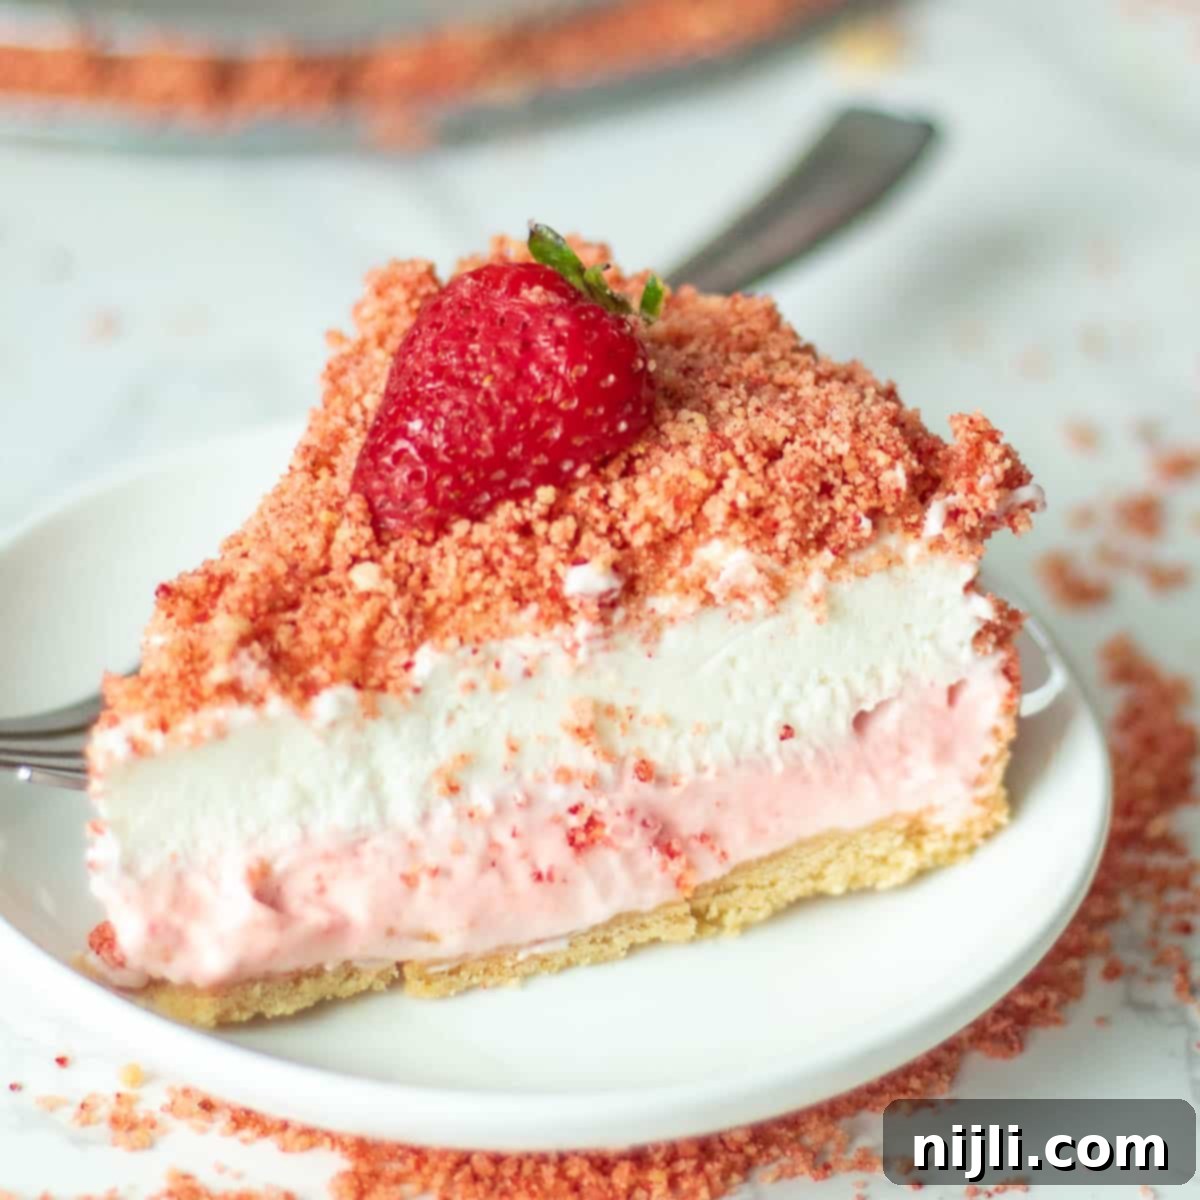
This exquisite dessert is crowned with my signature strawberry crunch topping, making every bite a symphony of textures and flavors. If you adore creamy, fruity treats, you’ll also love exploring my No-Bake Oreo Cheesecake for chocolate lovers or my rich Biscoff Cheesecake for a spiced caramel delight!
Strawberry Crunch Cheesecake – An Effortless No-Bake Delight
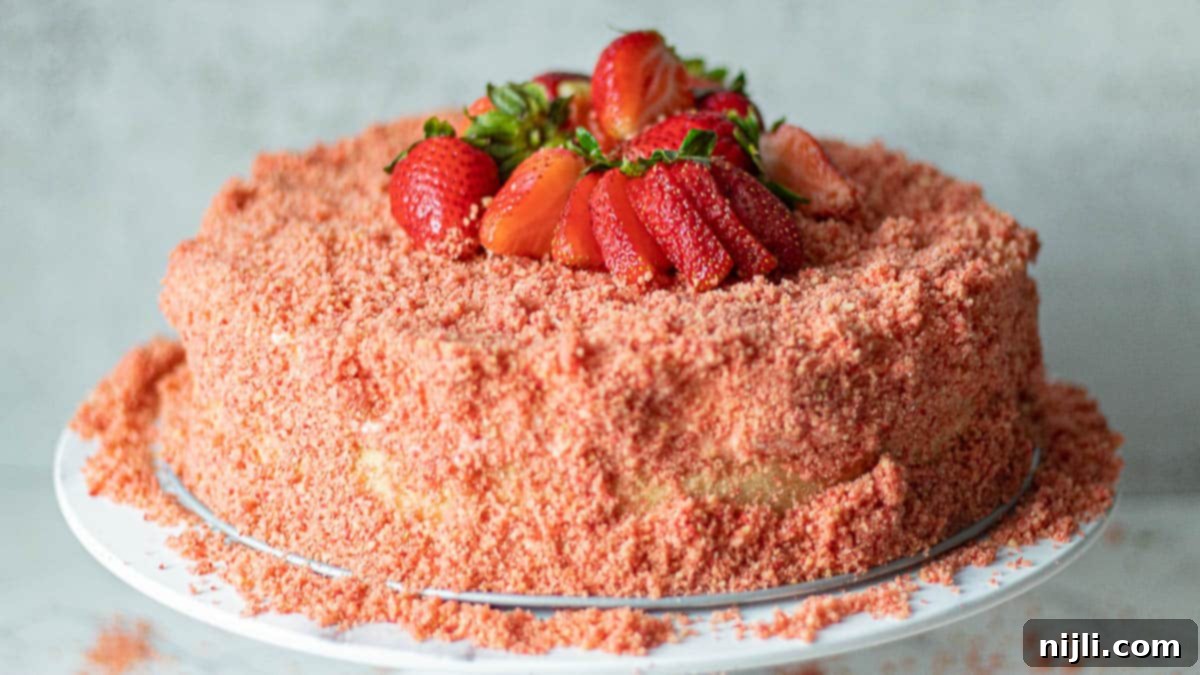
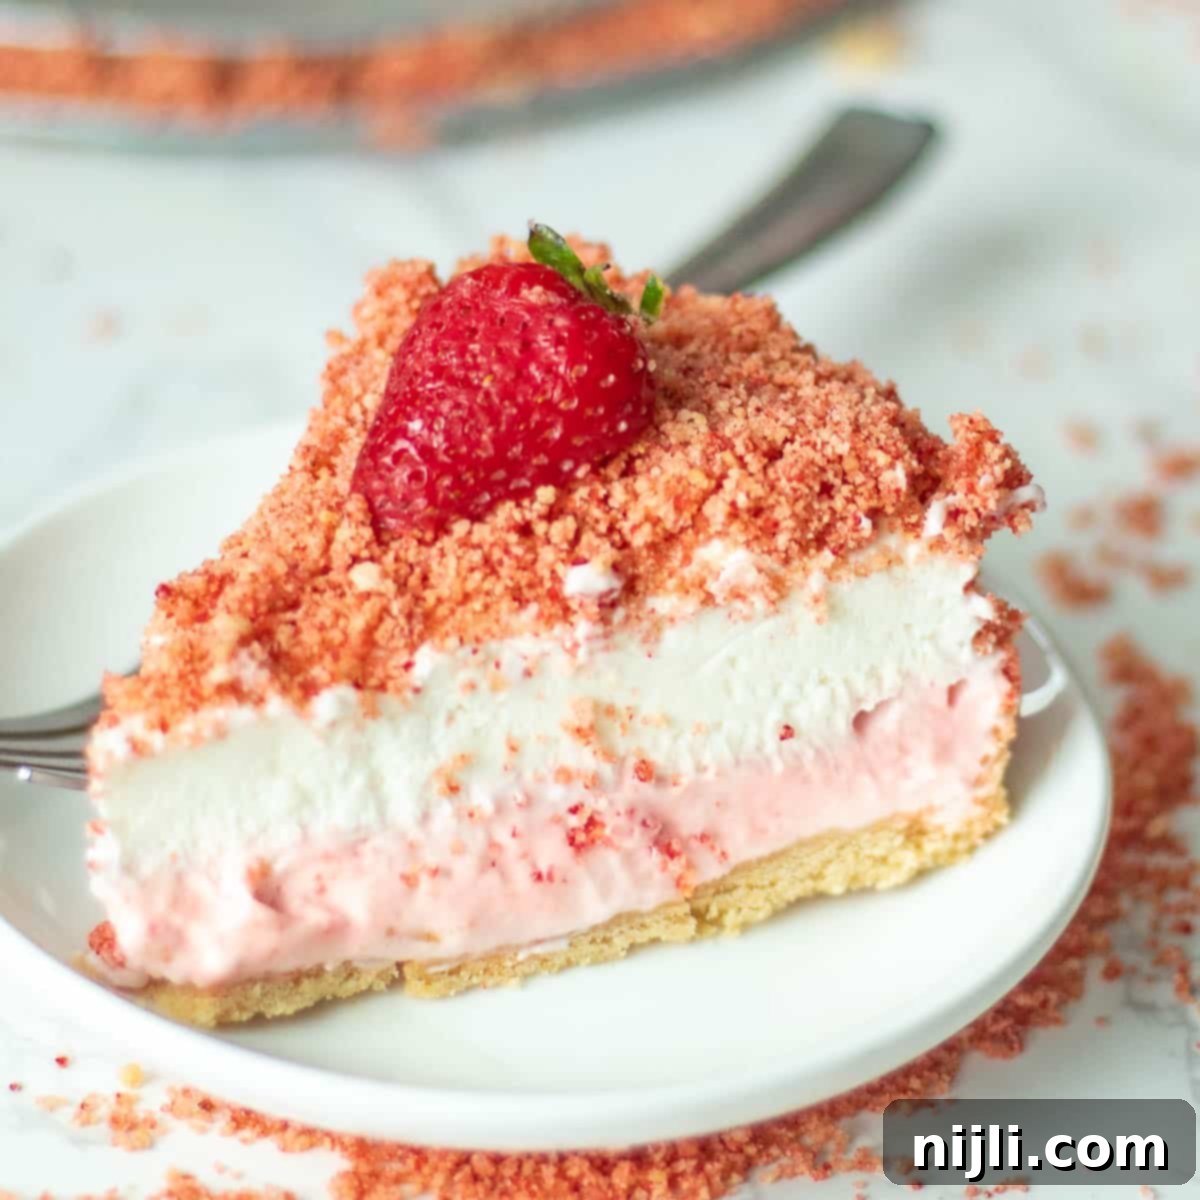
If you’re already a fan of my delightful Strawberry Shortcake Crumble, prepare to fall in love with its cheesecake cousin! This magnificent no-bake strawberry crunch cheesecake begins with a buttery, sweet crust made from crushed Golden Oreos, forming a perfect foundation. On top of this, we layer a light and airy strawberry cheesecake filling, infused with the fresh, vibrant taste of real strawberries. What truly sets this dessert apart is the generous sprinkle of homemade strawberry crunch topping, creating an irresistible outer layer that adds both flavor and texture. For another fantastic variation featuring this beloved crumble, be sure to check out my Strawberry Crunch Cupcakes!
Creating this cheesecake is surprisingly simple, yet the results are incredibly impressive. The “no-bake” aspect means you don’t have to worry about water baths or cracking, making it a stress-free option for both novice and experienced bakers alike. The chilling time allows the flavors to meld beautifully and the cheesecake to set into a firm, sliceable treat that’s ready to wow. It’s truly the perfect dessert for any occasion, from casual family dinners to elegant celebrations.
[feast_advanced_jump_to]
Essential Ingredients for Your Strawberry Crunch Cheesecake
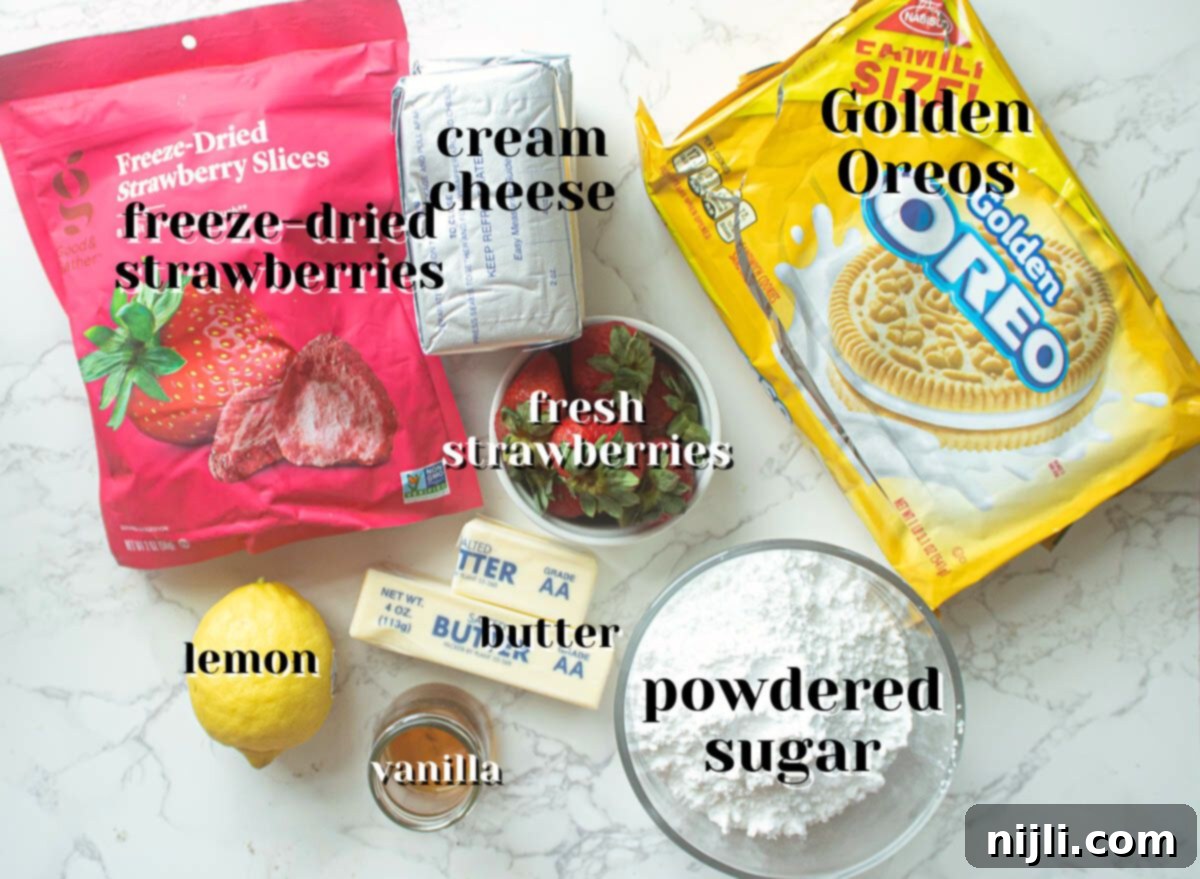
Crafting this incredible strawberry crunch cheesecake requires a few key ingredients, each playing a vital role in achieving that perfect balance of creamy, crunchy, and fruity goodness. Here’s what you’ll need, along with some helpful tips:
- Golden Oreos: These vanilla-flavored sandwich cookies form the base of our irresistible crust. Their mild sweetness and crunchy texture perfectly complement the strawberry and cream cheese. You’ll need to crush them finely; a food processor makes quick work of this, or you can place them in a Ziploc bag and crush them with a rolling pin until they resemble coarse crumbs. For a slight flavor variation, classic graham crackers or even vanilla wafers can also be used.
- Salted Butter: Melted butter acts as the binding agent for both the Golden Oreo crust and the strawberry crunch topping. The touch of salt in salted butter helps to balance the sweetness of the dessert, enhancing the overall flavor profile. If you only have unsalted butter, simply add a tiny pinch of salt to your crust and crumble mixtures.
- Cream Cheese: The heart of any cheesecake! For the smoothest, creamiest filling, it’s crucial that your cream cheese is softened to room temperature. I recommend taking it out of the fridge at least an hour before you plan to start baking. Full-fat cream cheese works best for a rich, luxurious texture.
- Powdered Sugar: Also known as confectioners’ sugar, this fine sugar is essential for achieving a silky-smooth, lump-free cheesecake filling. Unlike granulated sugar, powdered sugar dissolves instantly, ensuring that light and fluffy texture we’re aiming for in this easy strawberry crunch cheesecake.
- Heavy Whipping Cream: Whipped to stiff peaks, this cream provides the delicate, airy structure that makes our no-bake cheesecake so irresistibly light. It’s what gives the filling its signature melt-in-your-mouth quality, rather than a dense, heavy texture.
- Lemon Juice: A splash of fresh lemon juice is a secret weapon in this recipe! It cuts through the sweetness and richness of the cream cheese, adding a subtle, refreshing tangy flavor that brightens the entire cheesecake. If you’re a true lemon enthusiast, don’t miss my vibrant Lemon Bars with Graham Cracker Crust!
- Vanilla Extract: Always opt for the highest quality vanilla you can find – pure vanilla extract makes a noticeable difference. Its warm, aromatic notes enhance all the other flavors in the cheesecake. Did you know you can even make your own?
- Fresh Strawberries: These are crucial for imparting that authentic, sweet strawberry flavor and beautiful pink hue to our cheesecake filling. Choose ripe, vibrant red berries for the best taste. For those who adore berry desserts, you absolutely must try my Strawberry Blueberry Pie or my decadent Chocolate Blueberry Cake! If baking with berries is your passion, my Blackberry Coffee Cake is another must-try.
- Strawberry Crunch Topping: This is the star of the show! You’ll need to prepare one batch of my super easy 3-ingredient strawberry crunch topping. This magical crumble is made from additional Golden Oreo cookies, vibrant freeze-dried strawberries (which give it that intense strawberry flavor and beautiful color), and more melted salted butter. It’s the perfect crunchy contrast to the smooth cheesecake.
Recommended Equipment for a Perfect No-Bake Cheesecake
Having the right tools can make all the difference in preparing this delightful no-bake strawberry crunch cheesecake with ease and precision. While some steps can be done by hand, a few pieces of equipment will streamline the process significantly:
- 9-inch Springform Pan: This is an absolute must-have for any cheesecake recipe, especially a no-bake one. A springform pan features sides that can be removed from the base, allowing for a pristine, intact cheesecake presentation without any awkward flipping or struggling. I highly recommend this one from Nordic Ware for its quality and reliability.
- Plastic Wrap: Essential for covering your cheesecake while it chills. This prevents it from absorbing any unwanted odors from the fridge or freezer and keeps the surface from drying out.
- Parchment Paper: Lining the bottom of your springform pan with parchment paper before adding the crust ensures effortless removal and prevents sticking, guaranteeing a beautiful, clean base.
- Food Processor: This is your best friend for quickly and efficiently crushing the Golden Oreos for both the crust and the strawberry crunch topping. It creates uniform crumbs, which is key for consistency. If you don’t have one, crushing cookies in a sturdy Ziploc bag with a rolling pin works too!
- Electric Mixer (Hand or Stand Mixer): Crucial for blending the cream cheese mixture until smooth and whipping the heavy cream to stiff peaks. A hand mixer is perfectly adequate, but a stand mixer can make the process even more hands-off.
- Blender: For puréeing the fresh strawberries into a smooth liquid, a regular blender or even an immersion blender will work perfectly.
- Large Mixing Bowls: You’ll need a few good-sized bowls for preparing the crust, the cream cheese mixture, and whipping the cream separately.
- Rubber Spatula: Indispensable for scraping down the sides of bowls, gently folding ingredients, and smoothing the cheesecake layers.
Step-by-Step Guide to Making Your Strawberry Crunch Cheesecake
Creating this stunning no-bake strawberry crunch cheesecake is a straightforward and rewarding process. While the full, detailed instructions are provided in the recipe card below, here’s an overview of the key steps to guide you:
- The very first step is to prepare your delightful cookie crust. Begin by finely crushing your Golden Oreo cookies. A food processor is ideal for achieving uniform crumbs, but you can also use a sturdy Ziploc bag and a rolling pin for a more rustic approach. Once crushed, combine these crumbs with melted butter and pulse or mix until the mixture is well saturated and just comes together. Press this mixture firmly and evenly into the bottom and slightly up the sides of your prepared springform pan. Place it in the freezer to chill while you work on the filling.
- Next, prepare your fresh strawberries. Wash and hull them, then purée them in a blender until completely smooth. Transfer the strawberry purée to an airtight container and refrigerate it. Chilling the purée will help it incorporate better into the cheesecake mixture without thinning it too much.
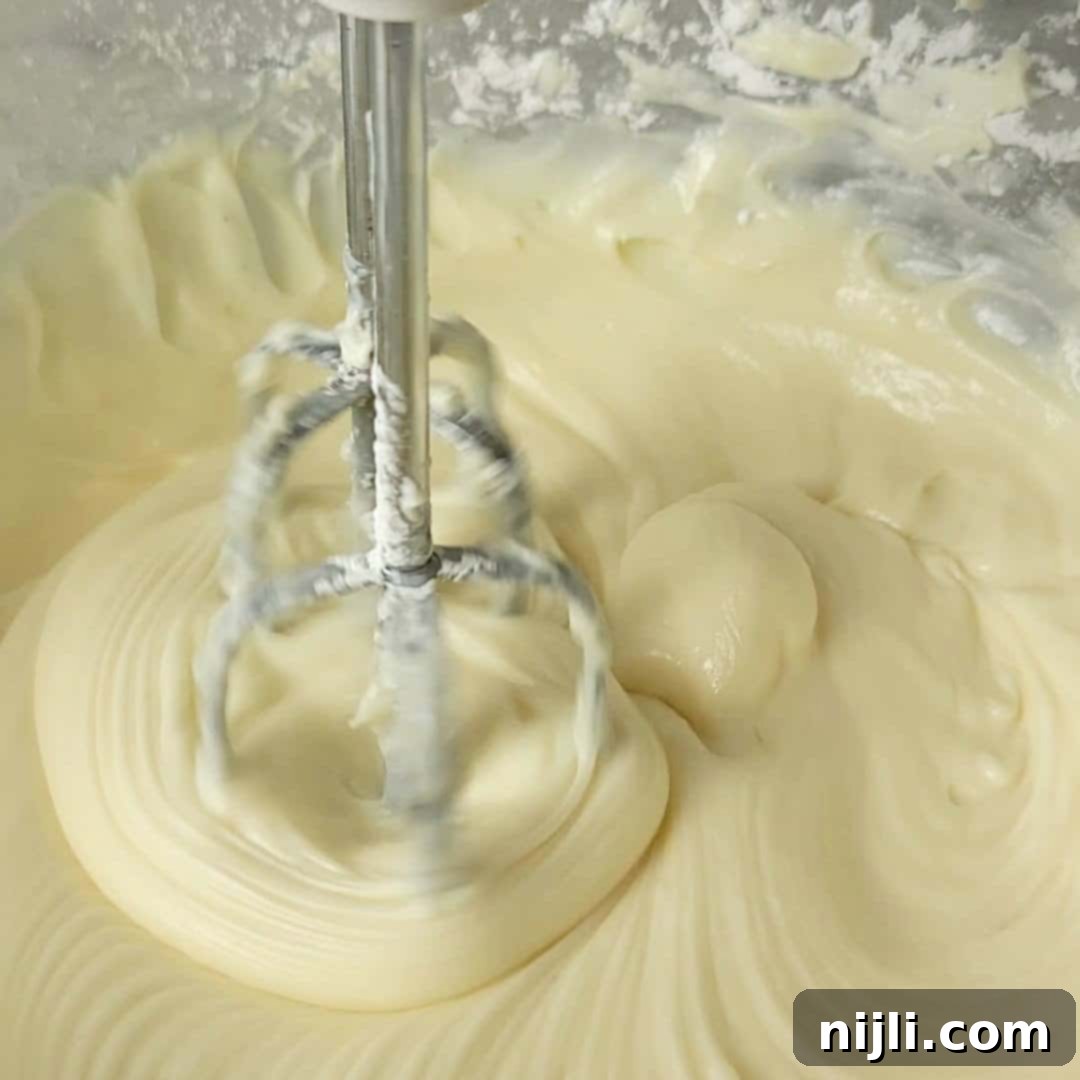
3. In a large bowl, combine your softened cream cheese, powdered sugar, vanilla extract, and fresh lemon juice. Using an electric mixer, beat these ingredients together until the mixture is completely smooth and creamy. Be sure to scrape down the sides of the bowl periodically to ensure everything is thoroughly incorporated.
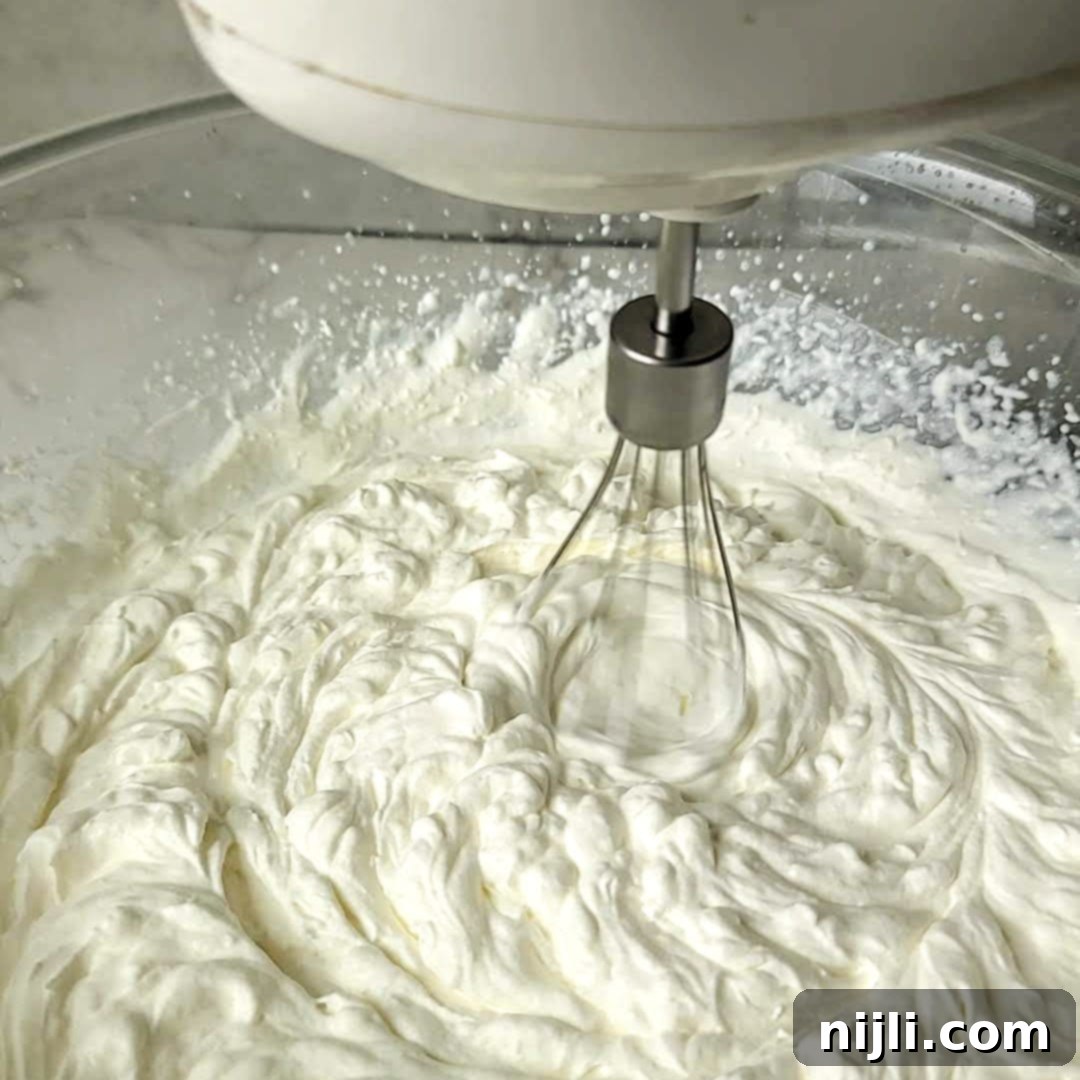
4. In a separate, chilled bowl, use the whisk attachment of your hand mixer or stand mixer to whip the heavy cream until stiff peaks form. This means when you lift the beater out of the bowl and turn it upright, the whipped cream should stand straight up without drooping. Be careful not to over-whip, as it can turn granular.
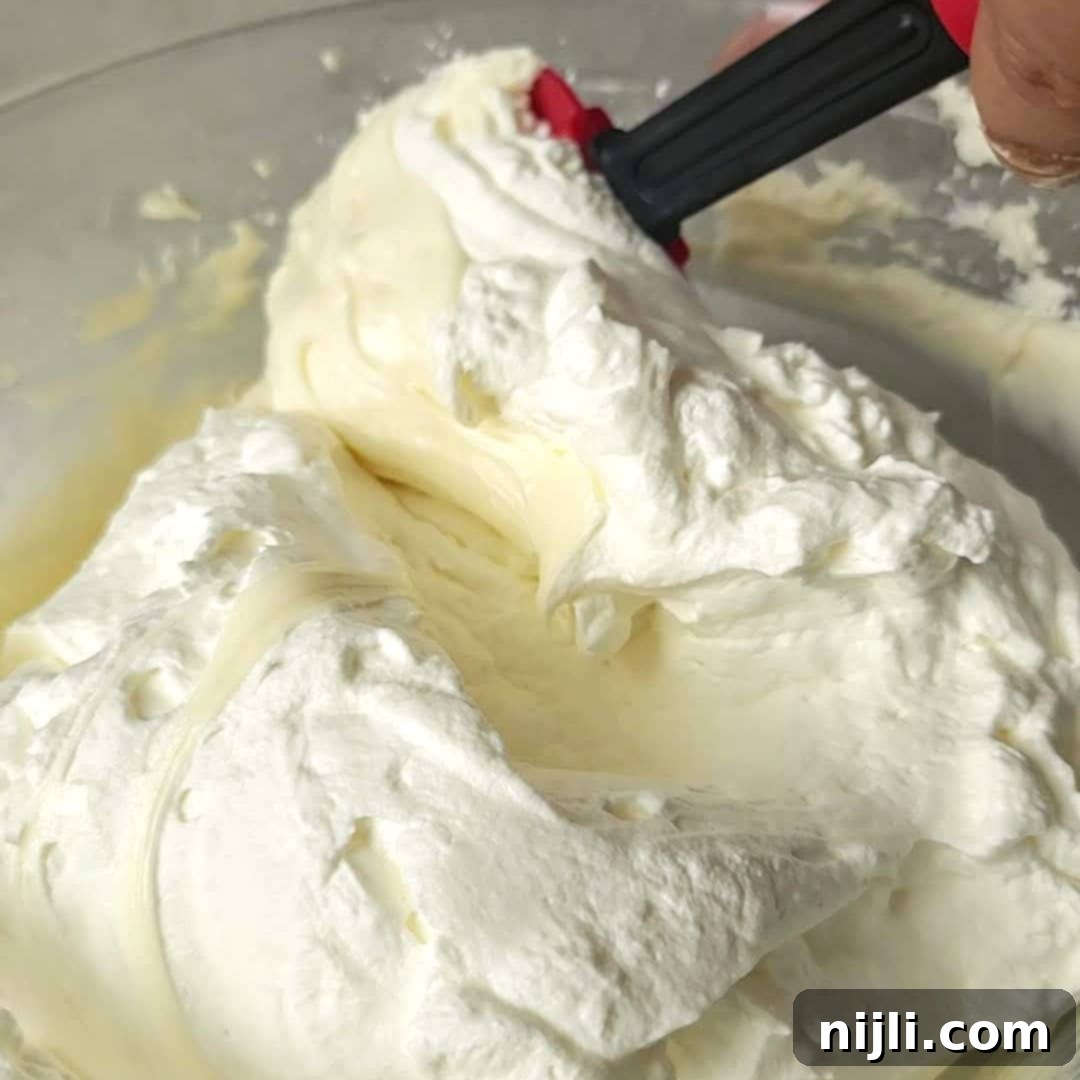
5. Carefully and gently fold your whipped cream into the cream cheese mixture. This step is crucial for maintaining the airy texture of the cheesecake, so use a light hand and fold in sections until just combined. You’ll want to ensure none of the delicate whipped cream deflates while you’re combining them.
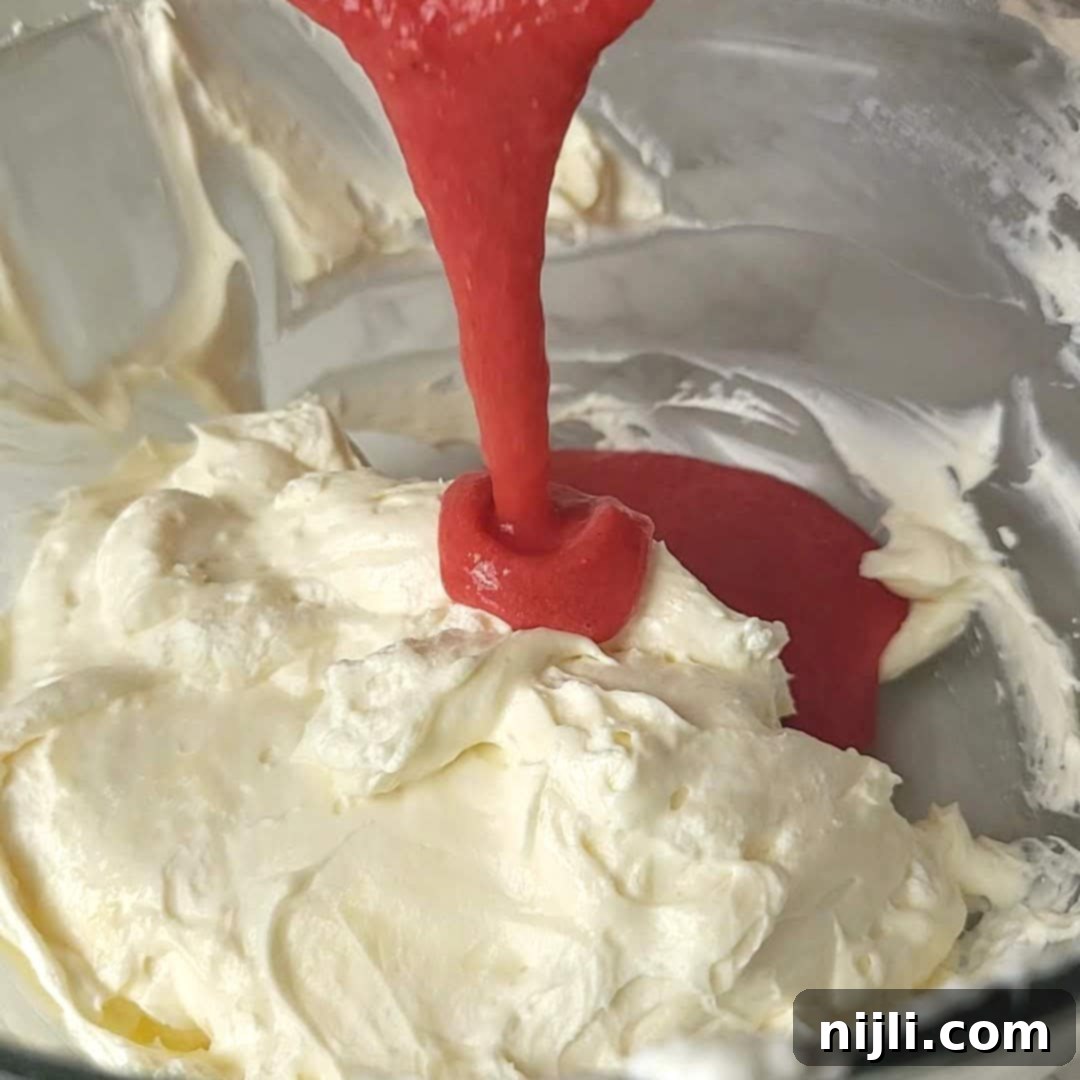
6. Divide the combined cream cheese and whipped cream mixture into two separate bowls. Into one bowl, gently fold in the chilled strawberry purée until a uniform pink, strawberry-flavored cheesecake mixture is achieved. The other bowl will remain as your classic vanilla cheesecake layer.
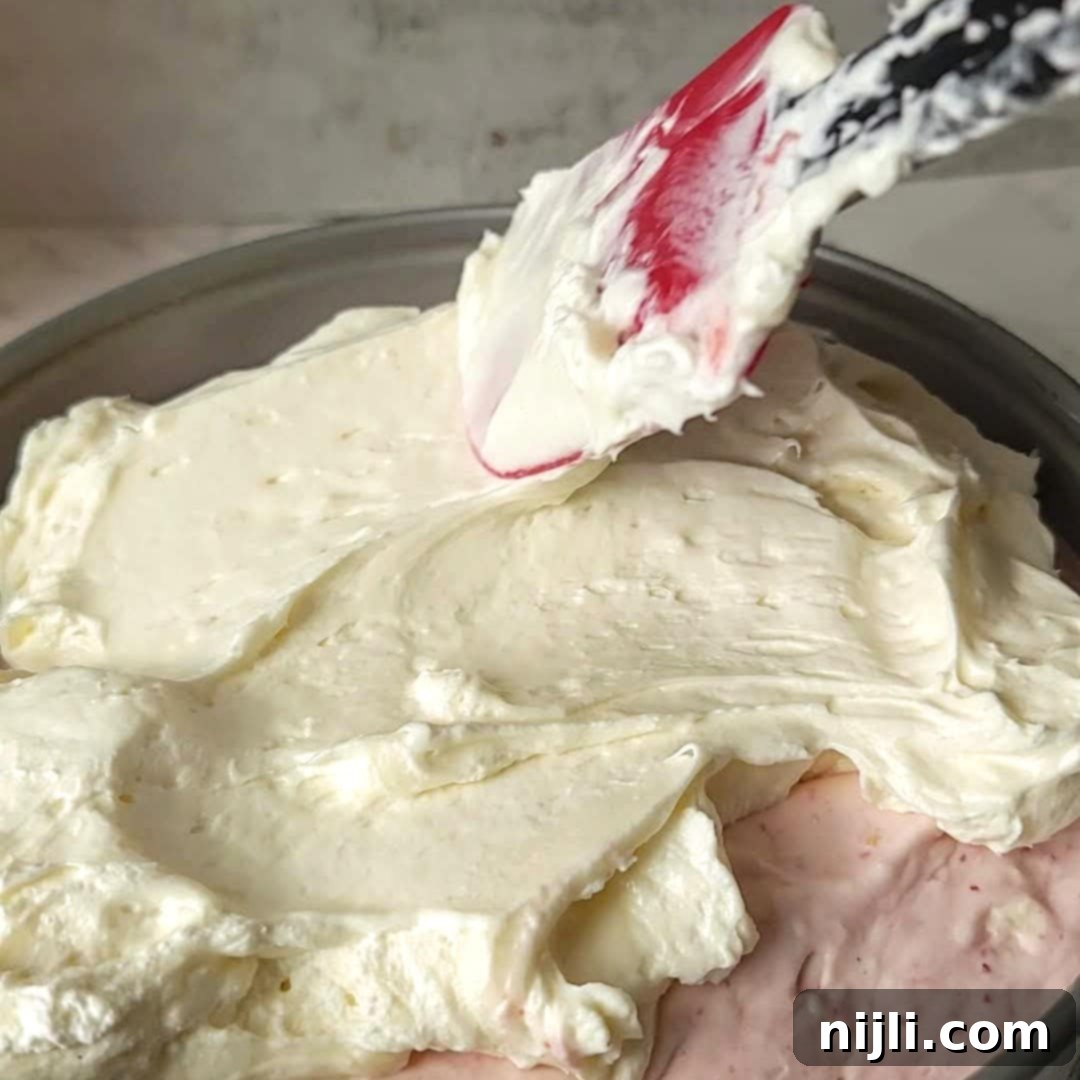
7. Now it’s time to beautifully layer your cheesecake! You can start with either the strawberry cheesecake layer or the vanilla layer; the choice is yours. Gently spoon in one layer, carefully smooth it out with an offset spatula, then add the second layer and smooth its surface. Once both layers are in, tightly cover the cheesecake with plastic wrap and transfer it to the freezer. It needs to chill for at least 4 hours, or ideally overnight, for the best results and to ensure it sets perfectly firm.
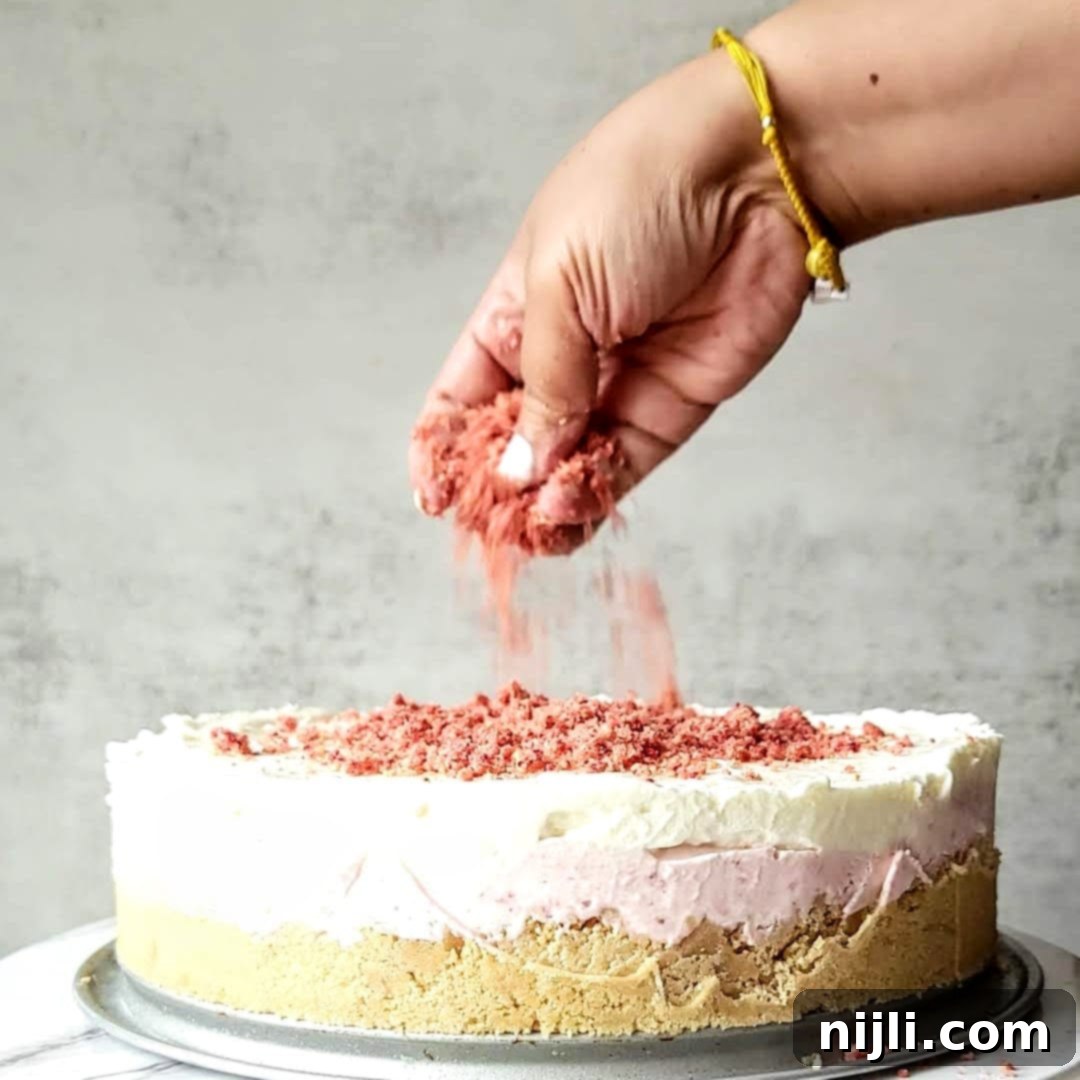
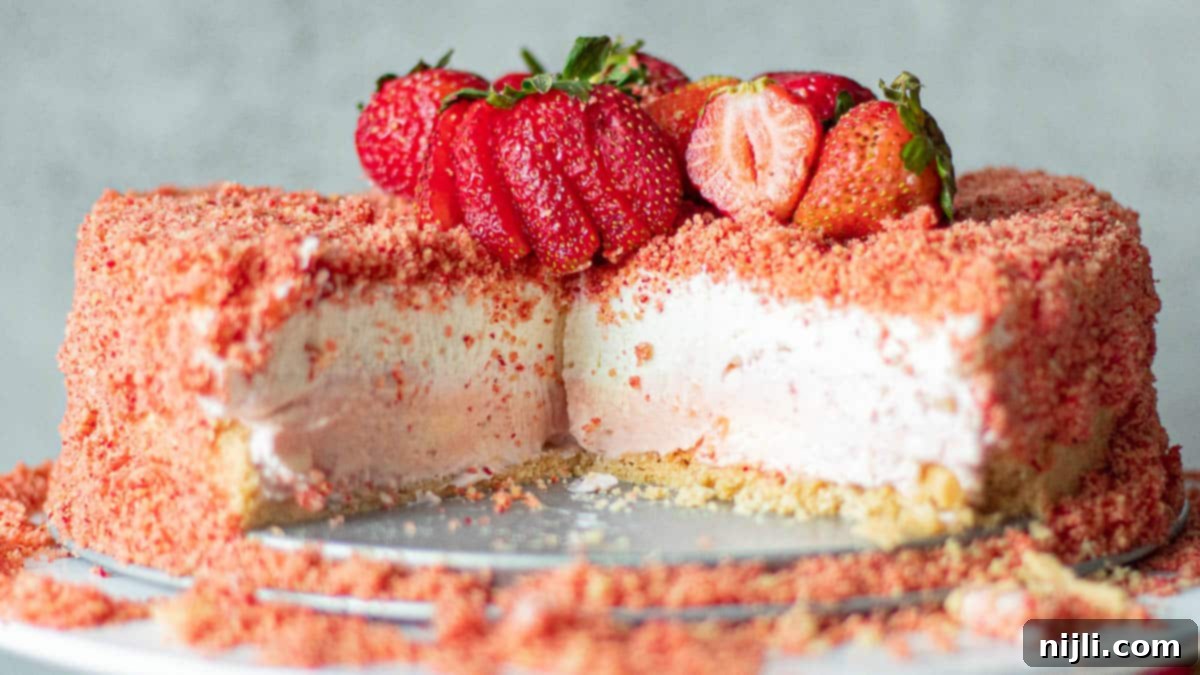
8. This is arguably the most exciting part: adorning your cheesecake with the star attraction – our crunchy strawberry shortcake crumbles! Once your cheesecake is fully set, carefully remove it from the springform pan. Then, generously sprinkle the vibrant topping all over the top surface and gently press some onto the sides for a complete coating. Be mindful of any stray crumbs, but don’t worry too much, as a little mess is part of the fun!
After applying the delightful crunch topping, you can serve your no-bake strawberry crunch cheesecake immediately for a slightly softer texture, or return it to the fridge or freezer until it’s perfectly chilled and firm, ready to be enjoyed! This dessert is truly a crowd-pleaser and a feast for both the eyes and the palate.
Creative Variations: Strawberry Crunch Cheesecake Cones
Unleash your creativity and transform this classic no-bake cheesecake into exciting new formats! One of the most beloved twists is creating individual strawberry crunch cheesecake cones, a playful nod to the nostalgic Strawberry Shortcake ice cream bars. This variation is fantastic for parties or for a fun, hand-held treat that’s less messy than a traditional slice.
To make these delightful cones, simply layer your creamy strawberry cheesecake filling (you can even swirl both vanilla and strawberry layers for extra visual appeal) into crisp sugar cones. For an added burst of freshness and texture, you can intersperse small pieces of fresh strawberries between the layers of filling. Once the cones are filled, crown them with a generous dollop of whipped cream and, of course, a sprinkle of that irresistible strawberry crunch topping. They’re visually appealing, easy to serve, and absolutely delicious!
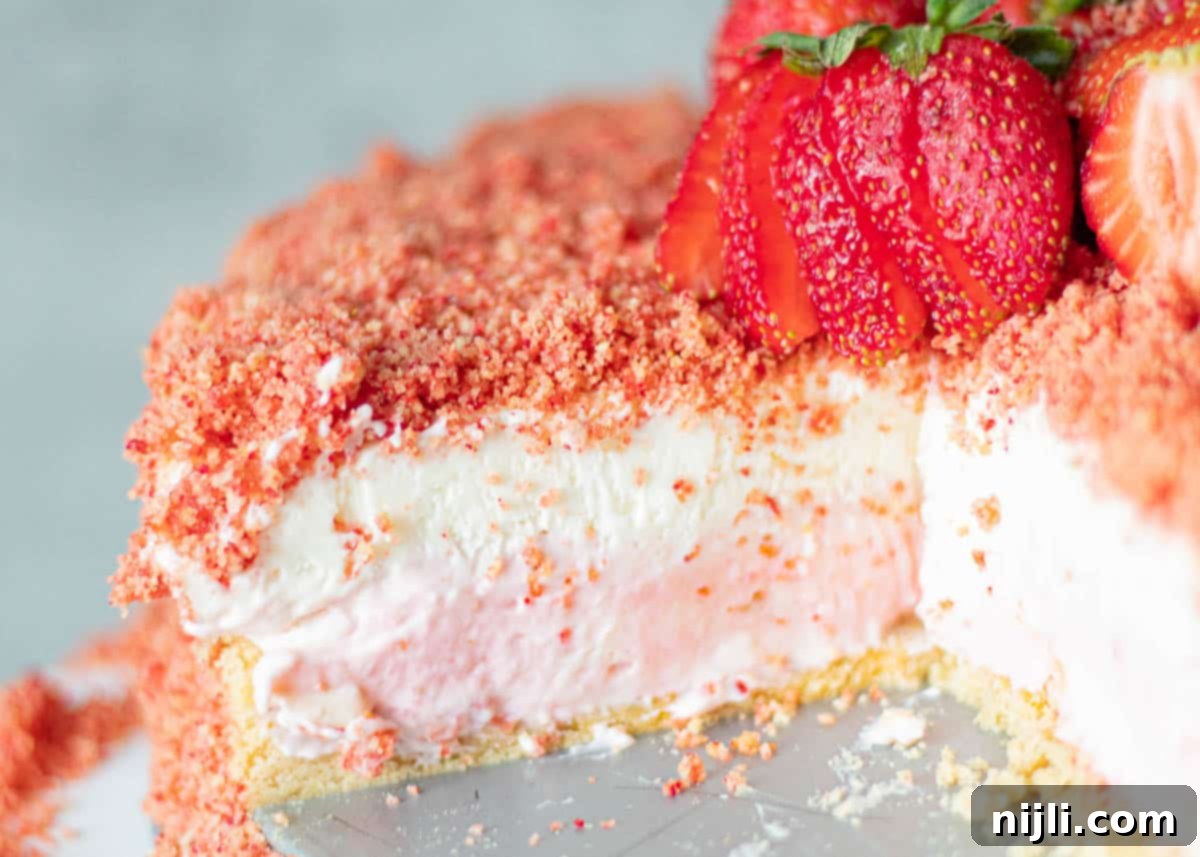
More Delightful Strawberry Crunch Cheesecake Serving Ideas & Variations
Beyond the classic whole cheesecake and fun cones, there are many ways to enjoy the irresistible flavors of this strawberry crunch cheesecake. Its adaptability makes it perfect for various occasions and preferences:
- Strawberry Crunch Cheesecake Bites: For elegant individual servings or easy portion control, consider making mini cheesecake bites. Simply press your Golden Oreo crumble crust into the bottom of a cupcake pan lined with silicone cupcake liners (or paper liners for easier removal). Spoon in your cheesecake filling, chill, and then top with the strawberry crunch. These miniature delights are perfect for dessert platters, parties, or just a quick sweet treat.
- Grab-and-Go Strawberry Crunch Cheesecake Jars: Create charming, portable desserts by layering your Golden Oreo crumbles and cheesecake fillings in individual 8-ounce mason jars. These beautiful jars are not only convenient for picnics or packed lunches but also make lovely edible gifts. You can alternate layers of the vanilla and strawberry filling for an appealing striped effect, then top with the crunch and a fresh strawberry slice.
- Speedy Store-Bought Crust Option: If you’re really short on time but still crave this amazing dessert, you can easily pour the cream cheese filling into a pre-made 10-inch graham cracker pie crust. This significantly cuts down on prep time without sacrificing much flavor, making it an excellent shortcut for last-minute cravings.
- Berry Flavor Twists: Don’t be afraid to experiment with other fruits! You can add a delightful twist to this recipe by incorporating fresh and freeze-dried blueberries or raspberries into your purée and crunch topping. This creates a whole new flavor profile while maintaining the beloved crunchy and creamy elements. Imagine a “Berry Crunch Cheesecake” with layers of blueberry and vanilla, or a tart raspberry crunch version. Just swap out the strawberries for your berry of choice, ensuring you have the corresponding freeze-dried fruit for the topping.
Enjoy this delightful strawberry cheesecake recipe on its own, or pair it with a refreshing Strawberry Gin Smash for an adult treat! And if you appreciate easy-to-serve individual desserts, be sure to check out my Cheesecake Mousse Cups – they’re perfect for entertaining guests with elegance and ease!
Proper Storage for Your Strawberry Crunch Cheesecake
To ensure your delicious strawberry crunch cheesecake stays fresh and enjoyable for as long as possible, proper storage is key. This no-bake dessert freezes exceptionally well, making it a fantastic make-ahead option!
Store any leftover strawberry crunch cheesecake in an airtight container in the freezer for up to 2 months. When you’re ready to indulge, you can serve it straight from the freezer for a firm, ice-cream-like consistency, or allow it to thaw at room temperature for about 10-15 minutes before slicing. This brief thawing period will make cutting easier and restore some of its creamy texture. For shorter-term storage, the cheesecake will remain fresh in an airtight container in the refrigerator for 3-4 days.
Top Tip for a Perfectly Set Cheesecake
The secret to a truly firm and sliceable no-bake cheesecake lies in giving it ample time to chill. Because there’s no baking involved to set the cream cheese, the freezer does all the heavy lifting. If you take it out too early, the filling will be very soft and difficult to cut neatly. For the absolute best results, I highly recommend letting this strawberry crunch cheesecake set in the freezer overnight. This extended chilling time guarantees a perfectly firm, creamy, and delightful slice every single time, making it worth the wait!
📖 Recipe
Strawberry Crunch Cheesecake – No Bake Recipe
Pin Recipe
Rate Recipe
Save Recipe
Saved!
25 minutes
4 hours
30 minutes
Dessert, Snack
American
18
slices
471
kcal
Chenée Lewis
Equipment you may need
-
measuring cups and spoons
-
mixing bowls
-
whisk
-
rubber spatula
-
hand mixer
-
food scale
-
stand mixer
-
food processor
-
9-inch springform pan
Ingredients
-
24
Golden Oreo cookies -
4 tablespoon
(59 ml)
salted butter – melted -
24 ounces
(680 g)
cream cheese – 3 packages, room temp -
2 cup
(240 g)
powdered sugar -
2 teaspoon
(10 ml)
lemon juice -
1 cup
(144 g)
fresh strawberries – puréed in a blender or food processor -
2 teaspoon
(10 ml)
vanilla extract -
1 ½ cup
(355 ml)
heavy whipping cream -
1 batch
strawberry shortcake crumble
9
inch
0
x
0
inch
round
,
3
inch
height
Prevent your screen from going dark
Instructions
-
To prepare the crust, begin by crushing the Golden Oreos thoroughly. This can be done efficiently in a food processor until fine crumbs are formed, or by placing them in a sturdy Ziploc bag and crushing them with a rolling pin.
-
Once crushed, add the melted salted butter to the cookie crumbs. Mix or pulse until the crumbs are well saturated with butter and hold together when pressed.
-
Lightly spray a 9-inch springform pan with cooking spray, then press the crust mixture evenly into the bottom and approximately one inch up the sides of the pan. Ensure it’s packed firmly. Place the pan in the freezer to chill and set while you prepare the cheesecake filling.
-
To make the filling, in a large mixing bowl, combine the softened cream cheese, vanilla extract, fresh lemon juice, and powdered sugar. Using an electric mixer, beat these ingredients together until the mixture is completely smooth and free of lumps, scraping the sides of the bowl as needed to ensure everything is incorporated.
-
In a separate, chilled bowl, beat the heavy whipping cream with the whisk attachment of a hand mixer or stand mixer until stiff peaks form. The cream should hold its shape firmly when the whisk is lifted. Gently fold this whipped cream into the cream cheese mixture using a rubber spatula, taking great care not to deflate the whipped cream and preserving the light, airy texture.
-
Divide the cheesecake mixture evenly into two separate bowls. One bowl will remain the classic vanilla base, and the other will become our strawberry layer.
-
To the first half of the cheesecake mixture, add the chilled puréed strawberries. Gently fold them in until the mixture is uniformly pink and well combined.
-
Retrieve the springform pan from the freezer. Pour the strawberry half of the cheesecake filling into the cookie crust and gently smooth the top with a spatula. Then, carefully layer the remaining vanilla half of the cheesecake filling on top and smooth its surface.
-
Cover the cheesecake tightly with plastic wrap to prevent freezer burn and place it back into the freezer. Allow it to chill for at least 4-5 hours, or ideally overnight, to ensure it sets completely firm. This is a crucial step for achieving the perfect no-bake texture.
-
Once thoroughly chilled, remove the cheesecake from the freezer and carefully detach it from the springform pan. Now for the grand finale: generously coat both the top and sides of the cheesecake with the prepared strawberry crumb topping. Return the cheesecake to the freezer until you are ready to serve. If needed, allow it to thaw at room temperature for 10-15 minutes before slicing to make cutting easier and achieve a creamier consistency.
Last Step!
Click here to leave a review and a star rating! It helps spread the word and allows me to keep sharing free recipes! 🥰
Video
Nutrition
Serving:
1
slice
|
Calories:
471
kcal
|
Carbohydrates:
46
g
|
Protein:
5
g
|
Fat:
31
g
|
Saturated Fat:
15
g
|
Polyunsaturated Fat:
4
g
|
Monounsaturated Fat:
9
g
|
Trans Fat:
0.1
g
|
Cholesterol:
67
mg
|
Sodium:
300
mg
|
Potassium:
120
mg
|
Fiber:
1
g
|
Sugar:
31
g
|
Vitamin A:
878
IU
|
Vitamin C:
5
mg
|
Calcium:
63
mg
|
Iron:
1
mg
Nutrition Disclaimer
Did you try this recipe? Rate it below!
I can’t wait to see (and share) your results! Follow me on Instagram at @chenee_today and tag #cheneetoday!
Frequently Asked Questions About Strawberry Crunch Cheesecake
If you’re eager to recreate that iconic crispy topping for your strawberry crunch cheesecake recipe, you’ll be delighted to know that my strawberry crunch topping recipe is incredibly simple and requires only three essential ingredients: crunchy Golden Oreo cookies, intensely flavored freeze-dried strawberries, and rich melted salted butter. These components come together to form a vibrant, sweet, and perfectly crumbly topping that adds an irresistible texture to any dessert!
One of the many joys of making a no-bake strawberry crunch cheesecake is that it inherently avoids many of the common pitfalls of its baked counterparts. Traditional baked cheesecakes are notorious for cracking as they heat and cool in the oven due to temperature fluctuations and structural stress. Fortunately, this no-bake strawberry crunch cheesecake completely bypasses these issues! Since it sets in the freezer rather than baking, you’re almost guaranteed a beautifully smooth, creamy, and crack-free surface every single time, making it a stress-free choice for a stunning dessert.
If you find yourself with any delicious leftovers of this strawberry crunch cheesecake, you can store them safely in the refrigerator. Ensure the cheesecake is well-covered in an airtight container to maintain its freshness and prevent it from absorbing other food odors. Stored correctly, your leftover cheesecake will last for up to 3-4 days in the fridge, remaining perfectly creamy and enjoyable.
Absolutely! This no-bake strawberry crunch cheesecake is an ideal dessert for making ahead, which is perfect for entertaining or busy schedules. You can prepare the entire cheesecake, including the crust and filling layers, up to 2-3 days in advance. Just be sure to keep it tightly covered in the freezer until about 30 minutes before you plan to serve. Add the strawberry crunch topping shortly before serving to maintain its optimal crunchiness, or you can add it before freezing if you don’t mind a slightly softer crunch.
Yes, you can certainly use frozen strawberries if fresh ones are not available or in season. Thaw them completely first, then drain any excess liquid to avoid making your cheesecake filling too watery. After draining, you can proceed with puréeing them as directed in the recipe. Keep in mind that frozen strawberries might have a slightly less intense fresh flavor compared to ripe, in-season fresh strawberries, but they will still provide a delicious strawberry essence to your cheesecake.

